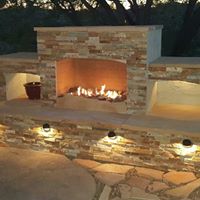
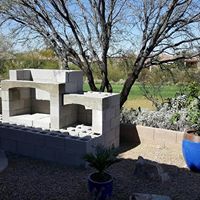
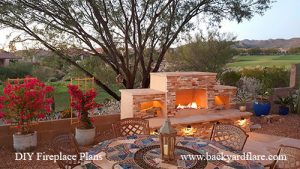
Gorgeous DIY outdoor fireplace built by a homeowner using our construction plan
I love phone calls
I love the fact that we have helped lots of DIYers with DIY fireplace plans. We also love to hear feedback from our customers. The other day I answered my phone and began speaking with a past customer who built a Pima II fireplace design. Karen explained that she had received some bids from contractors to build an outdoor fireplace in her backyard and was blown away at the price tag. She wasn’t prepared to pay what was bid.
Karen elected at that point to start looking for assistance. She stumbled on Backyard Flare’s website while searching for “DIY fireplace plans”. After reviewing our designs, Karen said she picked the Pima II because of the large firebox and the low rough materials cost.
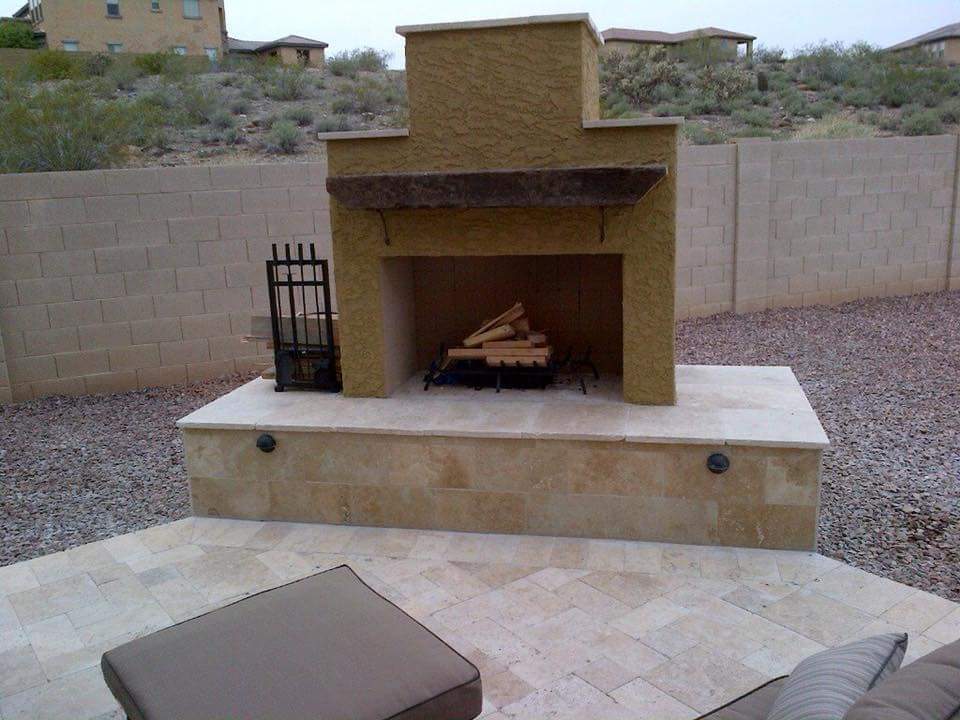
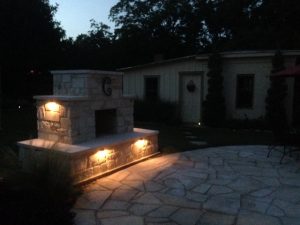
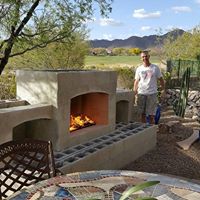
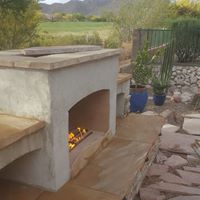
Inexpensive DIY outdoor Pima II fireplace built by a homeowner, stucco and travertine covered with a wooden mantel and lighting
I listened as she told me about her building experience and about how much fun and how fulfilling it was to complete the construction by her and her family. She said that she never thought she could build a DIY fireplace on her own…that was until she discovered our plans.
I was happy to get that phone call because it solidified what we have known for years. We design our fireplaces for the customers that don’t have a ton of masonry building experience. Some don’t have any at all. Our simplistic build plans cater to the DIY homeowners that want to step into a DIY project. They may need just a little bit of instruction to get started.
Get started on your project
We know that you have what it takes to build one too and we are eager to hear about your backyard and your plans to transform it. Text Dan at 520-269-9740 and let’s discuss your design ideas. Let’s talk and know that it’s free, and with no obligation.
Take care and happy building to you. It’s time to get started!!! Go to Backyard Flare to pick your favorite design.
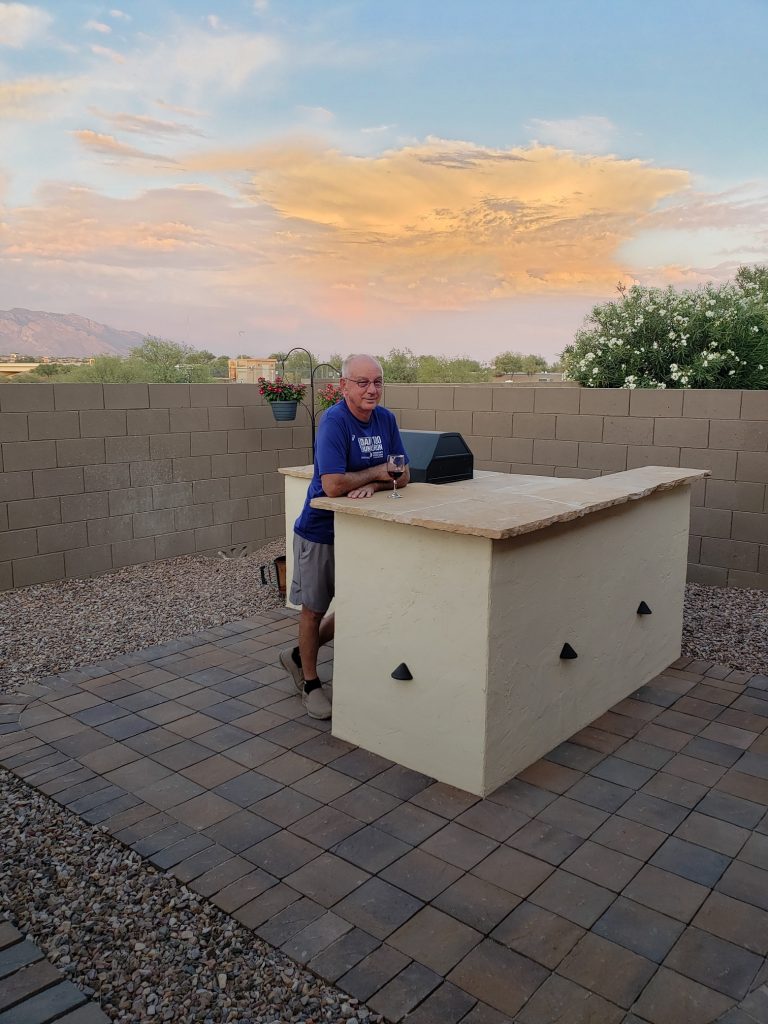
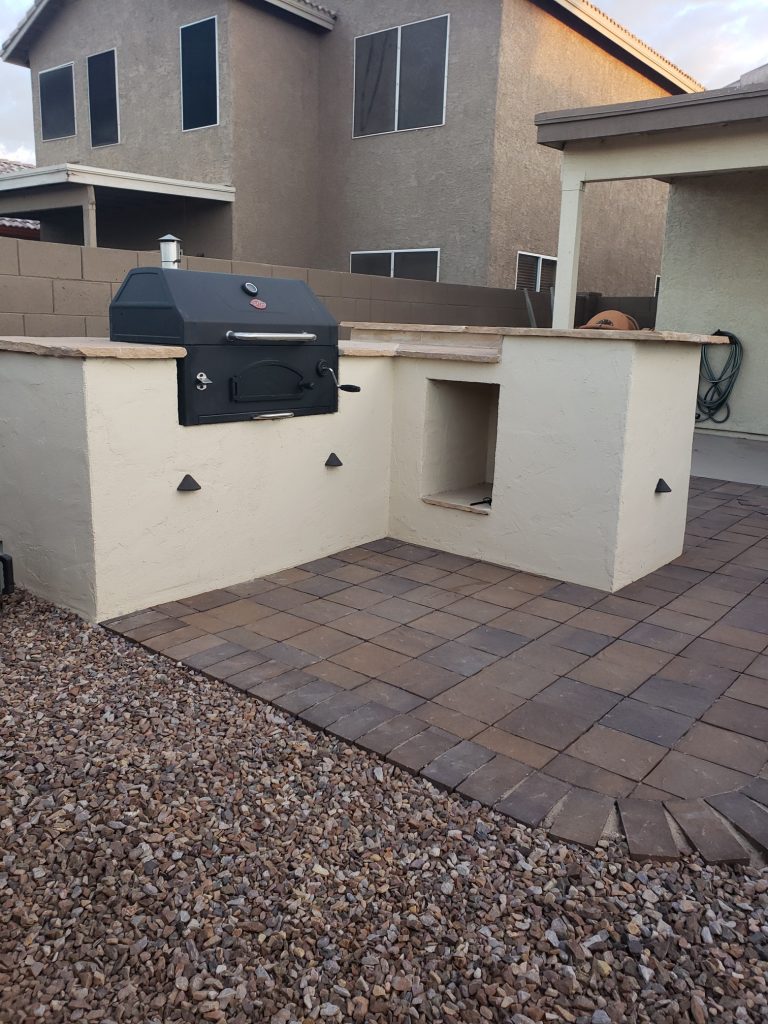
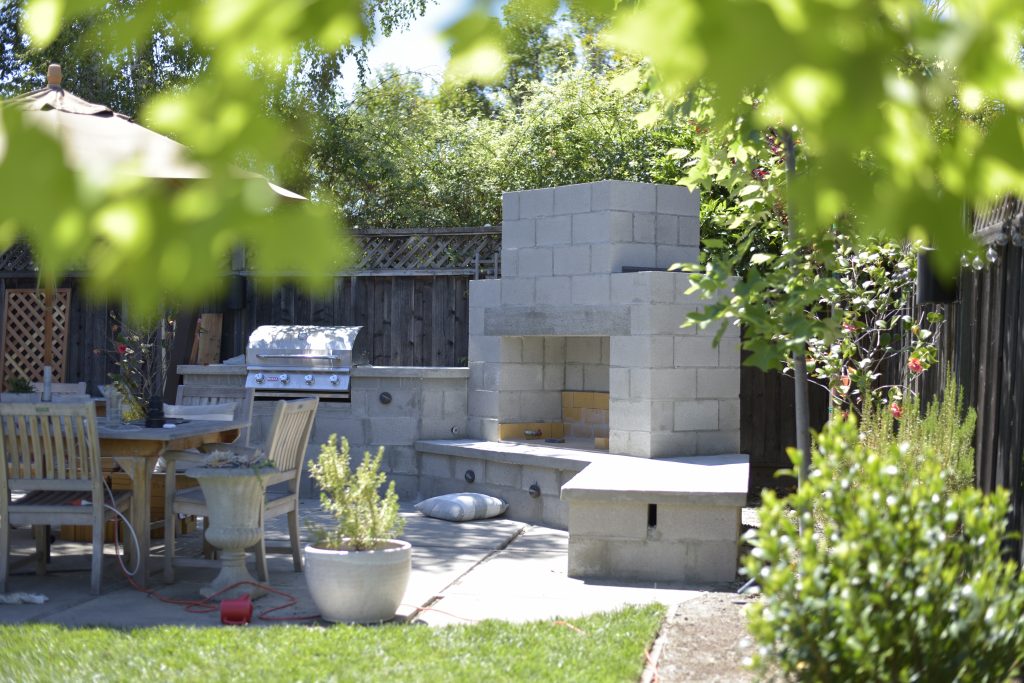
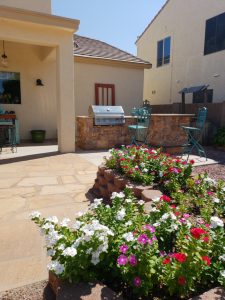
My father in-law standing proud with his new outdoor kitchen.
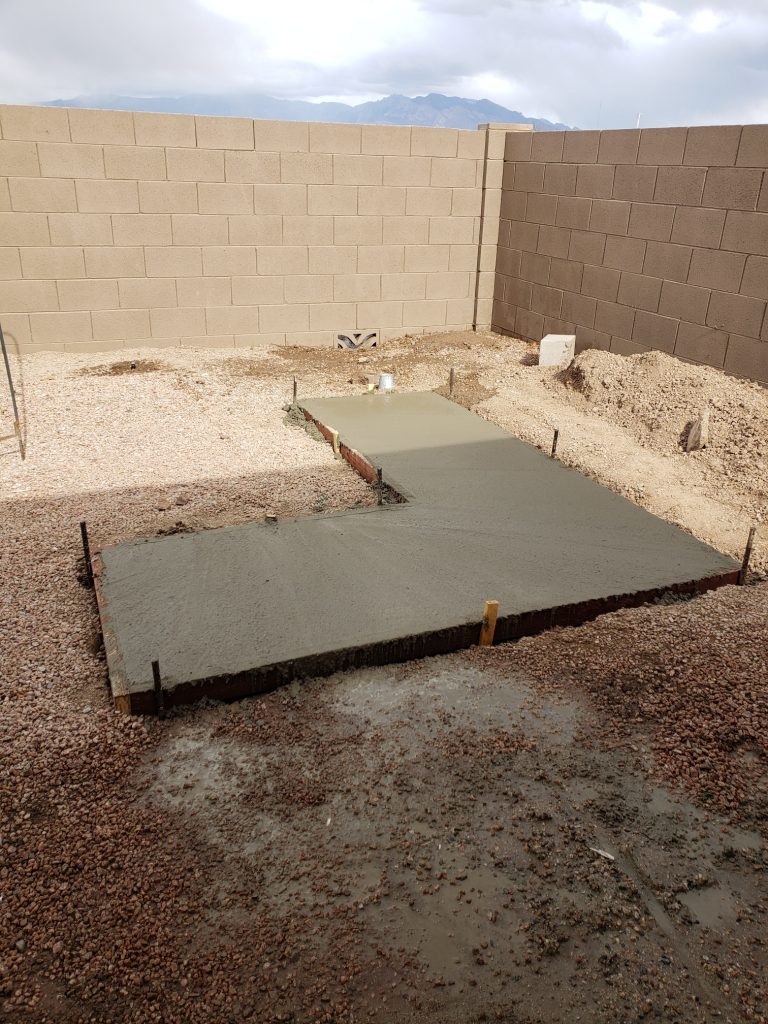
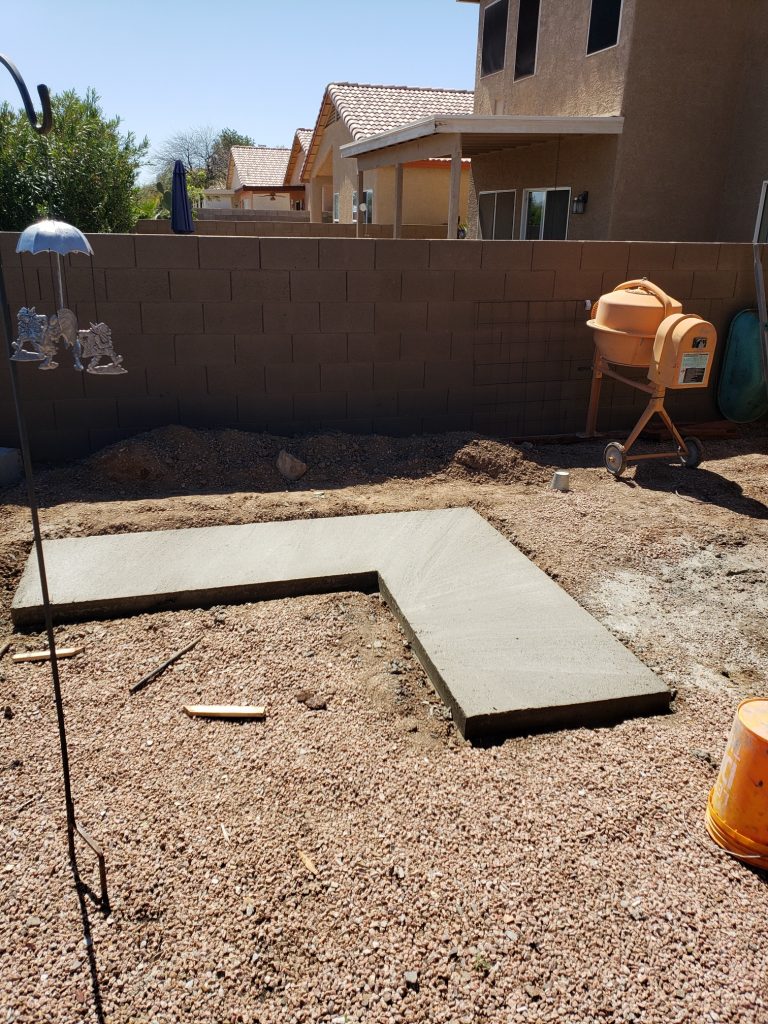
Our DIY outdoor kitchen build began with some ground excavation and measuring for slab height as compared to the existing concrete patio. This was very important as we planned to add brick pavers from the patio to the base of the outdoor kitchen and we wanted it to match up perfectly. Once we determined the proper slab height, we built our wood forms, tamped and prepared the ground, added our steel mesh, and got to pouring the concrete.
Slab was poured in approximately 35 minutes
My father in law and I worked in tandem, with me mixing and pouring the concrete and him screeding the wet mix. Within 35 minutes, we had the concrete done and we waited for it to start setting up.
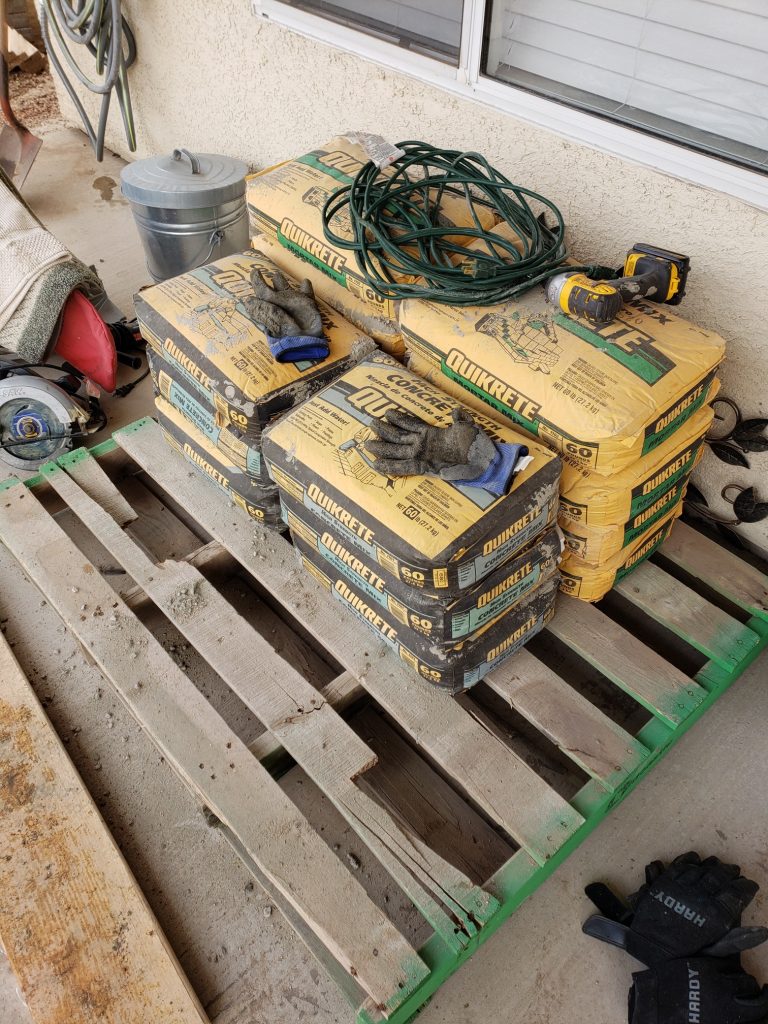
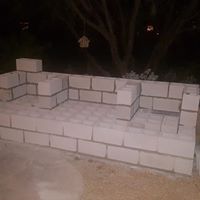
Two days later, we pulled the forms off and exposed a great looking L shaped slab that was waiting for some mortar and block. Once the block laying began, we worked for approximately 6 hours to complete the rough block build.
We mixed our N-type mortar in a mixing bin and got 15 blocks mortared in place with each 60-lb bag. This is how much you can generally get done if you don’t waste or lose too much mortar on the ground.
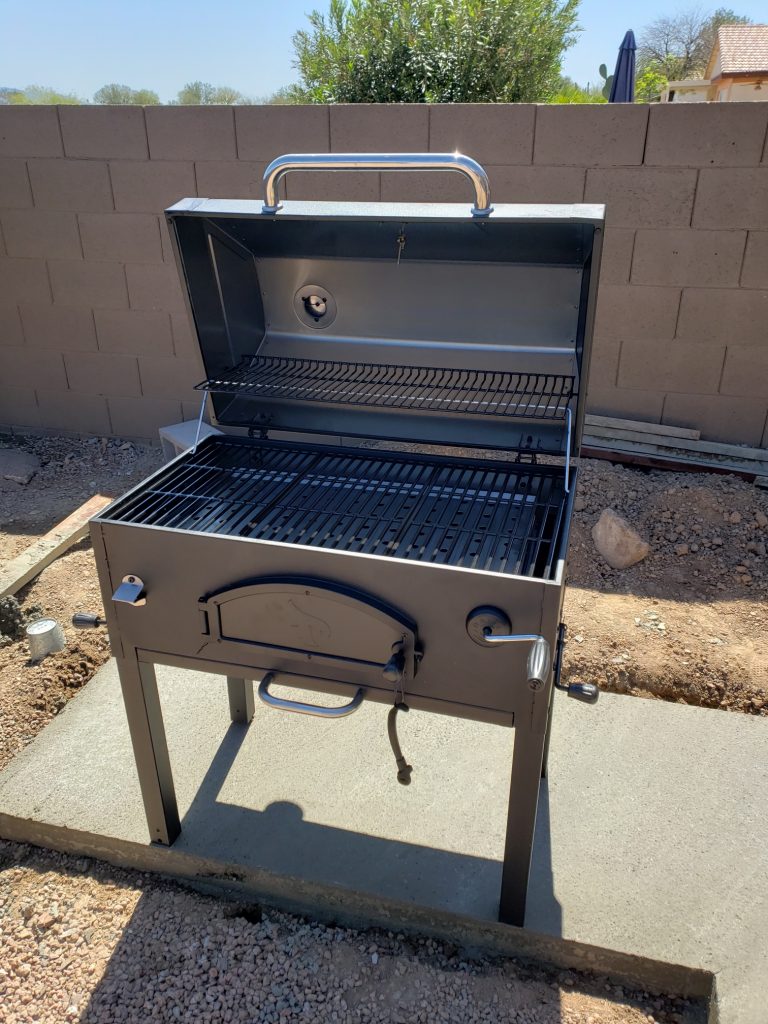
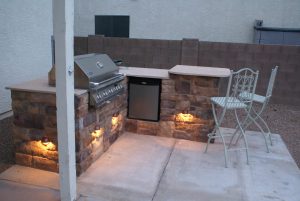
@charbroil grills are a great way to go for a great look and functionality
@Charbroil for Functionality
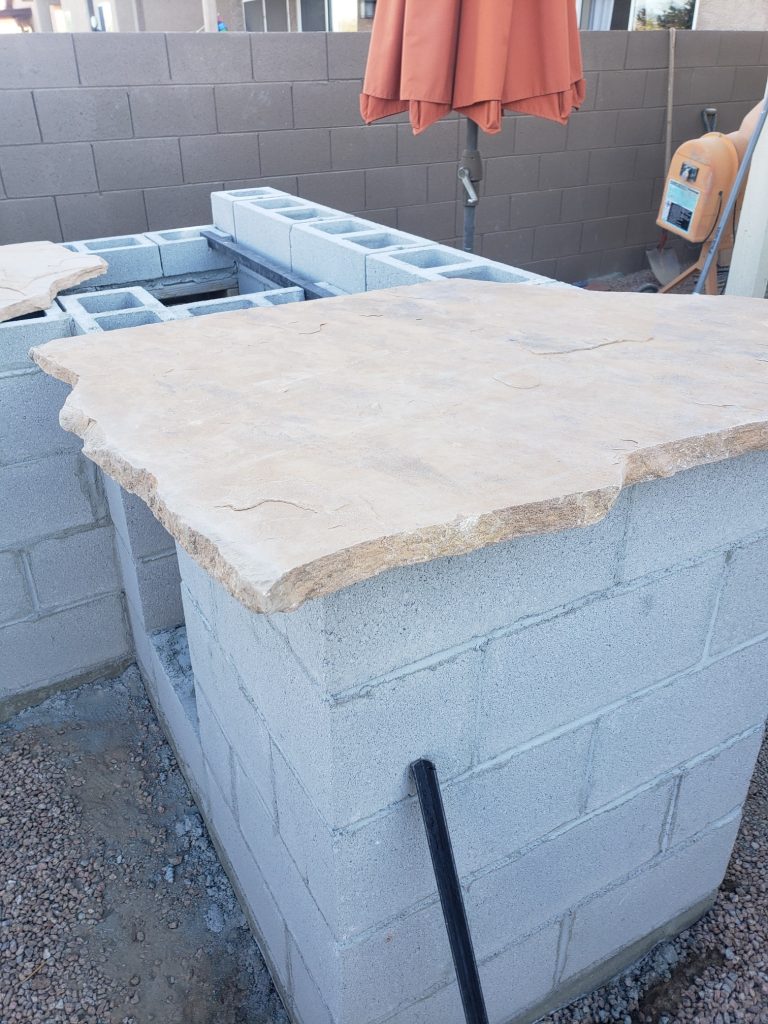
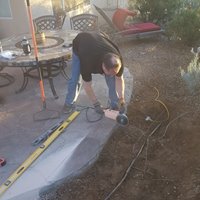
We dismantled a Char-Broil charcoal grill and built a base for the cooking system to sit on. The counter height was a standard 36″ and with a gorgeous flagstone, the raised bar and counter was finished. The outer edge of the flagstone was a very cool chisel cut for a rustic look.
Flagstone is a great counter and bar material
Finish Work – Stucco and LEDs
I applied stucco to the sides of the structure and painted it to match our previously built outdoor fireplace. We ran some low voltage lighting cord and added great looking LED lights for additional ambiance. We hoped to keep the outdoor kitchen build to a minimum and we ended up spending right at $1,000 total on the structure. This cost included the material, lights, counter, and even the grill. Amazing what you can do when you have a plan to follow. A DIY outdoor kitchen can be in your future.
Lighting is the best way to add a rich look
Let us know how we can help you with a DIY outdoor kitchen construction plan. It doesn’t have to cost an arm and leg so let us show you how to do it.
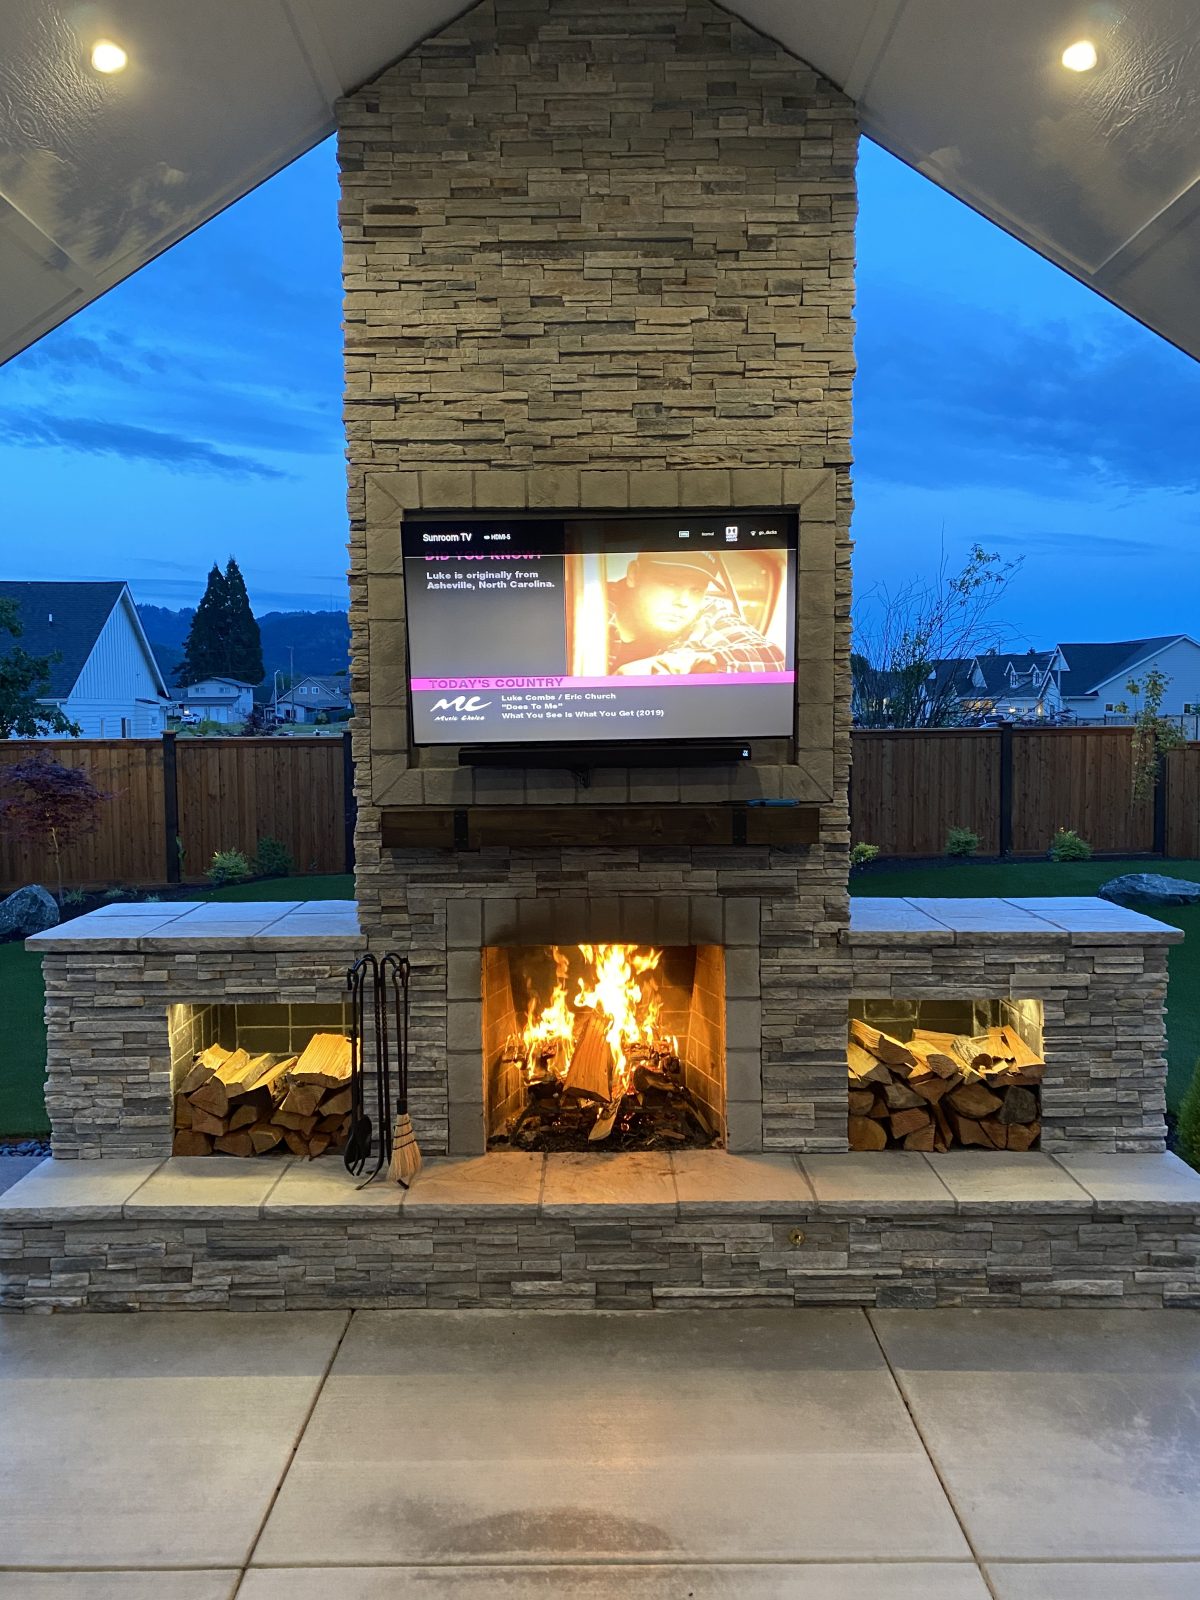
DIY homeowner built outdoor fireplace with storage voids and mounted TV.
With so many people wanting to spruce up their backyards, why not build an outdoor fireplace? Backyard Flare specializes in helping our clients, DIY homeowners just like you, with an easy and comprehensive method of building. We do this with our DIY outdoor fireplace construction plans. Every picture in this article is an example of fireplaces built entirely by DIY homeowners who used Backyard Flare DIY outdoor fireplace construction plans.
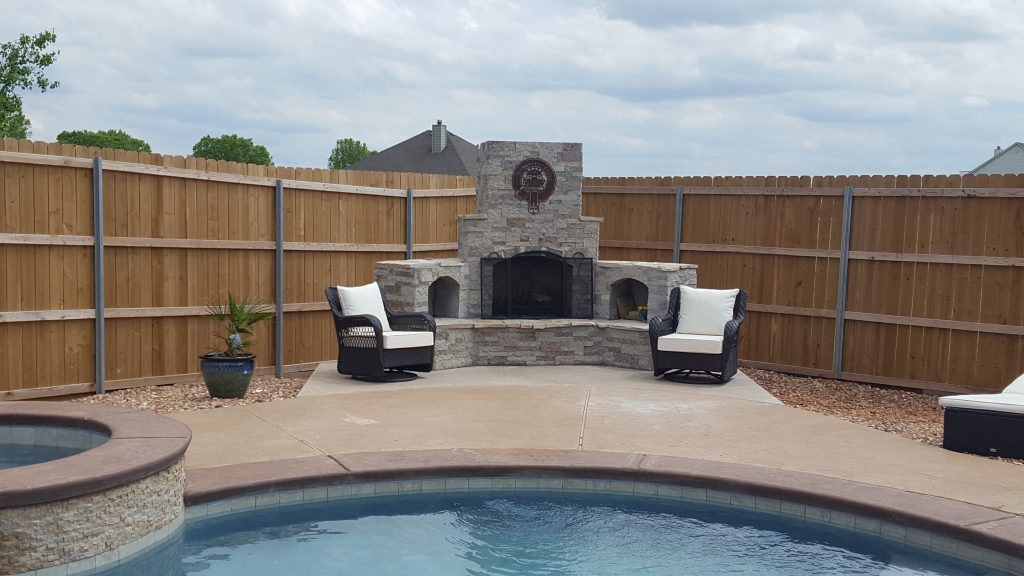
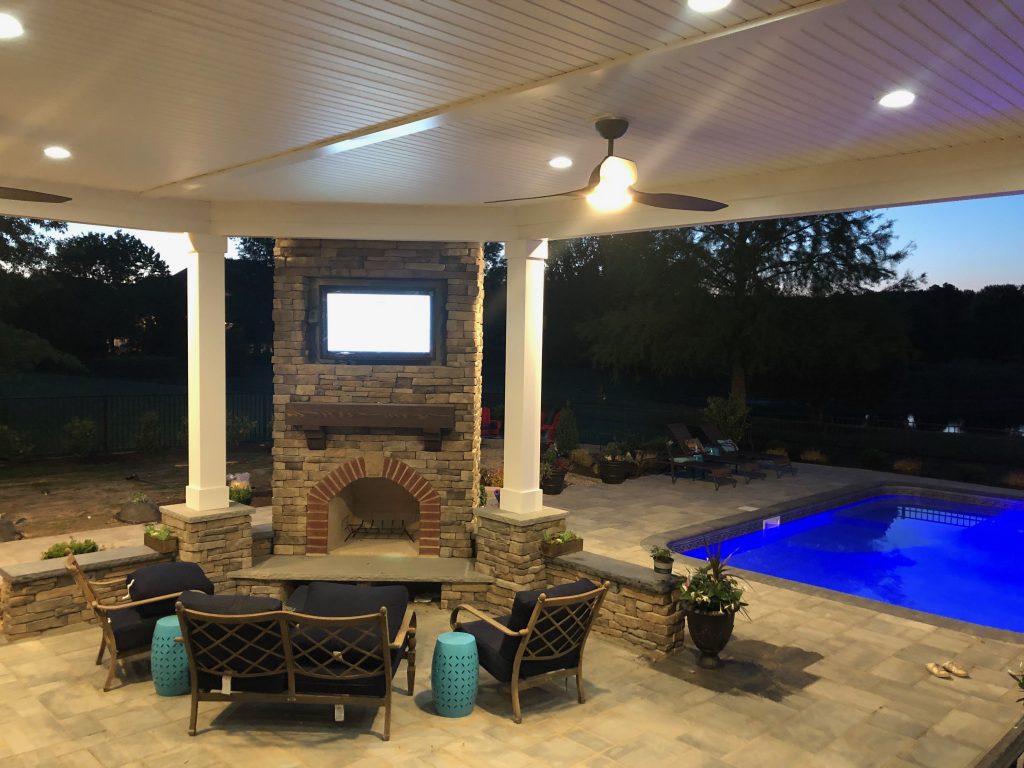
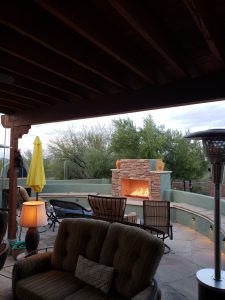
DIY homeowner built, poolside corner fireplace under a patio cover with a TV
So much goes into the planning and design of an outdoor fireplace, so trying to figure it out and hoping it functions at the end is not the way to proceed. There are lots of great designs and themes and we are confident we have designed one that would look great in your backyard. We have helped thousands of homeowners with their outdoor fireplace construction plans, and they have made us proud with the results they have achieved.
How much can you really save?
You will have fun while building and at the same time, you’ll be adding huge monetary value to your home. If you could build an outdoor fireplace in your backyard for $1,000 but get an additional $5k-$10k fo ryour home when you sell it why wouldn’t you do it? We have heard from many customers that their DIY outdoor fireplace was the reason their house sold. That makes us feel pretty good.
DIY outdoor fireplace and grill structure being built by a homeowner
The only two additional things not covered in our outdoor fireplace construction plans are directions on how to pour the foundation and what to cover the outside of the structure with. There are too many variables to the thickness of your foundation and we don’t want to dictate what the final structure will look like. That’s the fun part, figuring out a great veneer.
How’d We Do?
So, we hope you have been inspired to build your own DIY outdoor fireplace and that our construction plans will be used to guide you through the build process. We know they will not lead you astray. Let us know if you have any questions about our designs or the build process. Check out www.backyardflare.com for more info and inspiration.
As we always say here at Backyard Flare, LLC, happy building.
Dan Heston Backyard Flare, LLC Tucson, Arizona 520-269-9740
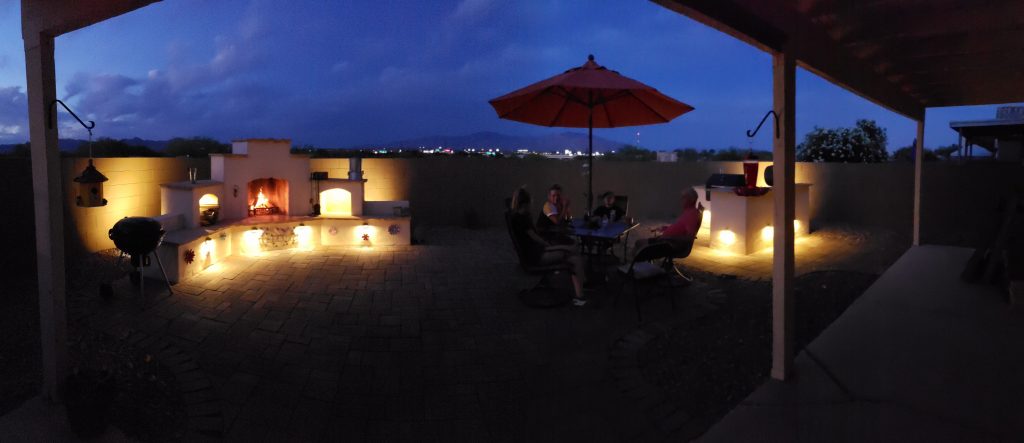
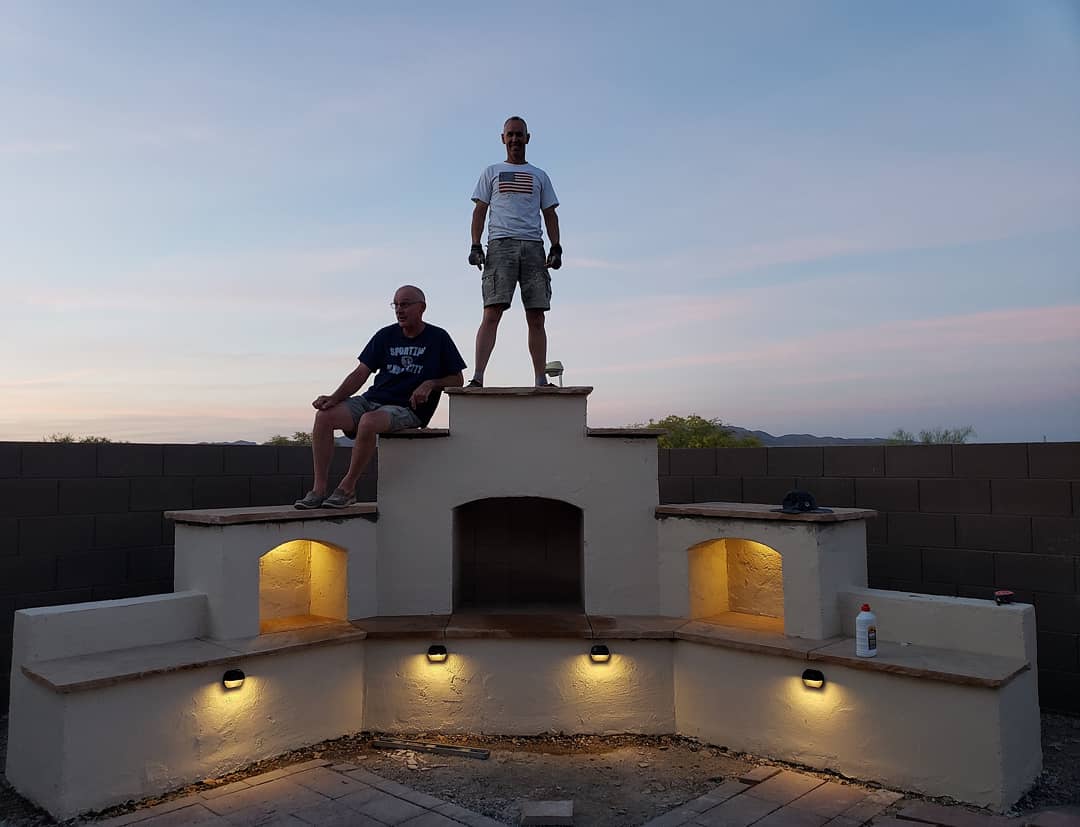
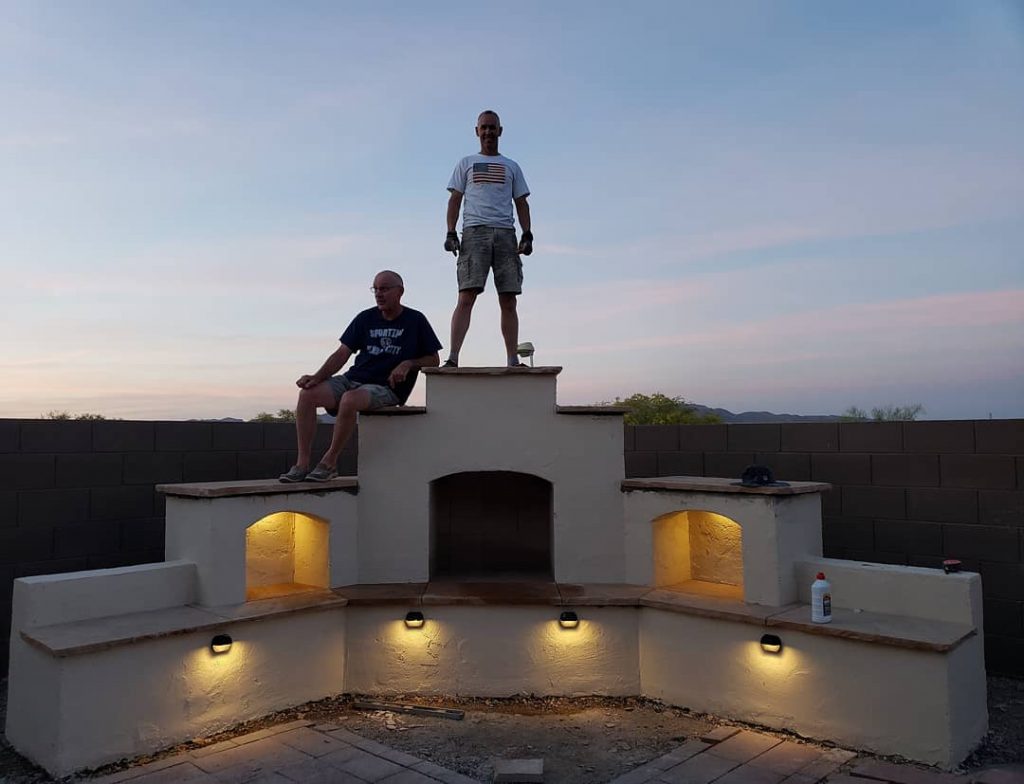
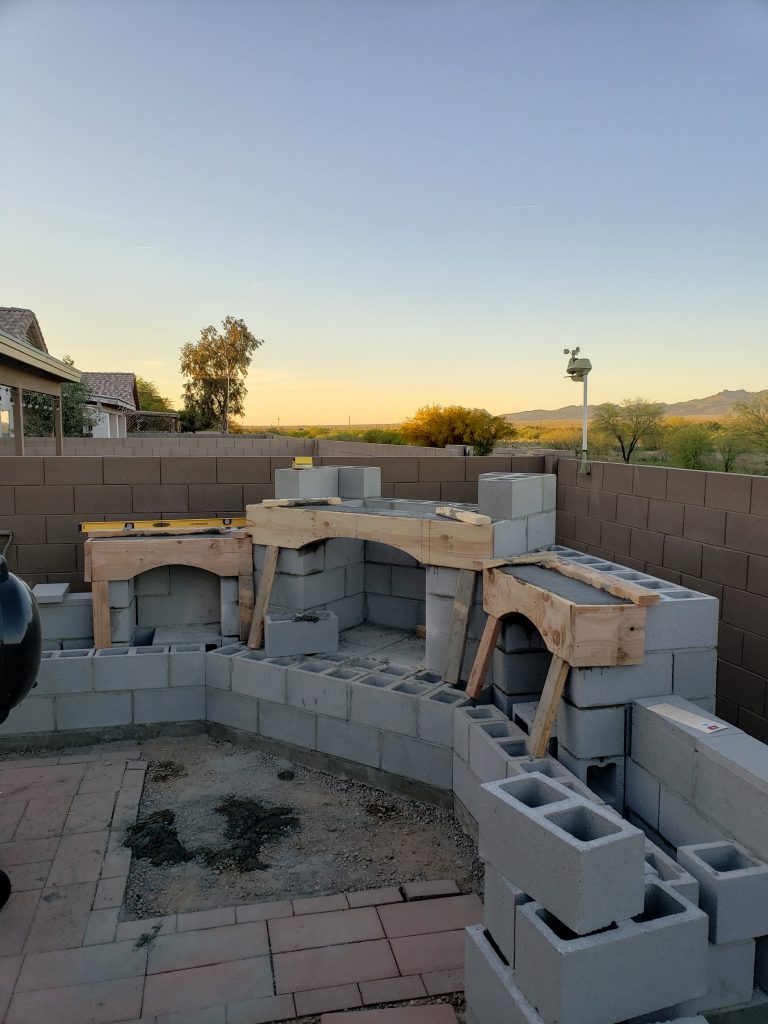
Hello all you DIYers and enthusiasts of backyard fireplace and transformation. I wanted to write a bit about one of our latest ventures, a corner Arizona outdoor fireplace with storage voids that I built at my in-law’s house in Arizona. The backyard isn’t huge, only about 30 feet deep from the back of the house to the back wall, so we decided to offset the fireplace in the corner to not block the mountain view.
Doesn’t Have to be Expensive!
The best
part of this whole build is that we really designed and built on a budget, building
as inexpensive as possible without substituting quality. In total, we spent just over $1,600, and that
included the poured concrete slab, lighting, and all finish work. It really is amazing at what you can build
and how cheap the overall cost can be when you enter the DIY world. So, let’s break it down.
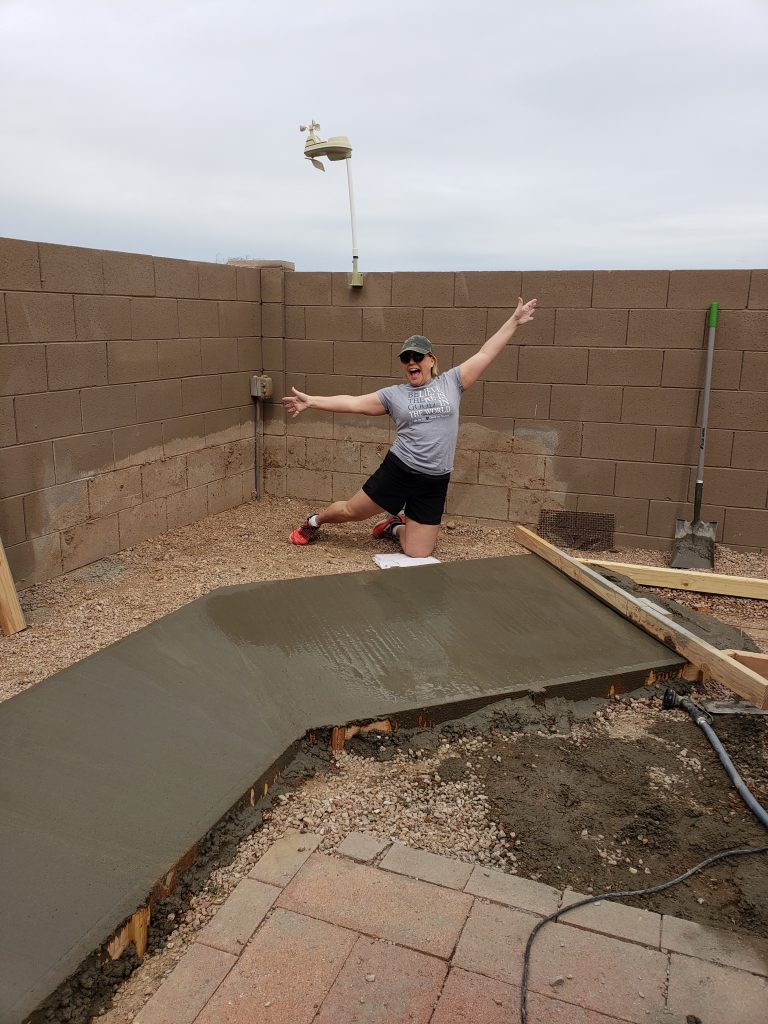
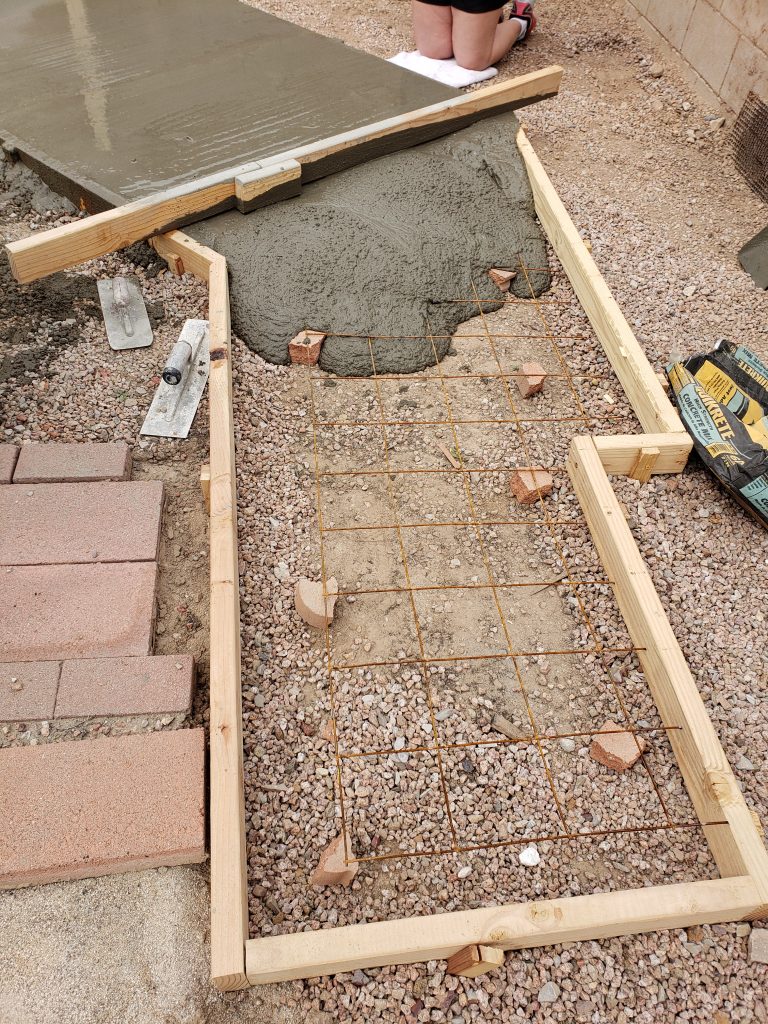
The Backyard Fireplace Building Begins
Getting the slab poured is lots of fun. Use wire mesh or rebar in your concrete pour to add strength to the slab.Concrete is a dirty job but lots of fun at the same time.
We knew the footprint of the backyard fireplace so we worked with disturbing only that area. We excavated the site and prepared the ground for the concrete slab, using steel in the pour. Once the concrete cured for a few days, we began laying the block as per the construction plan, which showed literally where every block went. So easy! We established the entry point at the back of the structure for the low voltage lighting wire to come in and routed that wire through the structure.
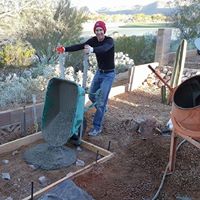
We filled wooden jigs with concrete to create the arched lintels.
The storage
voids and firebox were arched and that was completed by building wood jigs,
supporting them in place, and pouring concrete into them to create the
lintels. The arches really made the
three openings come to life, so we are happy we made that decision.
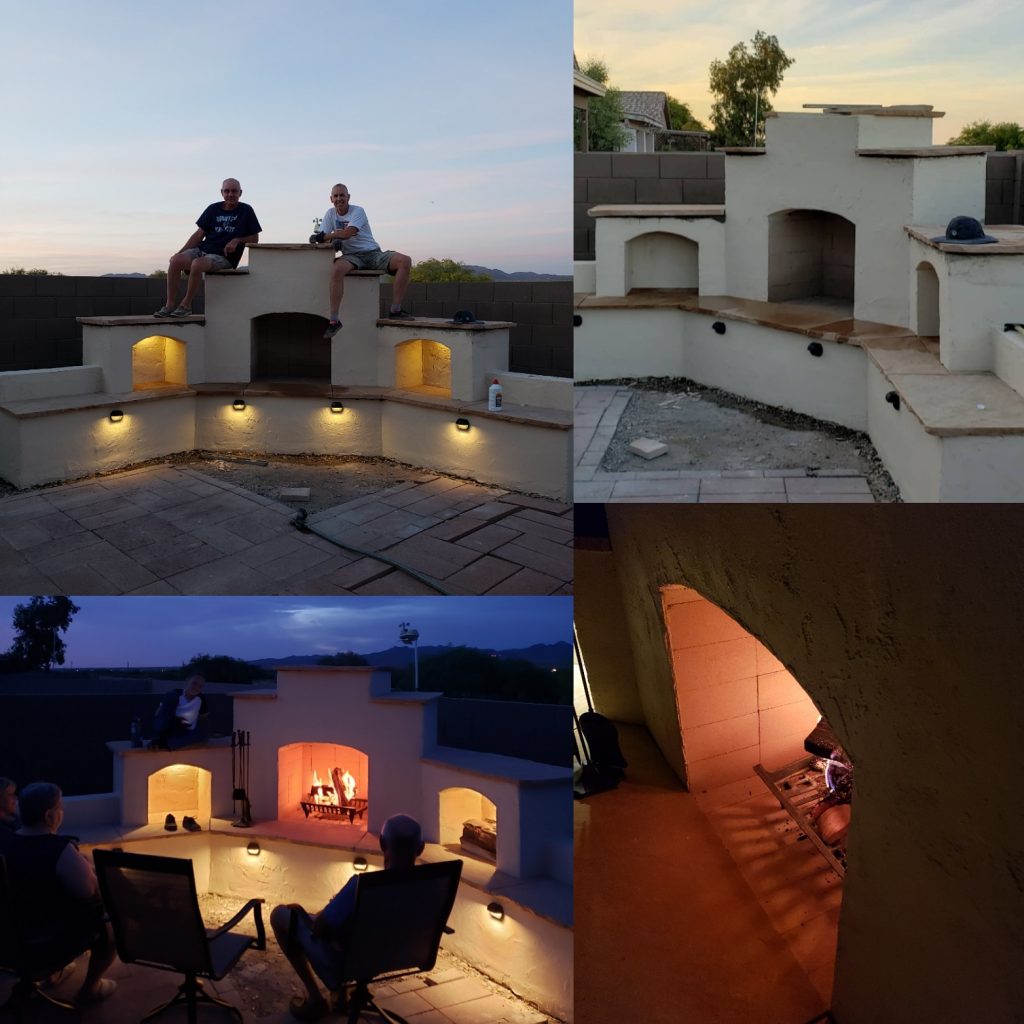
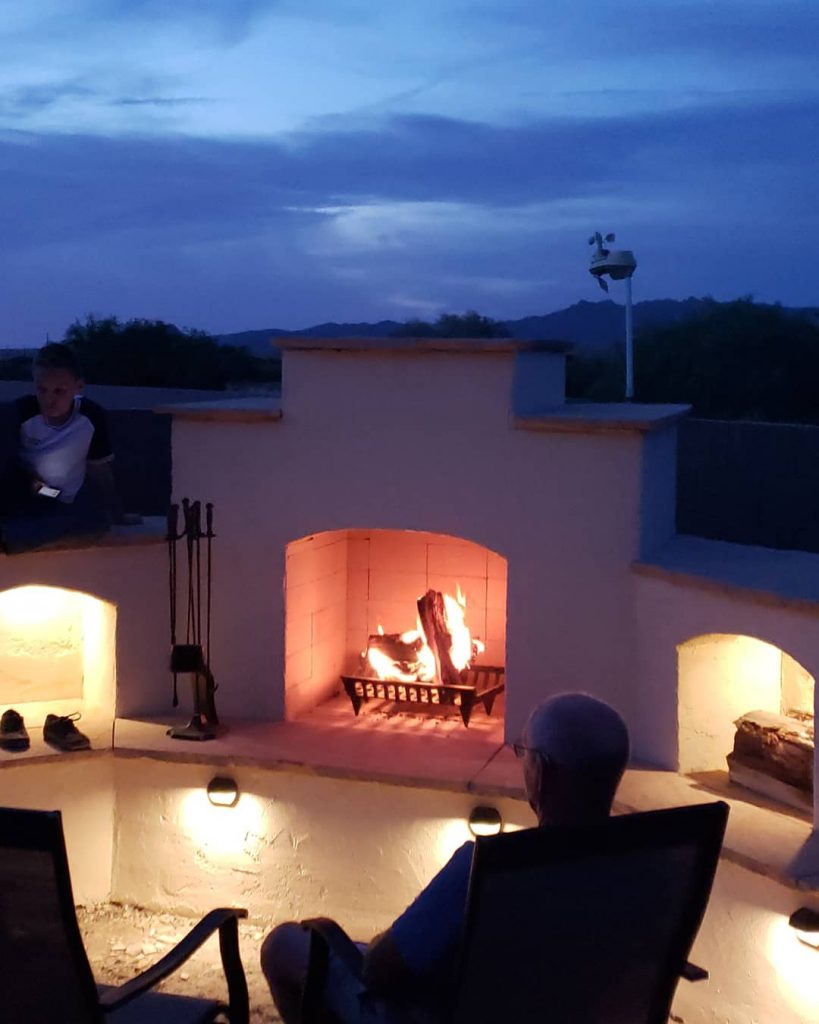
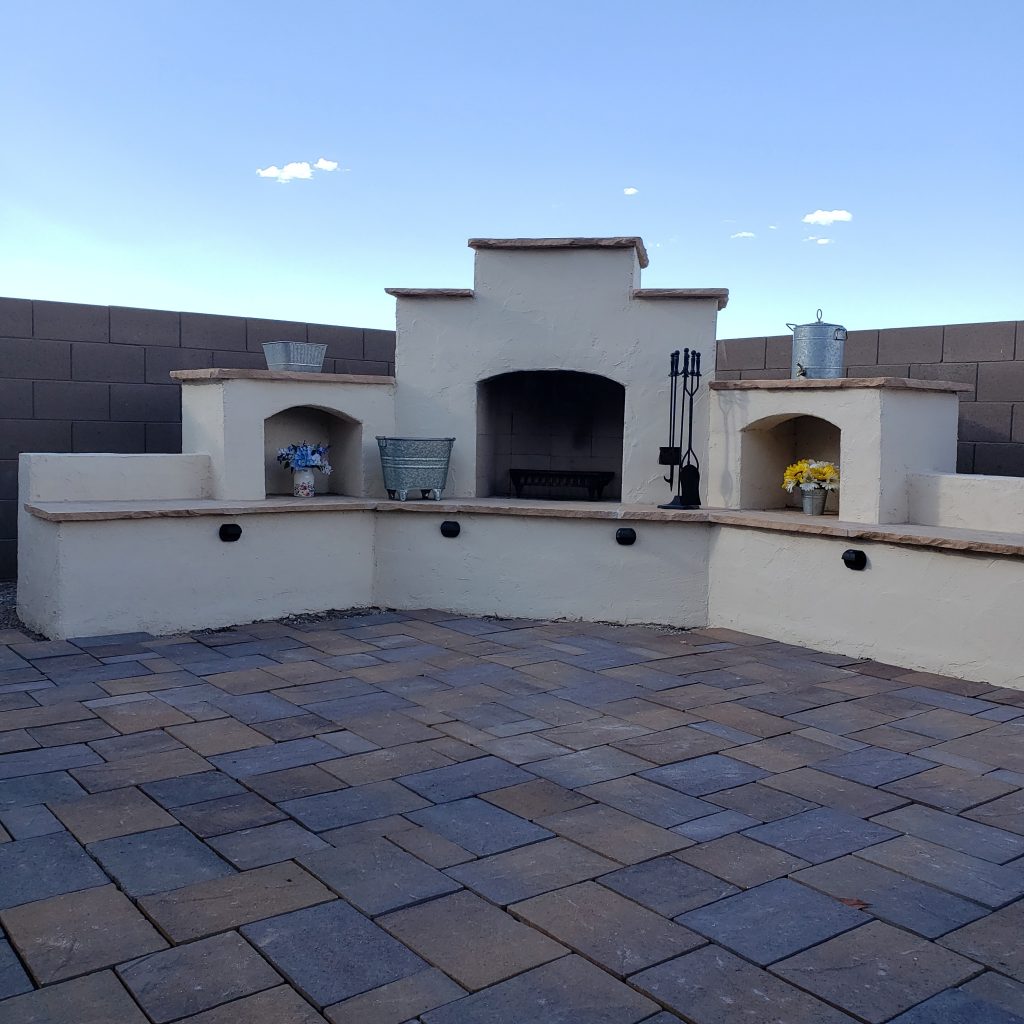
Finish Work Decisions
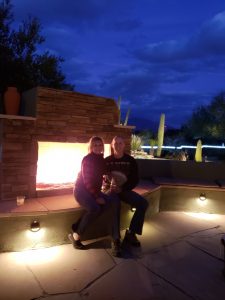
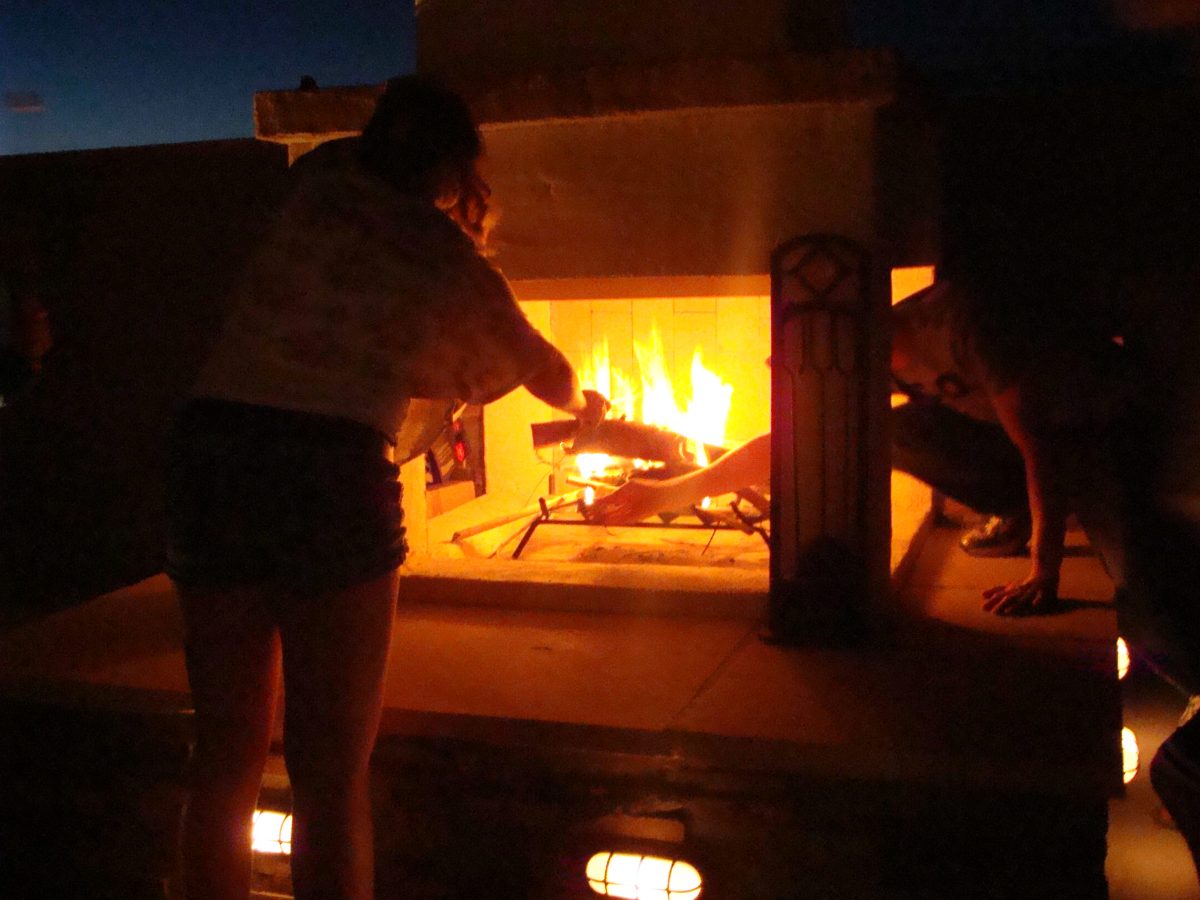
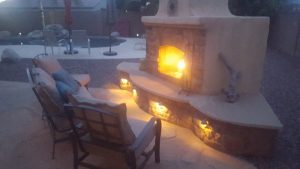
Just an amazing night with family and friends.
When the rough
build was completed, we lined the firebox with firebrick in a stacked pattern to
change it up and covered the whole structure in smooth coat stucco. The stucco was then painted to match the
color of the house, so it tied everything in.
Almost all horizontal surfaces were covered in a gorgeous honey brown
flagstone that we chisel cut for a rustic edge.
The LED lighting was added to the front of the structure and inside each
storage void, where it was connected to the low voltage wire. We are so happy we made the decision to add
lights because it makes the whole structure come to life even when not in use.
Finished DIY outdoor backyard fireplace with painted stucco and brick patio
The patio spanning the front of our backyard fireplace was completed in a random pattern with colored concrete pavers. It sure made the whole sitting area complete, giving it a finished look. We have enjoyed the fireplace even through the summer with ambiance fires, so we’re not letting the warm nights slow us down. Sitting at a distance is the way we do it when it’s warm outside. Just make sure you and your guests have your drink of choice while you sit and relax.
Want to Build a Backyard Fireplace Too?
We hope you love our backyard fireplace and all of what we built as much as we do and that you are inspired to step into this as well. Backyard Flare, LLC is the leader in DIY outdoor fireplace construction plans. Whether you are an accomplished mason or someone who has NEVER worked with block and mortar, you can build our designs. Open the construction plan and begin building your own backyard fireplace. We are confident that you too can build a masterpiece, so get going on your design ideas.
You can do it!!! I remember receiving a phone call from Shelley who said she lived in New Jersey. Shelley explained to me that she was single, in her sixties, and that she lived on a piece of property that had a small creek running through it down the hill from her backyard. Shelley explained that she really wanted an outdoor fireplace but that she was super apprehensive about doing it herself. Because of the limited knowledge she had about masonry construction, Shelley was concerned with her age and ability to do the physical labor. I asked her some questions about her ability to lift and explained what the project would require.
Shelley Said Yes to the Outdoor Fireplace
We talked it through, and by the end, Shelley was ready to take on the challenge. A DIY outdoor fireplace does not have to be intimidating or seem out of the realm of possibility if you have the right tools, preparation, and a good plan. A construction plan that is…something that will take the guess work out of the project. If you are physically able to lift a 60-pound bag of mortar, or if you have someone who can do it for you, that’s the first step. If you’re willing to step into a work site with an open mind, then you too can do what Shelley did.
Talk about charming. This backyard patio was transformed into a great sitting destination.
Shelley built her very own DIY outdoor fireplace and although it was small, it made a huge impact in her backyard and it is definitely a focal point. Do you agree, and do you think you want to join the DIY world? She had us do some special design work to make the fireplace what she wanted. We angled the chimney on all sides and designed the firebox to be low on the structure, which gave it a neat look.
It Was Fun According to Shelley
The fireplace sits on the edge of the patio with the treeline in the background.
After building the structure, Shelley said that she took her time and didn’t push hard to get it done quickly. She said that if she could do it in her sixties, then anyone could do it. This is a testament that most people have the capability to do more than they truly think. There is an inner construction worker in most of us. Give your insecurities to us and let us provide you with a DIY construction plan. If you follow it, you to will be able to build a beautiful outdoor fireplace just like Shelley did.
Shelley built her first fire and started making memories.
If you are wanting to learn more about the process of building a DIY outdoor fireplace, visit us online at Backyard Flare. We know that you can do it and that we can help. A construction plan may be exactly what you need to overcome the fear of building so you can DIY too. Thanks so much for reading and we hope to hear from you soon. Leave a comment and let us know if you think you’re up for a DIY project.
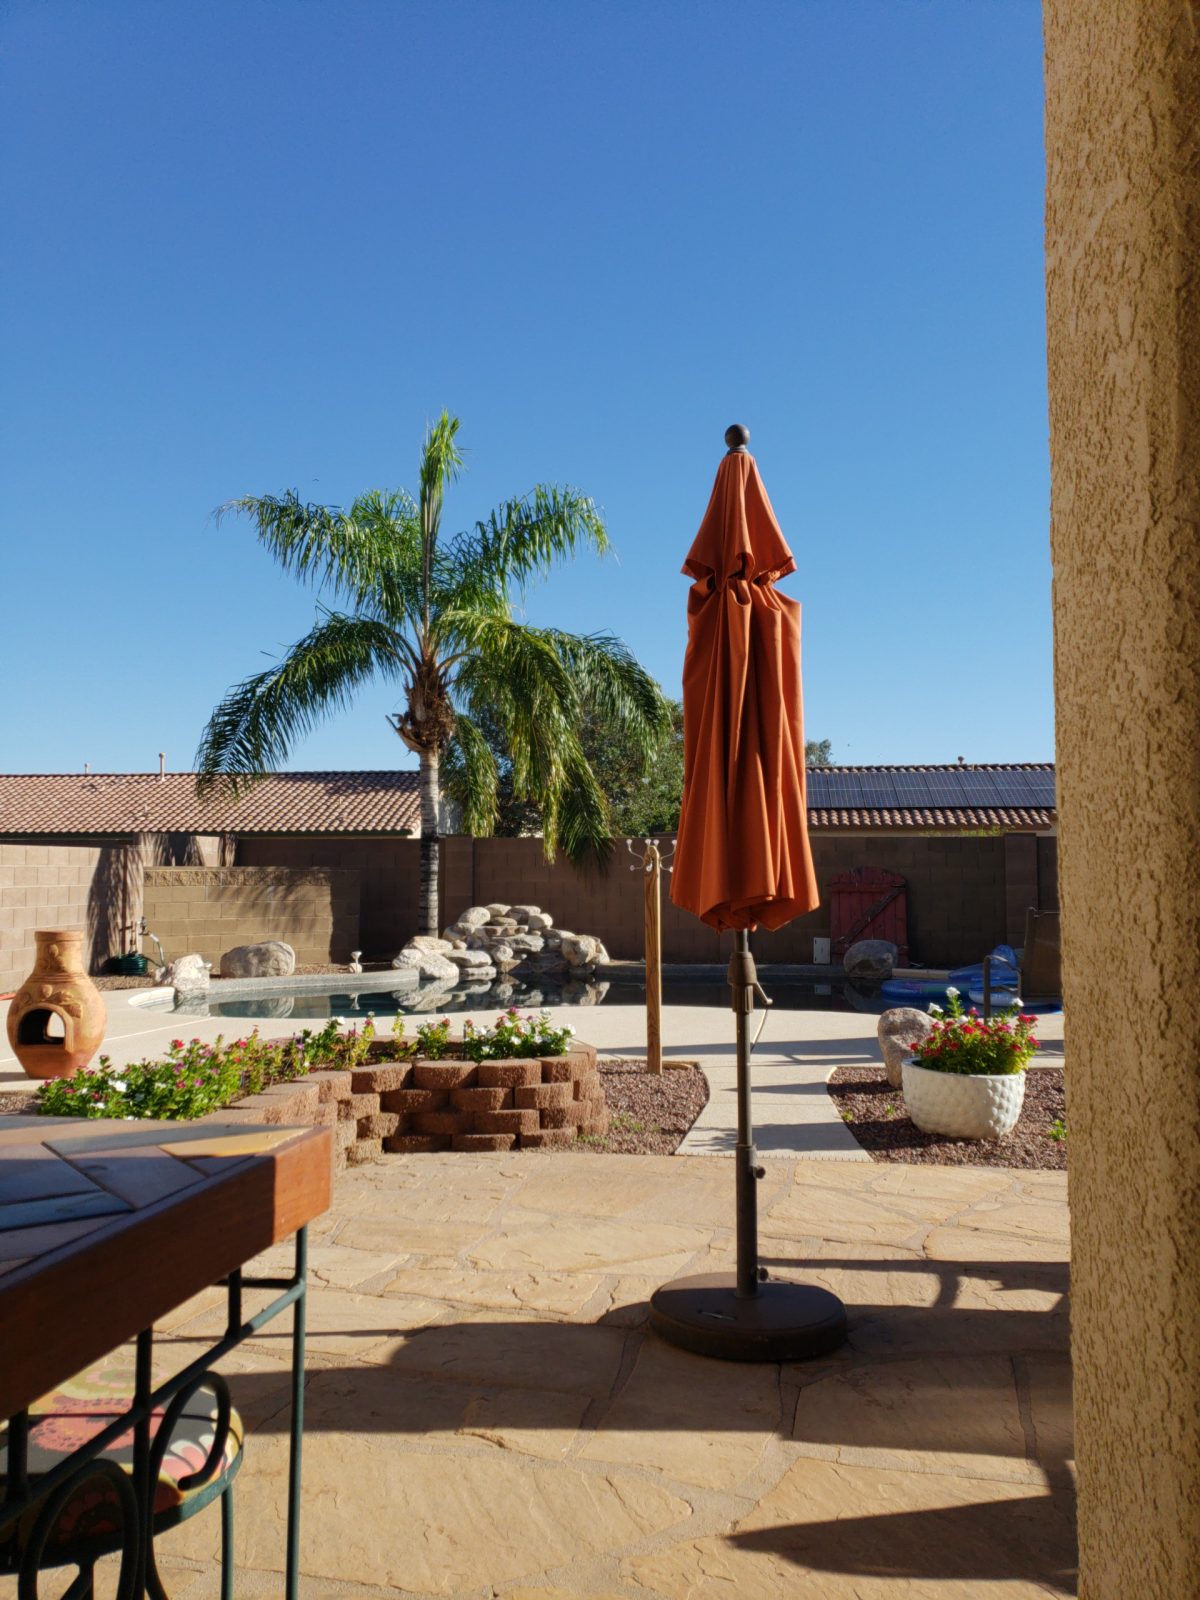
An uncluttered and clean backyard is a welcoming backyard.
Okay, I’m going to get right into it today. Not need to beat around the bush here. Your backyard…and mine…needs help probably. Your backyard might be old, dated, tired, messy, and it needs a little “pick me up”, so why not get started? There are quite a few things that you can do that will make a HUGE difference and at the same time not break the bank. Here are 3 ways to improve the look of your backyard.
Start By Picking Up the Place
First, pick up the clutter. If you’re like most of us, you have odds and ends laying around. You may have a section of your yard that is dedicated to compiling the old car parts or the old bikes that haven’t been ridden in years. Chances are that if you haven’t needed them in the past year (or five) you won’t need them at all in the future. Collect them and put them on Craigslist so you can make a few bucks too. Just cleaning up a cluttered corner will make a huge difference.
Unsightly Patio or Deck?
A clean backyard draws you in for an extended stay.
Second, sweep up the patio or deck area of your yard and then look up. Are there spider webs hanging around the lighting fixtures or the underside of the patio cover? Take down those spider houses with a broom and make a change up high. Get a hose or high pressure sprayer and clean up the whole area that is attached to the house. This includes patios, brick work, decks, patio covers, and even the back of the house itself. You’ll be amazed at how much dirt your house holds onto. A quick wash down may bring the color back to your home’s exterior too.
Time to Pick and Trim
Cleaning low and high will make it look more inviting.
Lastly, pick the weeds growing in your flowers and trim your bushes and trees. The branches and clippings will usually take a while to get rid of if your garbage can isn’t big enough to handle a lot, but the yard will sure open up. Getting rid of low hanging branches and unwanted ground plants will make an immediate positive impact on the overall look of the yard.
The best part is that these three de-clutter and cleaning tasks are virtually free to do. They shouldn’t cost you any money, just a little time and sweat equity. In the end, you’ll have a nicer, cleaner, and more welcoming backyard area.
Who knows, your clean backyard may go on to inspire other projects. Start small and work your way up to a finished backyard sporting an outdoor fireplace or outdoor kitchen. You’ll love it in the end and you’ll marvel at the hidden gem that was under all that dirt and clutter.
Check Us Out
If you are interested in any construction plans for an outdoor fireplace or an outdoor kitchen, look no further than Backyard Flare. We specialize in easy to follow DIY construction plans that will take virtually all the guess work out of the build. Follow the plans, finish the structure, and begin relaxing in your backyard.
Call or text Dan at 520-269-9740 or email him at dan@backyardflare.com for additional info, special deals, and some fun discussion. As always, have fun and remember, happy building.
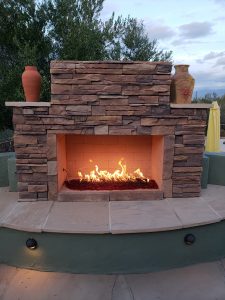
Relaxing by the DIY gas fireplace during a dinner party.
The other day, my wife and I attended a dinner party at the home of a previous fireplace and pizza oven customer. We were able to spend some time outside enjoying the fireplace and just the awesomeness of the backyard. Homeowner Tom helped me build this structure, so this is technically a DIY build in a sense. Tom learned a lot and he was able to add lots of great value while we had a blast constructing his masterpiece.
Massive Structure Size
What an amazing and welcoming space in this backyard.
There is so much to his fireplace and pizza oven structure. To get started, the whole circular structure is a whopping 31 feet in diameter. It’s massive to say the least. It surrounds a seven-foot-wide natural gas fireplace. Inside the four-foot-wide firebox is an “H” pipe covered with bright red fire glass. The fire glass color is great because, if you look closely at the picture, it turns blueish purple when it heats up. Such a great look.
Fireplace is 7′ wide with the gas “H” pipe covered in red fire glass.
The front of the fireplace is covered with a great stone veneer and the remainder of the structure was stuccoed to match the texture on Tom’s house. The seating is all smoothed flagstone cut to match the curvature of the seat back wall. On the hearth, there are several low voltage lights that add that extra something. It looks amazing every night, whether there is a fire blazing away or not.
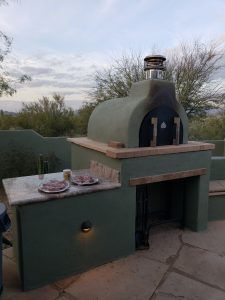
Pizza Anyone?
What an amazing backyard for parties and even some quiet time.
The left side of the structure holds the pizza oven built around a BrickWood Ovens DIY mold. It didn’t get any easier than that mold to build around and then wait until the mortar cured. The pizza oven is covered in stucco that is painted the same color as the rest of the structure.
To the left side of the pizza oven, we added a piece of polished granite, so Tom could roll out his pizza dough and prepare his pizzas. No need to run into the house every time, the counter is right there. Seeing how much Tom and his family has used the fireplace and pizza oven makes me smile that they are building lots of great memories. The parties with family and friends are a lot of fun and the quiet nights in front of the fire are special for them too.
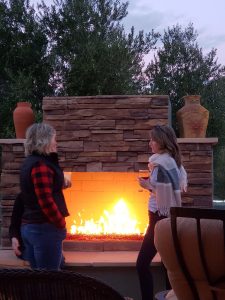
Conversation and drinks around the DIY outdoor gas fireplace.
Check us Out
The view of the Tucson valley from this backyard is amazing.
If the idea of a fireplace and pizza oven sounds like something you would want to step into, there is a great place to go, Backyard Flare. You can look through the great design ideas and also figure out what you want in your backyard. Big or small, every fireplace structure looks great. We want you to begin living in your backyard again. What better way to start than by building your own fireplace and pizza oven?
If you have any questions about anything, please let me know. I am always excited to hear from a fellow DIYer, or someone wanting to learn. You can certainly do it yourself and beautify your backyard space. I can be reached at dan@backyardflare.com and as I always say, “Happy Building”.
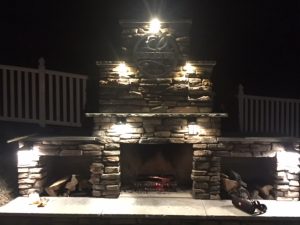
Lighting was added to the hearth and inside the storage voids.
Killin’ Time
The other day, I had to drop my car at the tire shop and because I had a few minutes to spare, I walked across the busy street to some stores. As always, I was drawn to one of my favorite stores, Lowe’s Home Improvement, and I found myself standing in the outdoor lighting aisle. If I go to Lowe’s, I almost always want to at least walk down some of my favorite aisles to see if there is anything new on the shelf. This day was no exception.
I should back up a bit and say that whenever I build any type of structure in a backyard, whether it is an outdoor fireplace or outdoor kitchen, I always look for ways to spice up the final look. One of the things that I have written on in the past is my love for outdoor lighting. It just makes a backyard, and specifically, outdoor structures, come alive at night. The shadows created and the way things look in the dark with some light are just awesome.
Lighting was added above the firebox.
So, back to Lowe’s and the outdoor lighting aisle… In the past, if I needed lighting, I have just gone to the store and picked up what I needed to complete the lighting project. I have never shared with my audience how inexpensive it really is to add this great feature to your DIY outdoor fireplace or outdoor kitchen. Well, wait no more. Here we go.
This DIYer added lighting to the hearth and the sides of the fireplace.
Outdoor Lighting Components Explained
With most outdoor lighting, there are three main components involved. They are a power source, otherwise known as a power transformer, wire, and the lights. The transformer is a heavy cube that plugs into an outlet. Many of these transformers will turn on at dusk with photo eye technology and you simply tell it through a setting, how long you want the lights to stay on from that point. Pretty cool!
Four lights were added to this curved hearth.
The neat part is the lights will come on automatically and shut off automatically; no work for you. They come in different wattage’s starting from around 60W to several hundred watts. For powering a structure, the smallest will be completely sufficient, especially if you’re using LEDs. A 60W transformer will sell for around $50.
The wire will hook into the transformer with screws and the wire will snake through your structure’s block work. We’ll get into the install in a different post. The wire will transfer (Direct Current – DC) low voltage as the transformer’s output to the lights, so it won’t shock you any more than holding on to a flashlight battery. It’s nothing like the power from an outlet in your house. A 50’ length of this outdoor lighting wire will cost around $20.
LED Lighting Is awesome
Lastly, the lights. Today’s technology has put LED lighting at the forefront for efficiency, longevity, and amazing power savings. LED stands for light emitting diode. An LED is a small electronic component (diode) that will glow when power is applied. No more changing incandescent bulbs, right? Can I get an amen on that one?
This Catalina fireplace had lighting added to the hearth for a great look.
LED lighting fixtures are sold individually, and they can run anywhere from a few dollars on clearance to around $20 for each fixture. I add at least two LED fixtures to any structure, so it is aesthetically pleasing. Two is really all you need for a structure width of only six to eight feet. The LED fixtures will have power cord on them. This cord will connect to the wire and the connectors will pierce the wire to be powered. The best part is that each LED is around 2W to 4W so you could hook up to 30 of these 2W LEDs to a 60W transformer. Do you see the math? This is turning into an electronics training course now.
This DIY Tucson Grill design had lighting added around it for a finished look.
How Cheap is It Really?
If you were to add two LED lighting fixtures to a fireplace, you would be able to spend as little as $110. Now that’s a bargain when you consider the look you’ll achieve. I hope this post helped you understand how simple outdoor lighting is and how inexpensive the components are. It’s really not that complicated.
Check out Backyard Flare, LLC to learn more about building your own DIY outdoor fireplace or outdoor kitchen and peruse our gallery for great ideas in design. See what other homeowners have done.
If you have any questions about anything, please let me know. I am always excited to hear from a fellow DIYer, or someone wanting to learn more about how to beautify their backyard space. I can be reached at dan@backyardflare.com and as I always say, “Happy Building”.
Welcome back my fellow DIY’ers and welcome to this edition of, “That Awesome DIY Fireplace” where we introduce a DIY homeowner, tell you what state they reside in, and show you how awesome they were at building their own outdoor fireplace. This one is awesome to say the least.
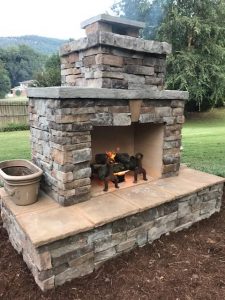
John’s completed DIY Outdoor Fireplace in GA
Who is Our Contestant?
Let’s go to the southeast, beautiful Georgia to be precise, to introduce homeowner John. John had a bare space out his backdoor that needed a little sprucing up. After checking out the construction plans at www.backyardflare.com, John decided to build the Pima II outdoor fireplace, and he purchased the plans.
Getting Started
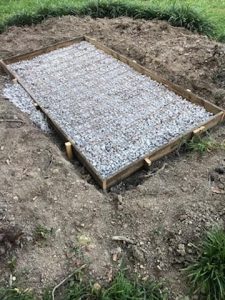
Getting ready to pour a concrete slab for the outdoor fireplace.
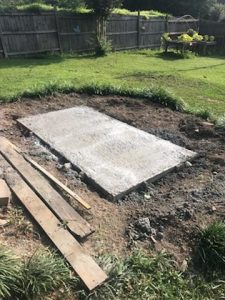
John had to clear a grassy area to get ready for the footprint slab to be poured. Once he mapped out the positioning of the fireplace, John excavated the area and did his ground prep. John built a wooden frame and added gravel and steel beneath the concrete. After pouring the concrete, he removed the wood, and he had his footprint slab ready for some mortar and block to be stacked.
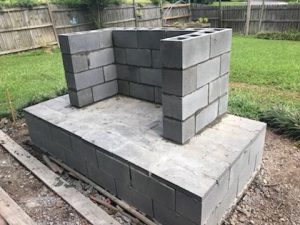
Concrete slab is ready for cinder block.
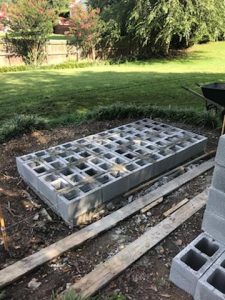
John spent the next few days building the cinder block structure, following the construction plans to a tee. John paid attention to detail with the mortar gaps and even though he hadn’t done much block work, he built beautifully.
First row of cinder blocks are down.
Firebox was established for John’s DIY outdoor fireplace.
When John was getting the cinder block structure finished he began thinking about his finish material. John added his firebrick to the inside of the firebox without mortar gaps between them. He took the recommendation of Backyard Flare and used high heat construction adhesive to adhere the firebrick to the firebox walls.
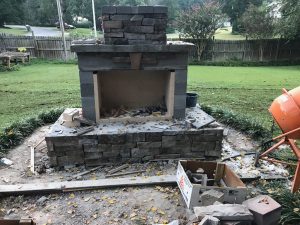
The work site was super busy with lots going on. Veneer was like a jigsaw puzzle, finding the perfect piece for each spot.
Finishing the DIY Fireplace
John finished with his fireplace and he cleaned up the work site. Anticipation for the first fire!
John picked out a great veneer with a dark tone. The chimney and hearth portions were covered first, with the keystone added just above the firebox, centered. The seating material was adhered to the top of the hearth with matching grout, before the center section of the fireplace was covered with veneer. The mantel was stuccoed for texture and the top of the chimney was adorned with a very cool cap stone.
Adding the Small Touches
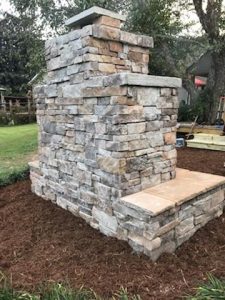
John added veneer to the whole structure giving it a really nice 360 degree look. It looks amazing from all angles.
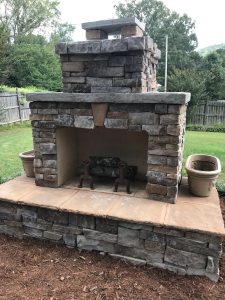
Dark colored mulch was spread all the way around the fireplace and up to the edge of the very green grass. Two planters were added to the sides of the structure, which will probably have great looking flowers in them someday.
John’s first fire in his DIY outdoor fireplace. He is so proud that he did it himself.
John’s completed DIY Outdoor Fireplace in GA
John bought a very decorative fire grate and added a few logs to it in anticipation of his first burn. Oh, and what a beautiful sight it was when John started his first blaze. He was so excited to share these pictures because he wanted to show off his DIY labor and show that it was possible to build it yourself.
Want to Build A Fireplace of Your Own?
We sure hope you like John’s fireplace and that it inspires you to think about one of these fireplaces in your backyard as well. It’s really not out of reach to achieve a stunning outdoor living space. John believes that if he can do it, anyone can do it. If you have the DIY mindset, we can help you achieve greatness. We have assisted hundreds of homeowners who are weekend DIY’ers, realize their potential to build fireplaces just like John’s, so you can do it too. Visit Backyard Flare to learn more so you can begin your journey too.
Thanks so much for reading about another great DIY fireplace build. We’ll bring you more soon, and as always …happy building.
Let’s Take a Trip to Visit a Gorgeous Outdoor Gas Fireplace
Hello all you DIY’ers and welcome to this edition of, “That Awesome DIY Fireplace” where we introduce a DIY homeowner, tell you what state they reside in, and show you how awesome they were at building their own outdoor fireplace. We’re going to see a stunning outdoor gas fireplace in this article.
Introducing Our DIY Homeowner
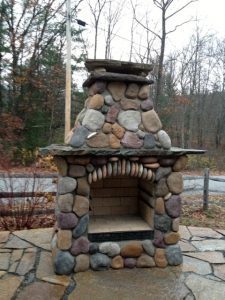
We venture down the street and across the tracks from Backyard Flare headquarters to introduce homeowner Jim, who wanted a short in stature outdoor gas fireplace. Jim specifically wanted to burn natural gas. Jim was restricted to natural gas and a short finished height by his homeowner’s association due to his home’s location on the golf course. Jim’s backyard was on the 12th tee so there is quite a view.
Jim contacted Dan at Backyard Flare and explained his fireplace design and restrictions. No sweat at all for the Backyard Flare team. Dan did a couple site visits to Jim’s backyard and they came up with a plan of action. Dan was contracted to build the fireplace, but Jim was able to save a bit of money because he helped Dan through the process …and Jim learned a lot, very quickly. It’s always a blast when homeowners can help because they learn and have a great sense of accomplishment.
Getting the Area Prepped
After the fireplace location and width was determined, a diamond blade was used to cut through the existing flagstone patio. This area was excavated and framed for the concrete slab with rebar inside the pour. An inexpensive Harbor Freight cement mixer was used which made this job relatively quick for two people.
Patio flagstone was cut to make way for the concrete slab.
Dan is using a wheelbarrow to dump concrete into the wood form for the concrete slab.
Once the concrete cured for a couple days, Dan and Jim started laying block in a running bond (staggered) pattern.
The running bond pattern was used to build the structure.
The firebox and storage voids were built with arched lintels made from concrete.
The firebox in the middle was sandwiched between two wood storage voids on either side. An electrical line was routed through the blocks to install a 110v outlet. This outlet was used to plug in a power transformer for the structure and backyard ground low voltage lighting.
The fireplace was covered in a stucco finish prior to the stone veneer being applied.
A level was used as a straight edge to mark the cuts on the flagstone.
Lot’s of Finishing Options Were Added
When the structure block work was completed, firebrick was added to the inside of the firebox.
The flagstone was added to all horizontal surfaces of the fireplace.
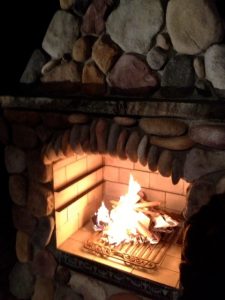
The natural gas line was plumbed up the backside of the structure and a shutoff valve was added inline before it was installed into the back wall of the firebox. This gas line stubbed out a few inches inside the lower right corner of the firebox. Gas tubing was added to an H pipe and a few test burns were done before anything was solidified.
The wire for the structure lighting was routed to the front of the hearth and to the inside of the storage voids, figuring out where each light would be located. The front face of the structure was adorned with a beautiful stacked stone, which was mortared in place. The remainder of the structure was covered in a smooth coat troweled stucco, which was later painted.
Natural Stone Added So Much
The horizontal surfaces were covered in a gorgeous light tan flagstone which Dan and Jim cut with a chisel method for a rougher edge. This was a bit time consuming and much slower than a saw cut front edge, but completely worth it in the end.
The finished fireplace sure makes a statement in this backyard.
With the leftover flagstone, Jim extended the flagstone patio to the far-right side of the structure and filled the joints with matching mortar. After it was pressure washed, you can’t even tell where the old flagstone patio and the new came together. Totally amazing.
A vertical piece of flagstone was added to the front of the firebox after it was chiseled to resemble a mountain range in Jim’s home state of Colorado. This piece of stone helped contain the local river rock that was added to the top of the H pipe. This rock completely hid the pipe, making it look as if the flames “originated” from the rocks.
Tying the Structure to the House Decor
For continuity in the backyard, the fireplace stucco was painted to match the house. New outdoor furniture was added to the patio and many nights have been spent eating, drinking, partying, and relaxing in the backyard. So many golfers stopped to see the fireplace and to offer kind words, complementing Jim on his design.
With the ambiance of the lighting in the voids and quick start of the natural gas in the firebox, Jim and his wife have been able to say, “hey want to have a fire?”, and enjoy it in a matter of seconds. Easy on and easy off is what Jim wanted and it turned out great.
This backyard was transformed with this fireplace overlooking the gorgeous golf course.
You Ready to Build One?
We sure hope you like it too, so let us know how this DIY fireplace inspired you? Are you ready to build your masterpiece like Jim did? Even though this outdoor gas fireplace included natural gas, low voltage lighting, and chiseled flagstone, it can all be done by you too. If you have the DIY mindset, we can help you achieve greatness. We have assisted hundreds of homeowners who are weekend DIY’ers, realize their potential to build fireplaces just like Jim’s. You can do it too. Visit Backyard Flare for more information and DIY construction plans.
Thanks so much for reading about another great DIY outdoor gas fireplace build. We’ll bring you more soon, and as always …happy building.