DIY Rocks…Nothing More

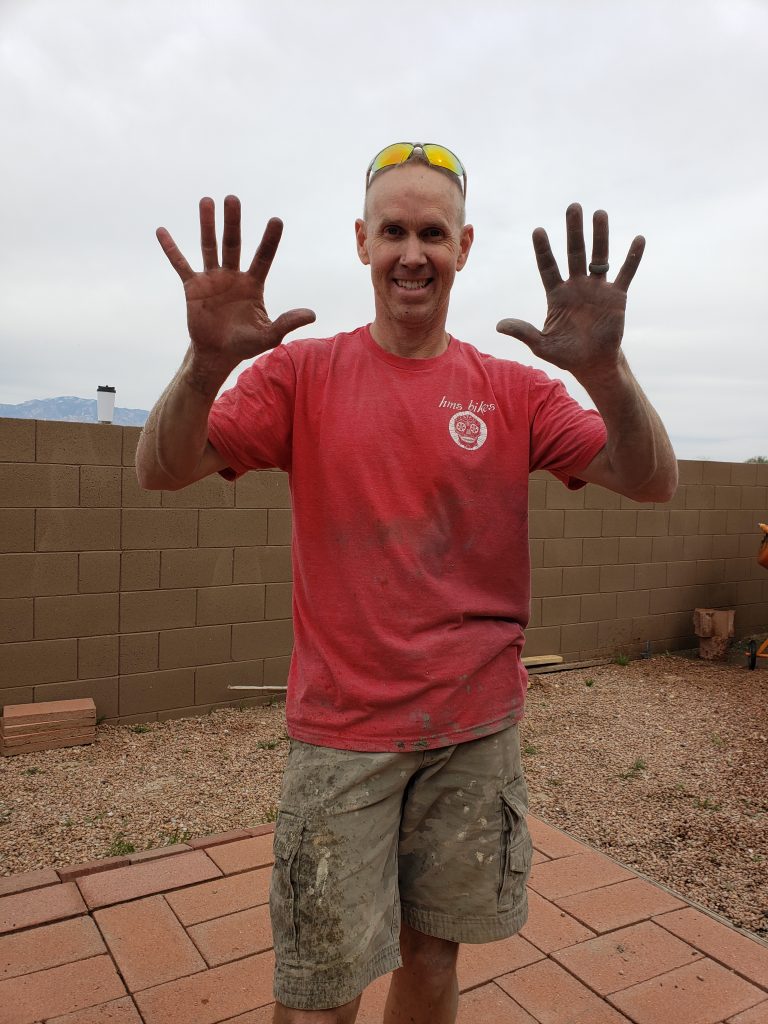
Man, I love building things, both big and small. Like I stated in the header, “DIY Rocks…Nothing More”. I look around my home and I am amazed at what my wife and I have been able to build and remodel. The list is long, from hanging new doors, flooring throughout, adding cabinets to the laundry room, tile work, paint, baseboards, wall additions, wiring and plumbing, etc…

DIY Rocks

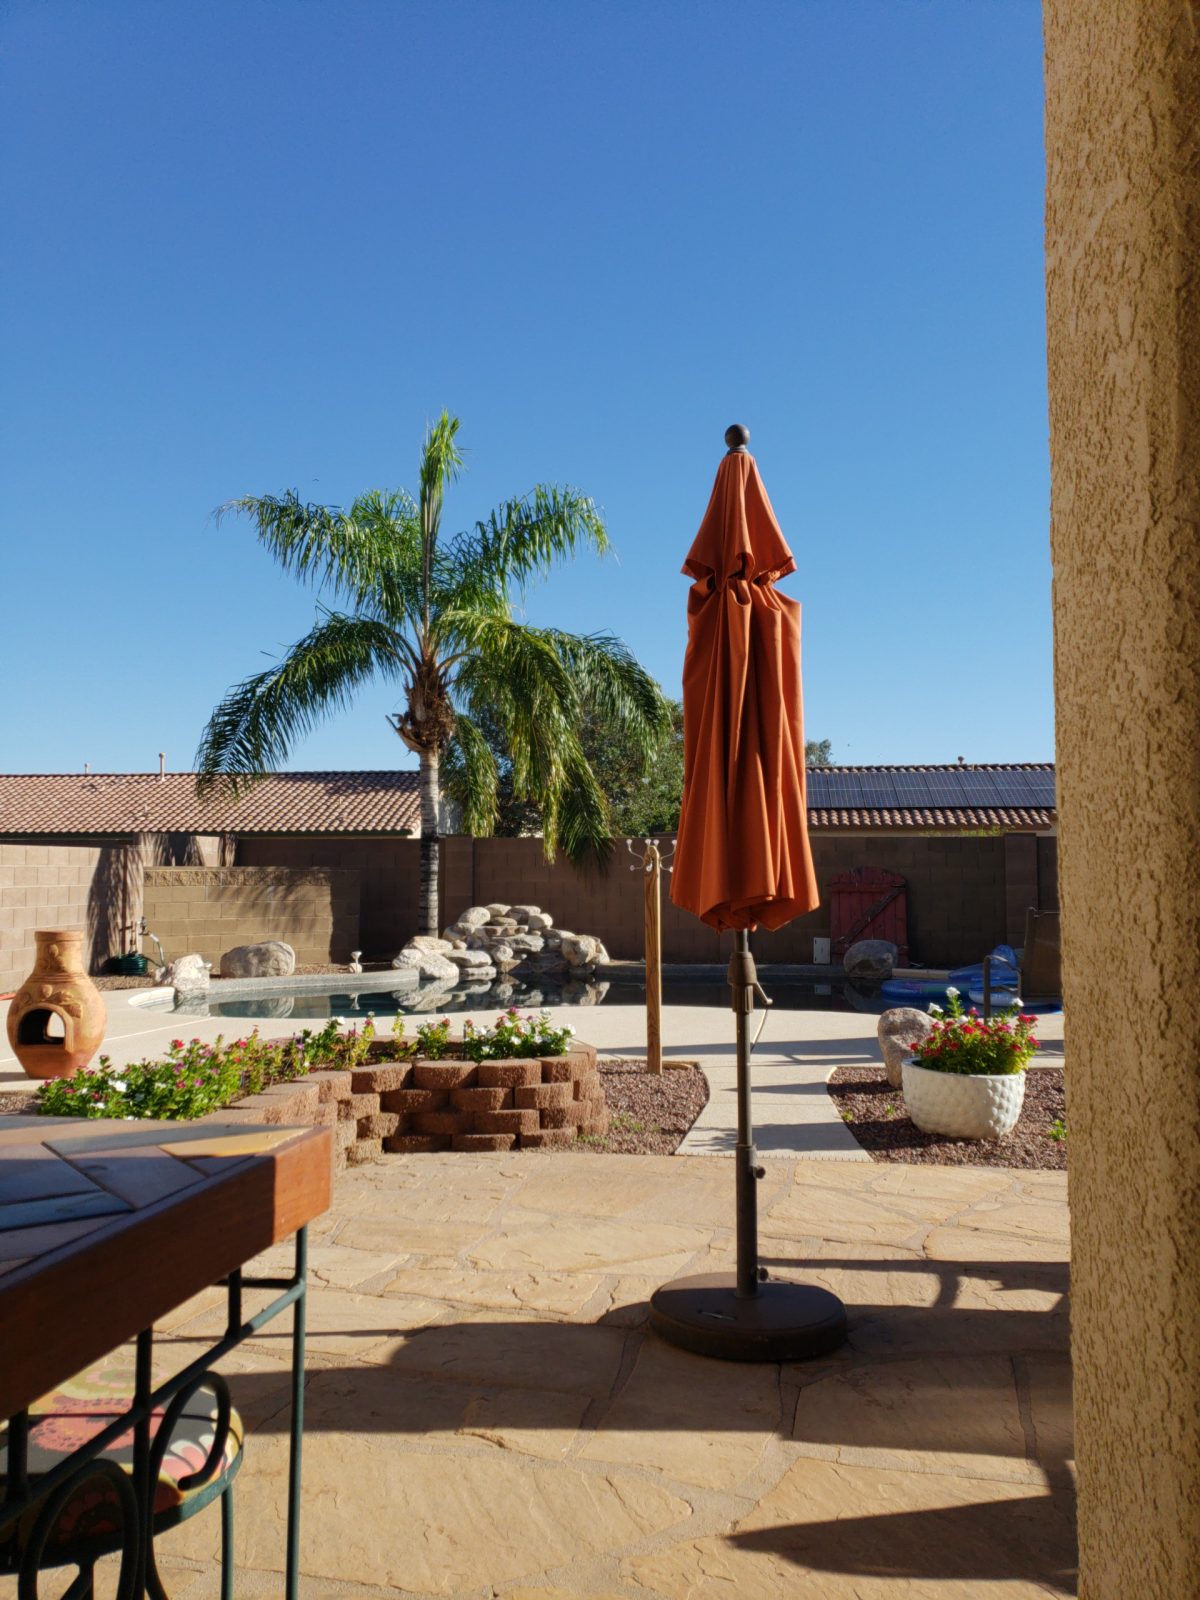
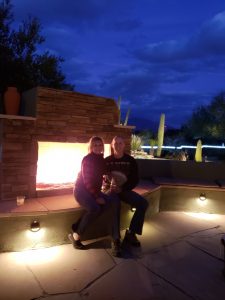
There really hasn’t been a room or area of our home that we haven’t had a direct impact on, DIY style. The inside has been a blast to build, but it doesn’t stop there. We love our backyard outdoor living area too and we do use it a lot. I would say we use it almost everyday, with the exception of mosquito season. That’s just miserable.

Building Our Backyard

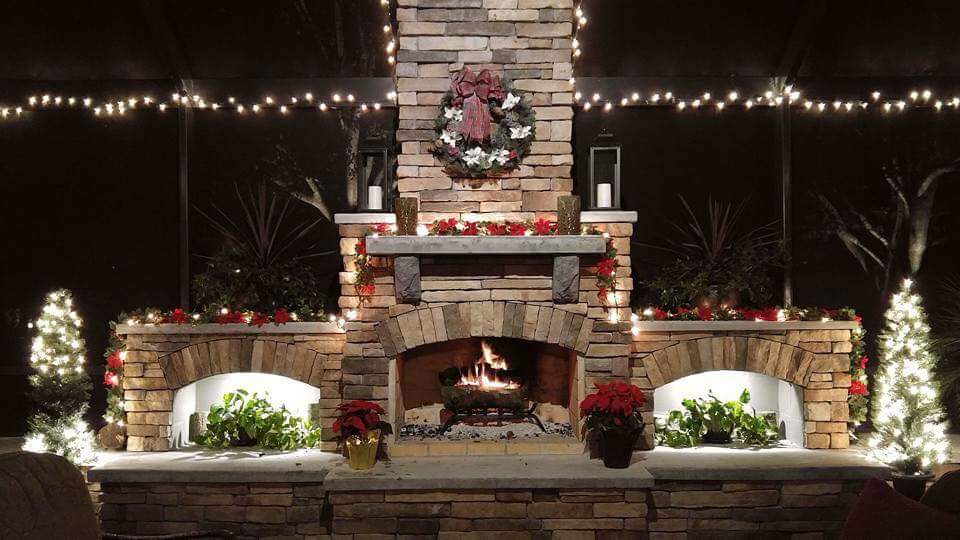
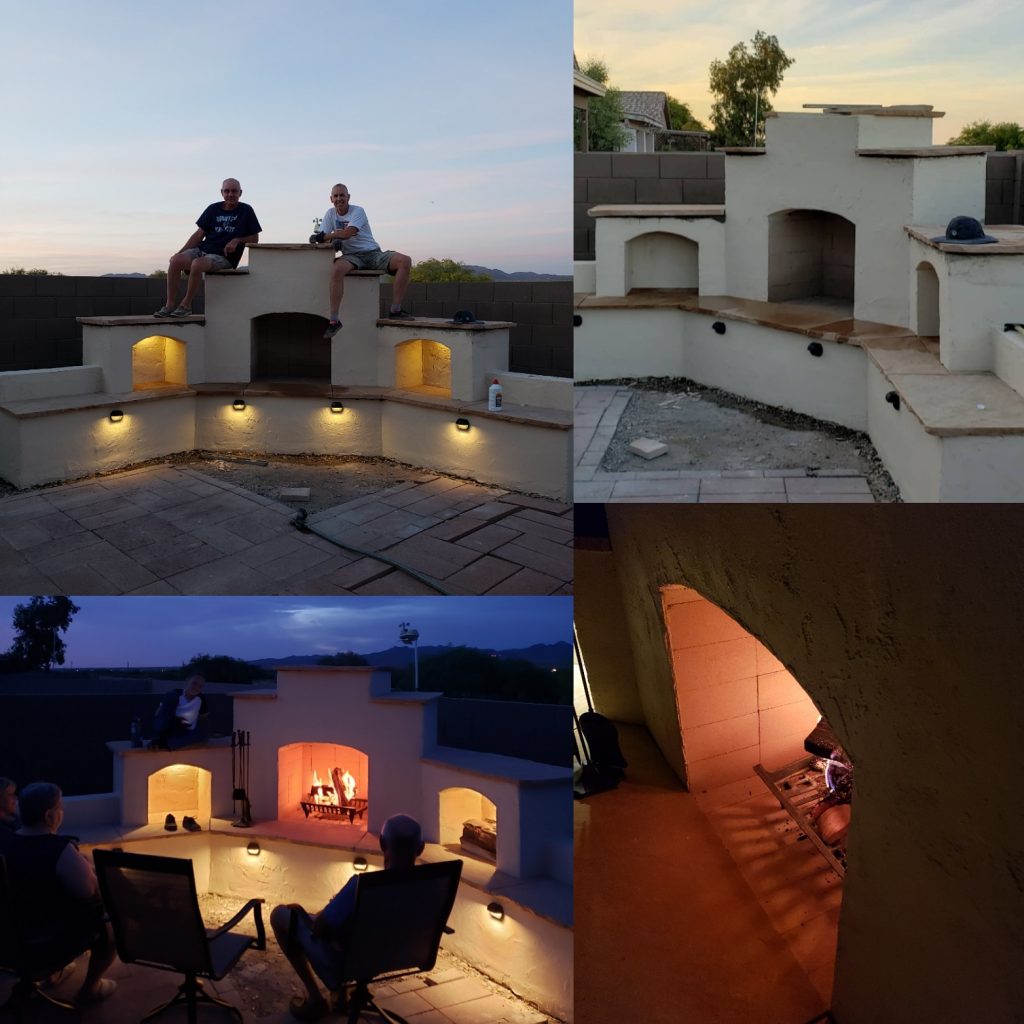
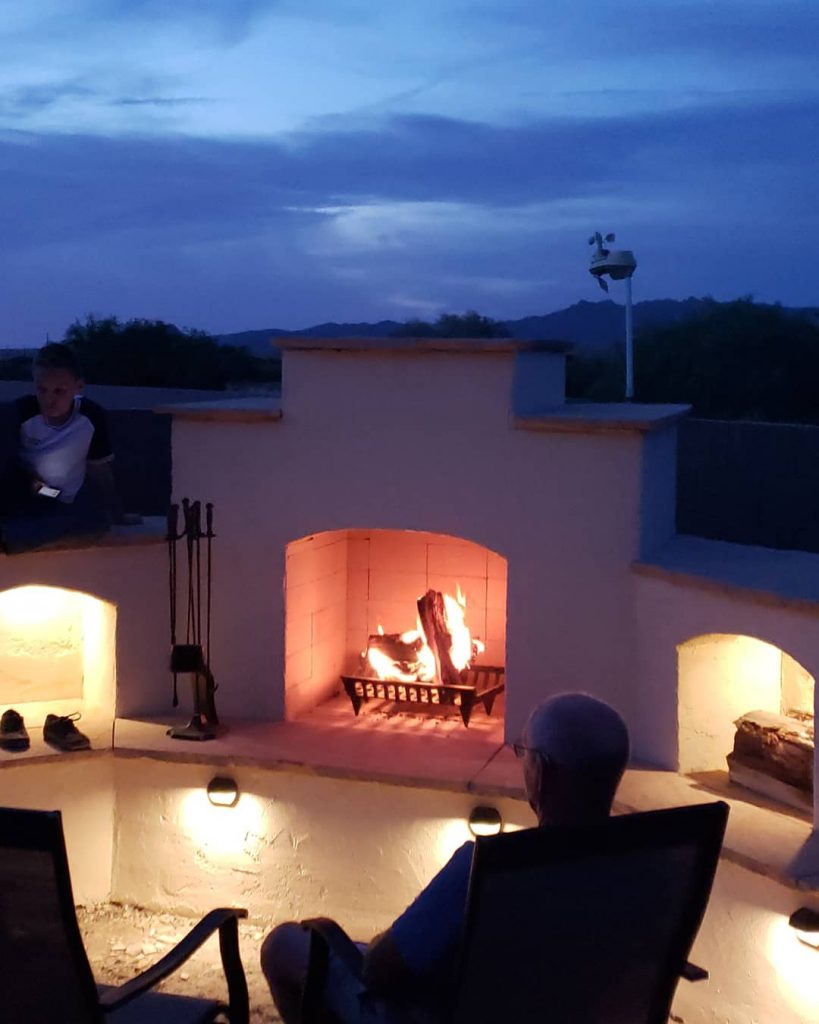
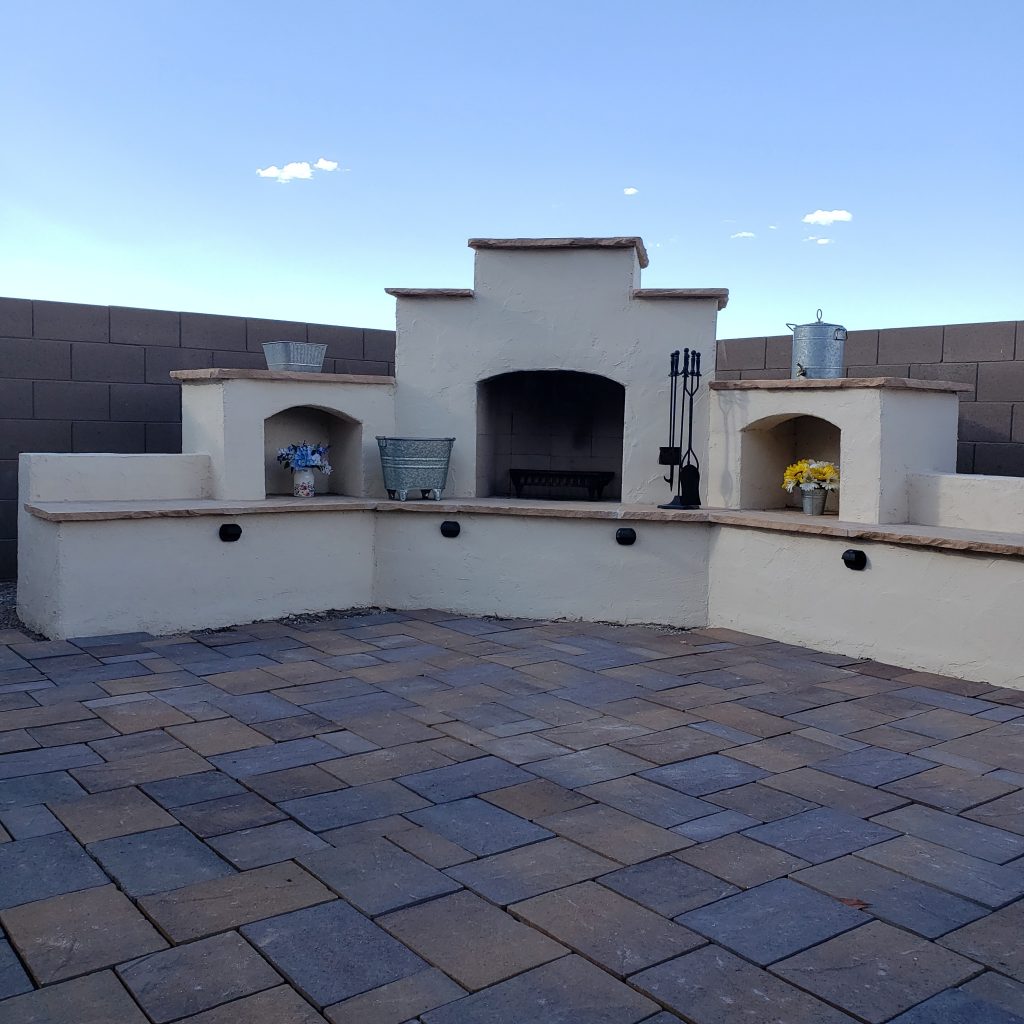
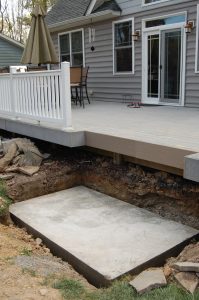
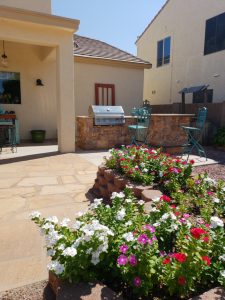
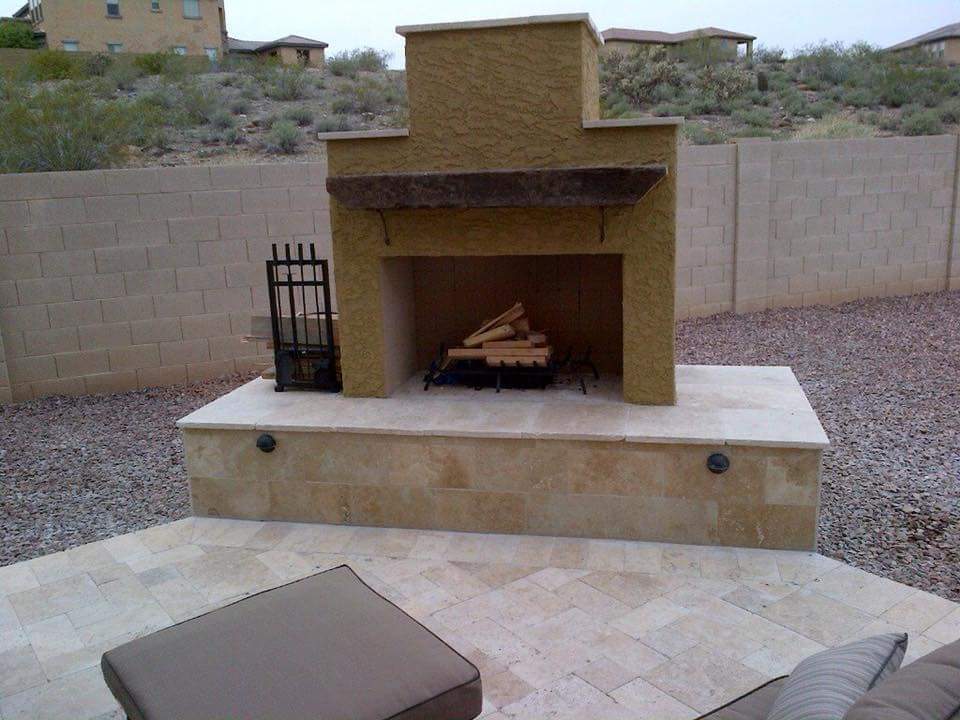
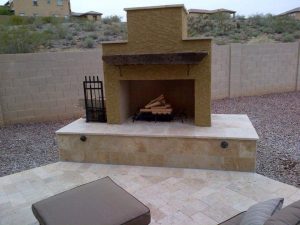
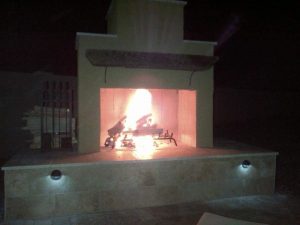
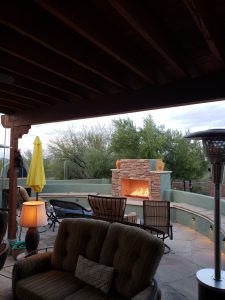
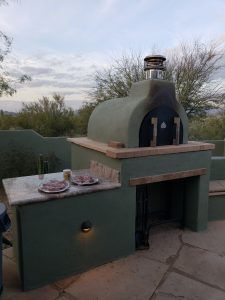
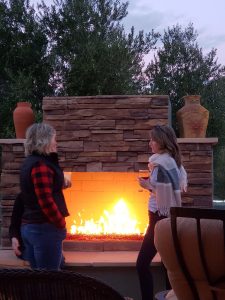
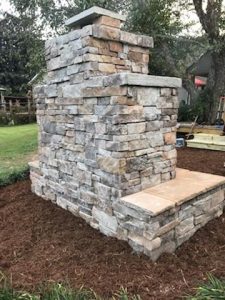
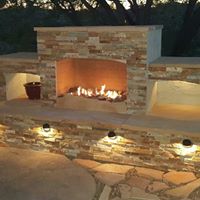
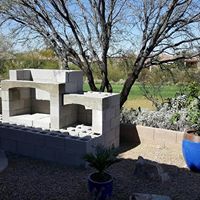
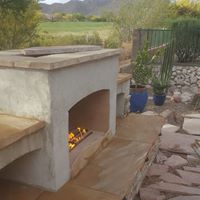
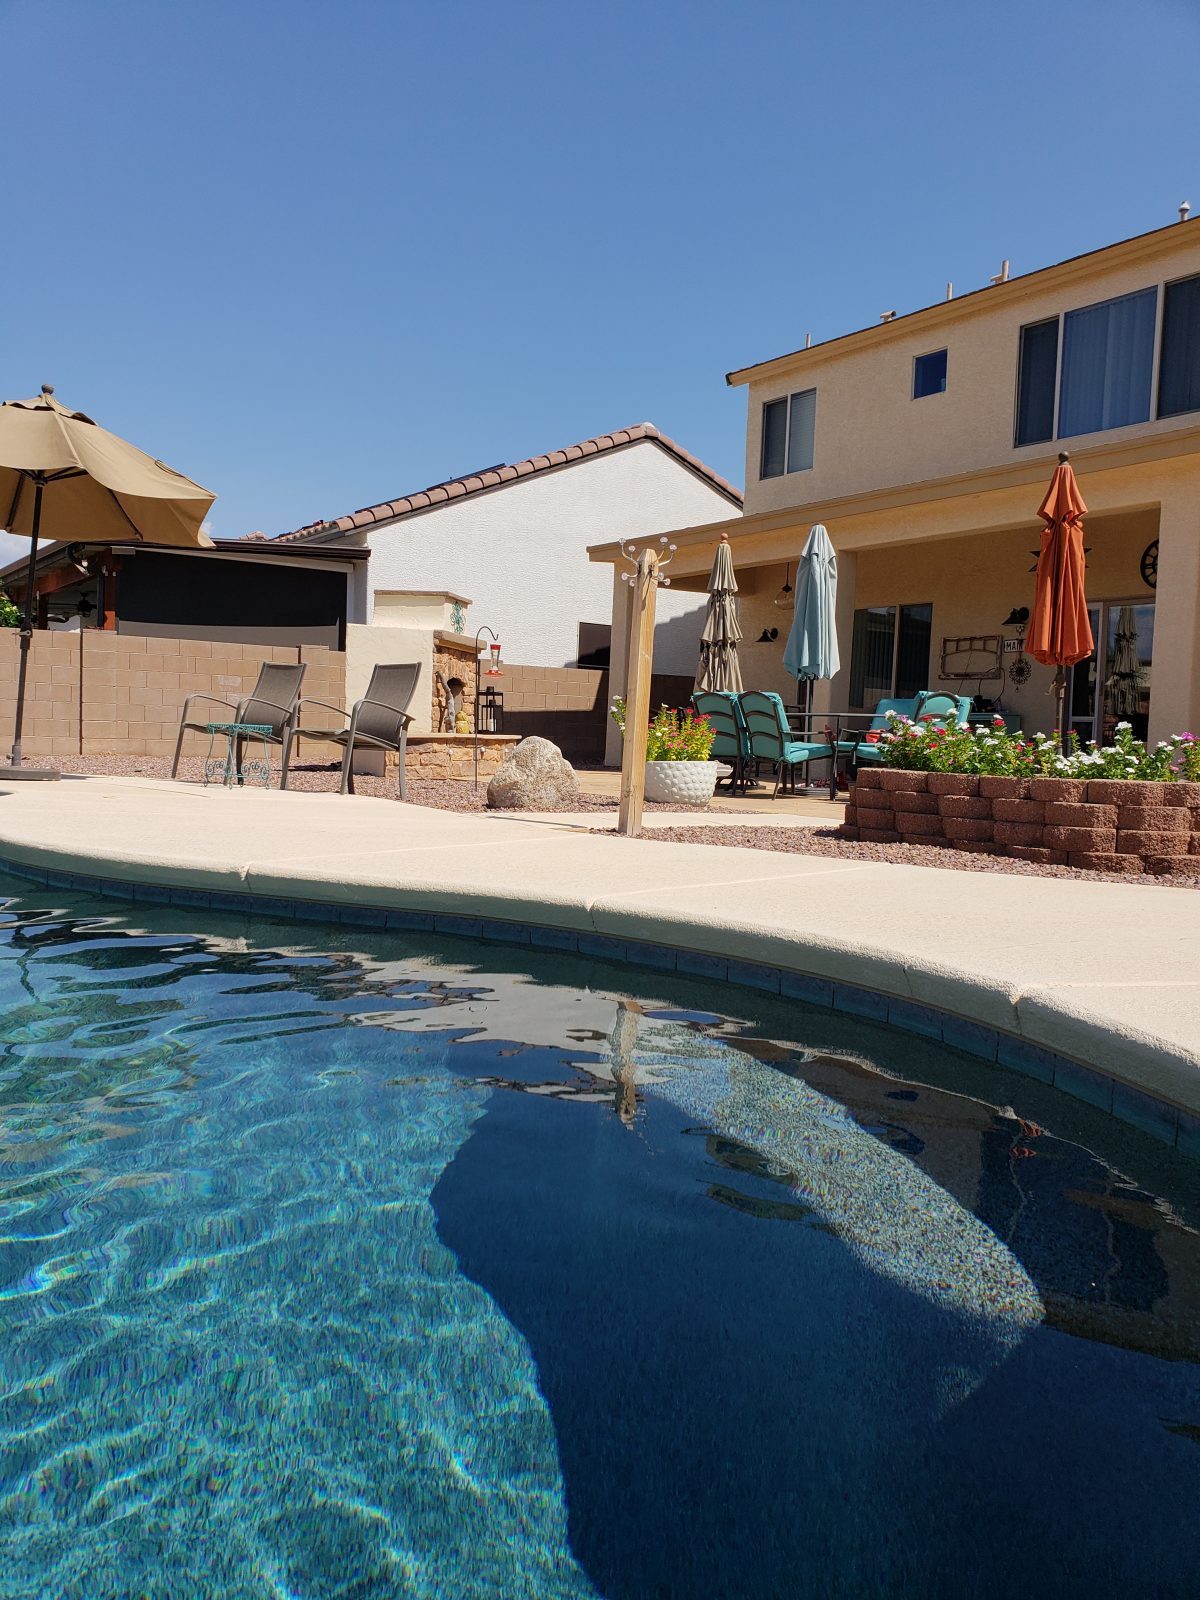
Years ago it took a lot of thought to build our backyard and with the numerous layout possibilities, we had to pick what we liked. The pool was first and because it was the biggest feature, it took up the first big chunk. Then we built our outdoor fireplace and outdoor kitchen. They went on opposite sides of the large flagstone patio, which framed the backyard area closer to the house.

improve the look swimming pool umbrella palm tree flagstone planter
Pool went in first due to its size
improve the look Flagstone patio red door grill kitchen flowers
The outdoor kitchen framed one side of the flagstone patio

We enjoyed the layout for many years but we started to get a little bored with it. My wife and I started talking about a backyard refresh. This will not be a small endeavor as most of the backyard will be altered.

improve the look swimming pool patio umbrella fireplace deck planter
The fireplace framed one side of the flagstone patio nearer the house

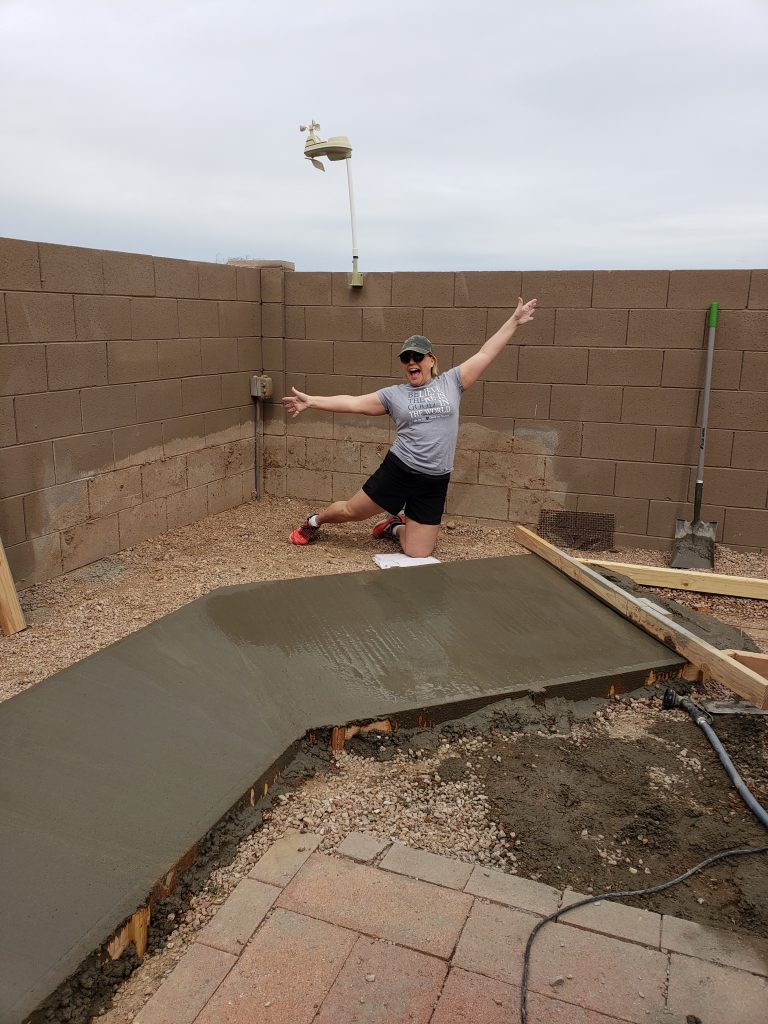
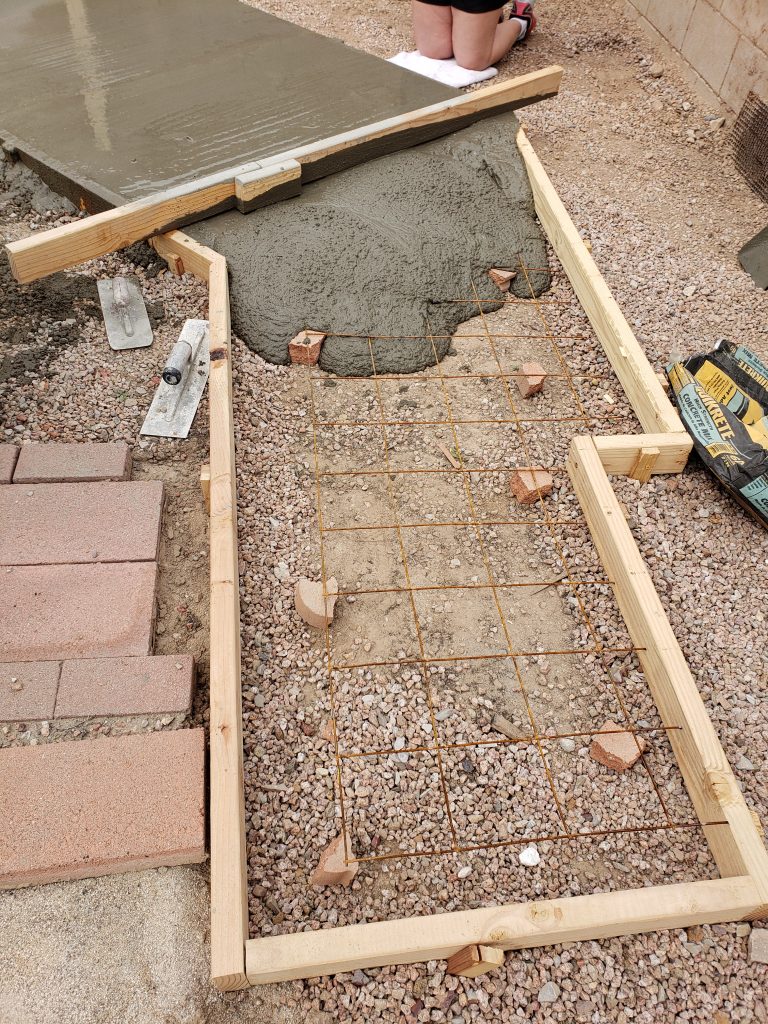
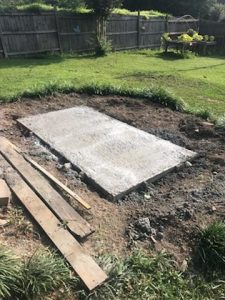
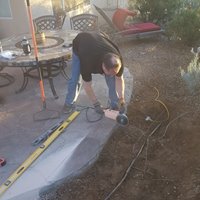
But we are going to be doing the bulk of the work. Now, as a habitual DIYer and DIY business owner, I am not intimidated by the task. The only thing I will need to contract out will be some of the heavy lifting and trash services to haul away the old building materials. This will be the old pool decking, the old masonry that will be removed, and the flagstone patio that will be replaced with a more modern paver.

Are You Ready?

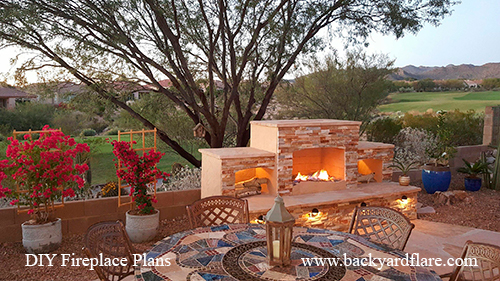
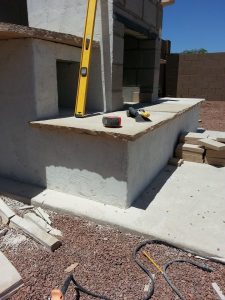
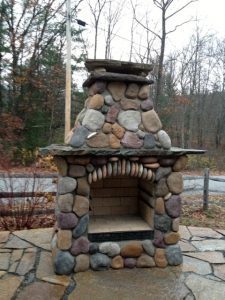
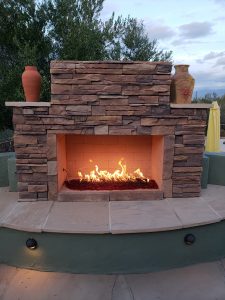
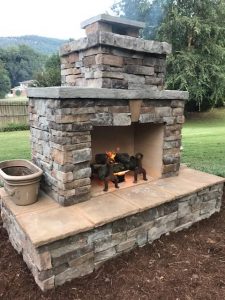
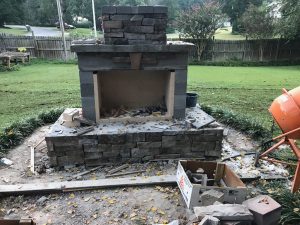
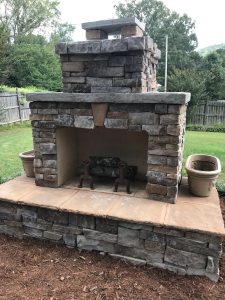
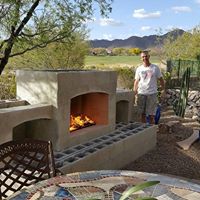
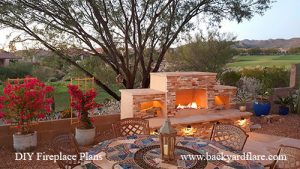
Maybe you’re in the same spot we are with regard to your backyard. Does your outdoor space need a redo, an upgrade, a refresh? It doesn’t have to be a daunting task, because we have DIY construction plans for your new outdoor fireplace and outdoor kitchen. DIY rocks can be your mantra too.

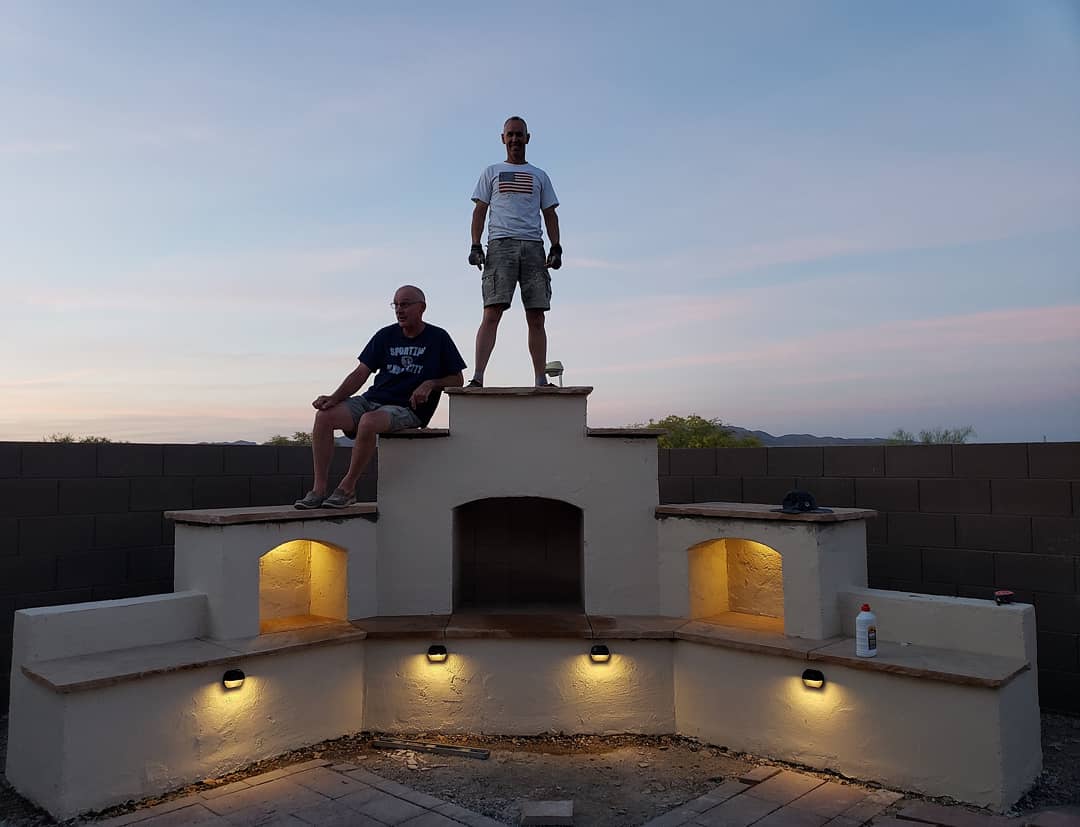
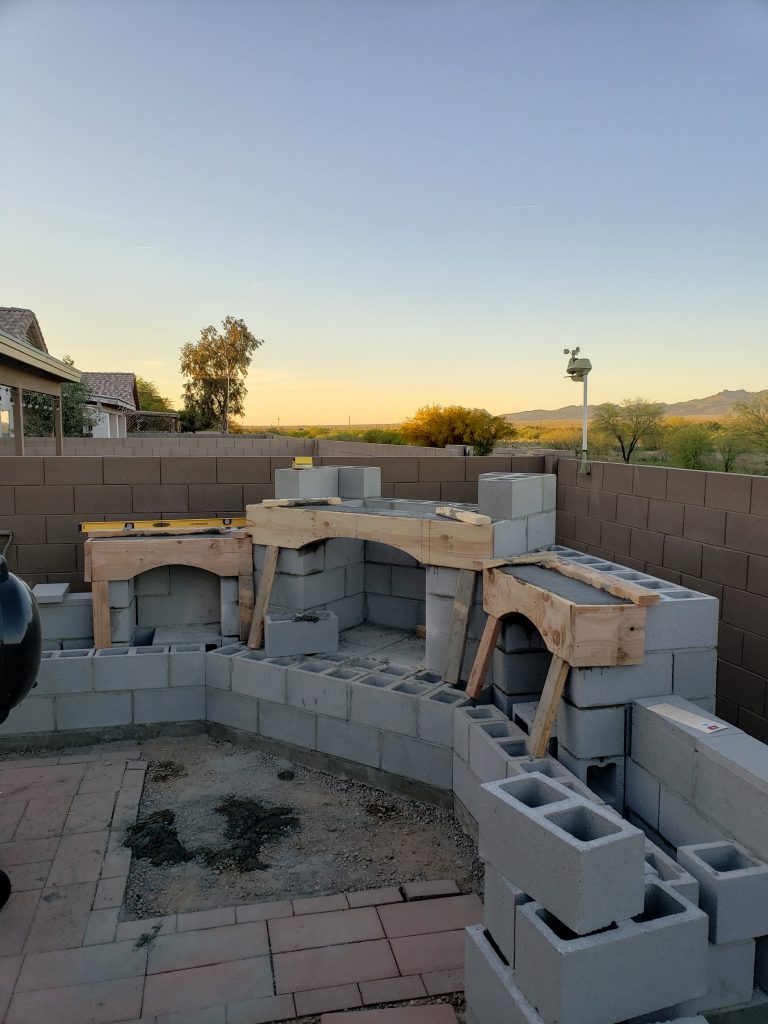
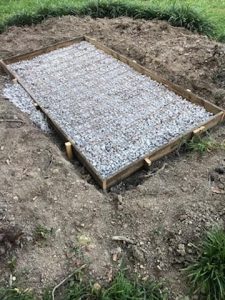
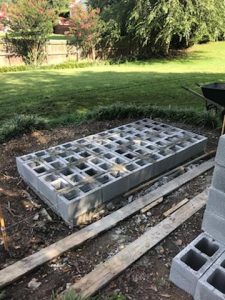
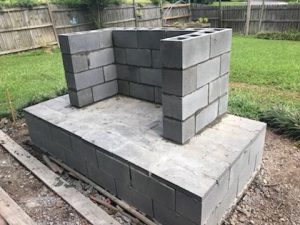
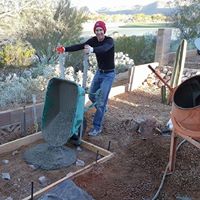
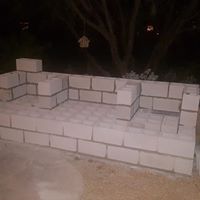
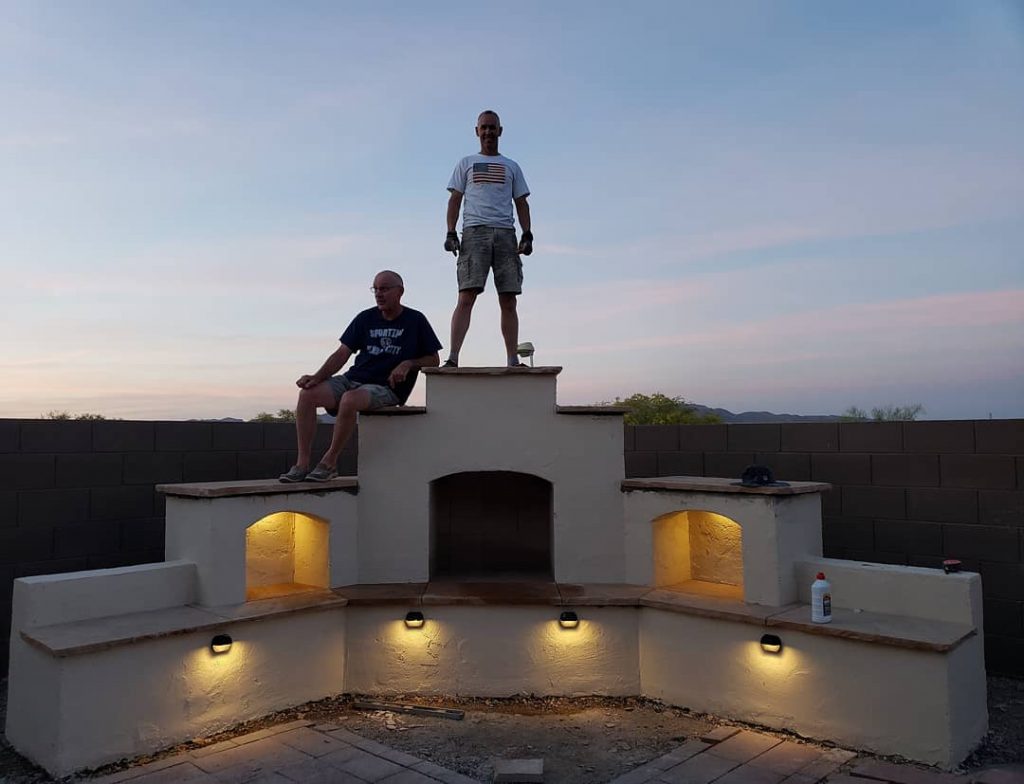
Even if you have never built with cinderblock and mortar, we can walk you through your build with step by step instructions and detailed diagrams. You will be able to follow the plans that will show you the exact placement of each and every block. There is no better way to build and you can classify yourself as a full-fledged DIYer. The BEST part is that you will save thousands of dollars if you do the work yourself.

We Are Here To Help

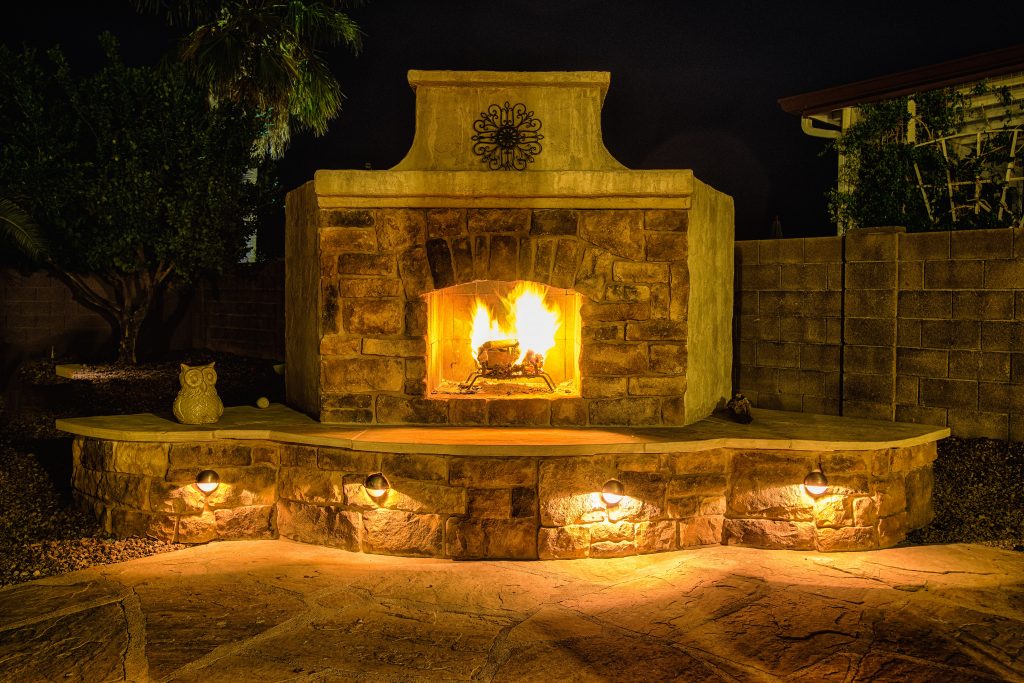
Don’t think you have what it takes? Go to our website, www.backyardflare.com and check out the gallery of outdoor fireplaces and outdoor kitchens built by Backyard Flare DIY customers. Anyone can do it with our help. Let us prove it to you.

DIY outdoor fireplace with painted stucco and lights
We stand on what we design. We got you covered!

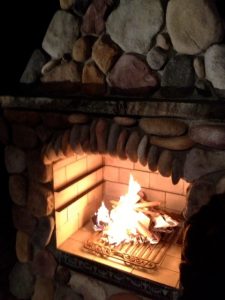
And if you need a bit more help, you can get our video tutorial series that will show you how to build an outdoor fireplace. We have strived to put together a whole package that a DIY homeowner can use to have outdoor building success. Why wait? Visit www.vimeo.com/ondemand/diyoutdoorfireplace today and watch our video trailer. We know you’ll be inspired to start your DIY project and we want to be a part of it.

Backyard Flare is second to none with customer service. You want to talk directly to someone about your project? Call Dan at 520-269-9740 now and discuss your project. Consults are free of charge. Never a better way to get started. We look forward to hearing from you.

As we always say, “DIY Rocks” and “Happy Building!!!!”

Is A Chimney Flue A Must?

Customer Questions

I was working on a custom fireplace design and DIY construction plan for a customer the other day. We had just spoken about her fireplace structure.  She had asked me questions, one of which was “should I use a chimney flue”?  I explained my experience with a chimney flue and the construction method of our designs, answering all her follow up questions.  She was eager to learn which made me very happy. When we finished our conversation, the phone rang again, and I answered it.

On the other end of the phone was a man who wanted to build a DIY outdoor fireplace in his backyard. Would you believe he had the exact same question concerning the use of a chimney flue.  I spoke with him for a while and answered all his questions.  When I hung up, I really started to think back. There were lots phone calls and emails that hit on the specific topic of a chimney flue in our outdoor fireplaces.

Here We Go!

I thought that this same topic would be a good one for my next blog post because the interest is obviously out there.  Now let me get started by saying that if you have ten masons in a room and you give them the same picture and dimensions of a fireplace, then say, “Go build it”, it will be built ten different ways.  No two structures would be alike.  Now I must continue with this and say that all ten fireplaces could very well be functional fireplaces and just because they are all built different doesn’t mean any of them are wrong.  They’re just different.  We are just one of those masons and ours is simply a different method of building and to some, a different train of thought.  The use of a chimney flue is not wrong at all, but we know they aren’t necessary if the structure is built the way we build.

DIY outdoor fireplace fire wreath christmas light flower vase candle
This is a DIY outdoor fireplace built using our plans without a chimney flue.

This is not to say that you absolutely can’t use a chimney flue with our designs, we just know that they aren’t always necessary.  A lot of masons build using these clay pipes.  Some are square, some are rectangle, and some are round.  Some are 12” long and some are three feet long and there are several diameters too.  First, I need to go back a bit and explain what a chimney flue is used for.  It is literally the tube that lines a chimney and lots of people think they are a necessity.

We Design Without a Chimney Flue

You may be thinking, “how do I not need a flue to direct the smoke”.  Our designs are constructed with the interior chimney dimensions being formed by block.  In essence, our chimneys designs are all squares and rectangles.  There are no round edges or round entryways to our chimney openings so square and rectangle blocks dictate the way everything is formed.

diy outdoor gas fireplace stacked stone golf course arizona
Even our fireplace with no chimney functions well.

Backyard Flare fireplace designs incorporate a large throat chimney, so the inside of the chimney does not get super-hot. Our cinder block fireplace designs have been heat tested and they are hotter in the Arizona summer than in the winter months with a fire burning.  I can literally stand up on my fireplace after a fire has been burning for 15-20 minutes and stick my hand inside the chimney opening.  I can hold my bare hand against the inside of the chimney from the top and it is warm, but not so hot that it is unbearable.  This is the reason we can say that the inside of our chimneys aren’t even as hot as it is on a sunny Arizona day.

diy outdoor fireplace
This is Backyard Flare’s first ever fireplace built in 2007. No chimney flue was used and it still works great with no breakdown of the chimney blocks.

Lots of people will say you need to build your chimney with a clay flue for purposes of heat, thus keeping the heat off the cinder block.  I say, if your chimney opening is big enough, not restricting the smoke and heat, you don’t need a chimney flue.  You can open a chimney up pretty big and not even affect the draft of the structure, so it’s basically up to you which build method you want to subscribe to. 

How Are We Different?

Backyard Flare construction plans use the same basic build method above the firebox from design to design. These chimneys appear different from the outside too.  We have never had a draft problem, so we know we have a tried and true method of building that does not require a chimney flue, thus reducing the cost of the final structure. 

I hope his post has helped you out and that it has answered a few questions.  Let us know if you have any further questions and we will make every attempt to get you an answer.  Thanks for reading and if you are wanting to build a DIY outdoor fireplace, visit www.backyardflare.com for the best and most comprehensive DIY construction plans on the market.  As I always say, happy building.   

Inexpensive DIY Outdoor Fireplace

Our Arizona Backyard Fireplace

Hello all you DIYers and enthusiasts of backyard fireplace and transformation.  I wanted to write a bit about one of our latest ventures, a corner Arizona outdoor fireplace with storage voids that I built at my in-law’s house in Arizona.  The backyard isn’t huge, only about 30 feet deep from the back of the house to the back wall, so we decided to offset the fireplace in the corner to not block the mountain view.

Doesn’t Have to be Expensive!

The best part of this whole build is that we really designed and built on a budget, building as inexpensive as possible without substituting quality.  In total, we spent just over $1,600, and that included the poured concrete slab, lighting, and all finish work.  It really is amazing at what you can build and how cheap the overall cost can be when you enter the DIY world.  So, let’s break it down.

The Backyard Fireplace Building Begins

Concrete slab for DIY outdoor fireplace
Getting the slab poured is lots of fun.
Wood form with steel and concrete for outdoor fireplace
Use wire mesh or rebar in your concrete pour to add strength to the slab.
Man pouring concrete for outdoor fireplace
Concrete is a dirty job but lots of fun at the same time.

We knew the footprint of the backyard fireplace so we worked with disturbing only that area. We excavated the site and prepared the ground for the concrete slab, using steel in the pour.  Once the concrete cured for a few days, we began laying the block as per the construction plan, which showed literally where every block went.  So easy!  We established the entry point at the back of the structure for the low voltage lighting wire to come in and routed that wire through the structure.

Masonry construction outdoor fireplace with storage and concrete lintels
We filled wooden jigs with concrete to create the arched lintels.

The storage voids and firebox were arched and that was completed by building wood jigs, supporting them in place, and pouring concrete into them to create the lintels.  The arches really made the three openings come to life, so we are happy we made that decision.

Finish Work Decisions

DIY outdoor backyard fireplace at night with fire
Just an amazing night with family and friends.

When the rough build was completed, we lined the firebox with firebrick in a stacked pattern to change it up and covered the whole structure in smooth coat stucco.  The stucco was then painted to match the color of the house, so it tied everything in.  Almost all horizontal surfaces were covered in a gorgeous honey brown flagstone that we chisel cut for a rustic edge.  The LED lighting was added to the front of the structure and inside each storage void, where it was connected to the low voltage wire.  We are so happy we made the decision to add lights because it makes the whole structure come to life even when not in use.

Finished DIY outdoor fireplace with painted stucco and brick patio
Finished DIY outdoor backyard fireplace with painted stucco and brick patio

The patio spanning the front of our backyard fireplace was completed in a random pattern with colored concrete pavers.  It sure made the whole sitting area complete, giving it a finished look.  We have enjoyed the fireplace even through the summer with ambiance fires, so we’re not letting the warm nights slow us down.  Sitting at a distance is the way we do it when it’s warm outside.  Just make sure you and your guests have your drink of choice while you sit and relax.

Want to Build a Backyard Fireplace Too?

We hope you love our backyard fireplace and all of what we built as much as we do and that you are inspired to step into this as well.  Backyard Flare, LLC is the leader in DIY outdoor fireplace construction plans.  Whether you are an accomplished mason or someone who has NEVER worked with block and mortar, you can build our designs.  Open the construction plan and begin building your own backyard fireplace.  We are confident that you too can build a masterpiece, so get going on your design ideas. 

DIY Outdoor Fireplace and Concrete Pads

Concrete or Dirt? That is the Question

cDIY Concrete slab in backyard with grass wood
Concrete slab is ready for cinderblock.

The other day my phone rang and it was a customer of Backyard Flare that had purchased a DIY construction plan for the Pima II design.  This customer was looking for information about whether he needed to build the fireplace on a concrete pad or whether he could just build it on the dirt.  This question comes in quite often so I wanted to address it again.  Concrete pads are necessary for a masonry outdoor fireplace.

Where You Live is Important

DIY concrete pad deck level outdoor fireplace
Finished concrete is ready for block work

Think about all the places you have been and the ground you have walked on.  There’s Arizona with ground so hard that it almost takes a jack hammer to dig down a couple inches.  Then there’s Florida with gorgeous sandy beaches, but that sandy soil reaches inland too.  You have the northeast states that have frost lines so deep, that it’s a wonder that it ever thaws out. And we can’t forget the northwest that gets a lot of rain that could create washout conditions.

There is our dilemma with phone calls relating to how thick or whether a concrete pad is necessary.  Even here in Arizona, I always build my outdoor structures on concrete.  This is for peace of mind so if there is any ground settling, the structure will hopefully be okay.

If a masonry built structure settles, and it has been built on a running bond (stair step) block pattern, the cracking will look like a stair step going up.  The blocks will often separate at the seams, not crack.  This is not the way you want your outdoor structure to end up, because you spent your hard labor to build it.

What should you do?

DIY outdoor fireplace, stone seating
DIY outdoor fireplace on new poured concrete pad.

Do it right from the beginning and pour some concrete. Support that structure and keep it from settling and cracking.  Now you say, that’s all fine and dandy, but how thick does the concrete need to be? There’s an issue with that portion of the concrete pad question in that there is no “one answer” to that question.  There is no recommendation that we can give you because your geographic area and soil will dictate the answer.

Remember all the different soil types we cited a few paragraphs ago?  There are so many variables that exist that will need to be addressed and recognized before a concrete pad thickness answer can be formulated.  Our advice is to seek out some professionals in the concrete industry and ask.  Go to Home Depot or Lowes and see if there is a person who used to pour concrete for a living that is working there in retirement.  They are sometimes a wealth of information.  Go to the internet and search for recommendations based on your soil type and geographic area.  Again, lots of information.

Test Time

So, what have we learned?  I always recommend a concrete pad for an outdoor masonry built fireplace or kitchen.  There is no hard and fast recipe that applies to everyone that they should follow to pour the pad, so go find your local resources.  They’re out there.

If you would like to discuss your backyard outdoor fireplace or kitchen and would like to learn more about the DIY world we love so much, visit Backyard Flare.  We can help make it a reality, saving you thousands of dollars.  Give your backyard a face-lift and beautify your outdoor space.

Thanks for reading and as always, happy building.

Dan Heston
Backyard Flare, LLC
Tucson, Arizona

You Can Do It

Feeling Apprehensive?

You can do it!!!  I remember receiving a phone call from Shelley who said she lived in New Jersey.  Shelley explained to me that she was single, in her sixties, and that she lived on a piece of property that had a small creek running through it down the hill from her backyard.  Shelley explained that she really wanted an outdoor fireplace but that she was super apprehensive about doing it herself.  Because of the limited knowledge she had about masonry construction, Shelley was concerned with her age and ability to do the physical labor.  I asked her some questions about her ability to lift and explained what the project would require.

Shelley Said Yes to the Outdoor Fireplace

We talked it through, and by the end, Shelley was ready to take on the challenge.  A DIY outdoor fireplace does not have to be intimidating or seem out of the realm of possibility if you have the right tools, preparation, and a good plan.  A construction plan that is…something that will take the guess work out of the project.  If you are physically able to lift a 60-pound bag of mortar, or if you have someone who can do it for you, that’s the first step.  If you’re willing to step into a work site with an open mind, then you too can do what Shelley did.

DIY stone outdoor fireplace
Talk about charming. This backyard patio was transformed into a great sitting destination.

Shelley built her very own DIY outdoor fireplace and although it was small, it made a huge impact in her backyard and it is definitely a focal point.  Do you agree, and do you think you want to join the DIY world?  She had us do some special design work to make the fireplace what she wanted.  We angled the chimney on all sides and designed the firebox to be low on the structure, which gave it a neat look.

It Was Fun According to Shelley

DIY outdoor fireplace plan
The fireplace sits on the edge of the patio with the treeline in the background.

After building the structure, Shelley said that she took her time and didn’t push hard to get it done quickly.  She said that if she could do it in her sixties, then anyone could do it.  This is a testament that most people have the capability to do more than they truly think.  There is an inner construction worker in most of us.  Give your insecurities to us and let us provide you with a DIY construction plan.  If you follow it, you to will be able to build a beautiful outdoor fireplace just like Shelley did.

DIY outdoor fireplace with fire
Shelley built her first fire and started making memories.

If you are wanting to learn more about the process of building a DIY outdoor fireplace, visit us online at Backyard Flare.  We know that you can do it and that we can help.  A construction plan may be exactly what you need to overcome the fear of building so you can DIY too.  Thanks so much for reading and we hope to hear from you soon.  Leave a comment and let us know if you think you’re up for a DIY project.

As always, happy building,

Dan

3 Ways to Improve

3 Ways to Improve the Look of Your Backyard

swimming pool umbrella palm tree flagstone planter
An uncluttered and clean backyard is a welcoming backyard.

Okay, I’m going to get right into it today.  Not need to beat around the bush here.  Your backyard…and mine…needs help probably.  Your backyard might be old, dated, tired, messy, and it needs a little “pick me up”, so why not get started?  There are quite a few things that you can do that will make a HUGE difference and at the same time not break the bank.  Here are 3 ways to improve the look of your backyard.

Start By Picking Up the Place

First, pick up the clutter.  If you’re like most of us, you have odds and ends laying around.  You may have a section of your yard that is dedicated to compiling the old car parts or the old bikes that haven’t been ridden in years.  Chances are that if you haven’t needed them in the past year (or five) you won’t need them at all in the future.  Collect them and put them on Craigslist so you can make a few bucks too.  Just cleaning up a cluttered corner will make a huge difference.

Unsightly Patio or Deck?

swimming pool patio umbrella fireplace deck planter
A clean backyard draws you in for an extended stay.

Second, sweep up the patio or deck area of your yard and then look up.  Are there spider webs hanging around the lighting fixtures or the underside of the patio cover?  Take down those spider houses with a broom and make a change up high.  Get a hose or high pressure sprayer and clean up the whole area that is attached to the house.  This includes patios, brick work, decks, patio covers, and even the back of the house itself.  You’ll be amazed at how much dirt your house holds onto.  A quick wash down may bring the color back to your home’s exterior too.

Time to Pick and Trim

Flagstone patio red door grill kitchen flowers
Cleaning low and high will make it look more inviting.

Lastly, pick the weeds growing in your flowers and trim your bushes and trees.  The branches and clippings will usually take a while to get rid of if your garbage can isn’t big enough to handle a lot, but the yard will sure open up.  Getting rid of low hanging branches and unwanted ground plants will make an immediate positive impact on the overall look of the yard.

The best part is that these three de-clutter and cleaning tasks are virtually free to do.  They shouldn’t cost you any money, just a little time and sweat equity.  In the end, you’ll have a nicer, cleaner, and more welcoming backyard area.

Who knows, your clean backyard may go on to inspire other projects.  Start small and work your way up to a finished backyard sporting an outdoor fireplace or outdoor kitchen.  You’ll love it in the end and you’ll marvel at the hidden gem that was under all that dirt and clutter.

Check Us Out

If you are interested in any construction plans for an outdoor fireplace or an outdoor kitchen, look no further than Backyard Flare.  We specialize in easy to follow DIY construction plans that will take virtually all the guess work out of the build.  Follow the plans, finish the structure, and begin relaxing in your backyard.

Call or text Dan at 520-269-9740 or email him at dan@backyardflare.com for additional info, special deals, and some fun discussion.  As always, have fun and remember, happy building.

Backyard Renovation Pricing

How Much $$$ Can Be Saved?
Backyard Renovation Pricing

Backyard Flare is dedicated to helping our customers.  We want you to have as much information as possible before you step into a backyard addition.  We want you to understand backyard renovation pricing.  One question I get quite often from inquisitive DIYers is how much money can be saved by not using a contractor to build an outdoor fireplace.  With this question, there is no “one” answer and the savings, albeit a guarantee, cannot be exactly quantified.  There are costs that will be a surety, such as labor, but each contractor bills a little bit different.  There is no exact savings amount, other than saying a lot, unless you have an itemized quote from a contractor that you then compare to what you will spend.

Now let’s break this down a step further.  Most contractors do an excellent job and I believe you will get your fireplace built if you choose to go the route of a contractor to get it done.  I can’t step on the back-breaking work that they perform day in and day out.  It’s a tiring business for sure and they definitely deserve a pat on the back and some kudos.

Backyard Renovation Pricing

Having said that, you may be wondering about how contractors bill for jobs.  If you have elicited the work of a contractor for anything in the past, you will notice that some will give you a written estimate and others will come over and throw a monetary figure at you after looking at the building area for a few minutes.

A written estimate is better for you, provided it is broken down into independent materials and labor costs.  This will tell you roughly what they think the materials will cost with their slight mark up.  Most contractors will make a few dollars on materials as well, with the understanding that they had to go load them, deliver them, and then unload them at your worksite.  It’s a lot of work so it’s an okay upcharge, I guess.

Tactics and More Tactics

The contractors that throw out a price with no explanation of materials and labor make me smile.  These contractors are betting that you will jump at the offer and that you won’t throw up any objection.  Long and short, they don’t want you to know the breakdown of the profit they are making. It’s okay to haggle and negotiate too.  Remember, this is your backyard, and they will be working for you.  You dictate whether they leave each day with trash all over the place and you will be watching them while they finish the build.

These two quotation methods from contractors drastically differ but both are widely used.  Some that don’t write the job estimate are good at what they do and will provide a breakdown if asked to.  Just remember that you will probably be a bit shocked at how much contractors will charge for labor. It will make up the majority of the quote.  It’s a good living for company owners, believe me on that one.

So What Do You Do?

So, you have an option.  Either go with a contractor or elect to try to build the fireplace with your own two hands.  This is where the music is queued, and we emerge at the top of a hill with a DIY construction plan.  We swoop down to your backyard and hand it to you, and then we stand off to the side, waiting for questions while you build.  The trailer for the movie seems so awesome, but deep down we know that the movie will probably never be made. I guess we’ll stick to creating the construction plans and to our design work.

We Think DIY is the Best Build Decision

Enough already… we have more explanation to get back to.  When you build yourself, the labor that contractors charge won’t be an issue. There won’t be a subtraction from your bank account for labor as you’ll be the labor force behind the entire build.  This shouldn’t scare you either.  We have had a lot of customers who have done amazing at building their own fireplaces and they have never worked with mortar or block.

DIY Pima II Outdoor Fireplace with Stucco Mantel Firewood l
Jason’s DIY Pima II outdoor fireplace is built and ready to go.

One such customer, Jason, sent us pictures of his DIY Pima II outdoor fireplace to share.  After sharing them on our Instagram page, we asked him some pricing questions about his DIY build.  Jason replied, “I got quotes for $7k-$9k to build this exact plan and I built it for $1,600-$1,800.  Two easy weekends with my dad.  It was super easy with your step by step guide.  I’m a banker by trade so I’ve never done concrete block work ever.”

We’re so happy that Jason had a great experience and that’s an amazing savings of at least $5,200.  That’s a lot of money still in Jason’s bank account and the best part is it sounds like he really had a good time with his dad while building the fireplace.  Backyard renovation pricing wasn’t a big deal to Jason because he opted to save the money and pay sweat equity instead.

We’re Here to Help

DIY Pima II Outdoor Fireplace with Stucco Mantel Firewood and Lighting
Jason’s DIY Pima II outdoor fireplace is so inviting with a gorgeous fire.

Think about that when you contemplate your options.  Building your own DIY outdoor fireplace doesn’t have to be stressful or worrisome.  We have what you need to walk you through the process of a DIY outdoor fireplace.  Visit us at www.backyardflare.com for great design ideas and information.  We can help you with a great layout and will work with you personally to ensure you have the information you need to comfortably move forward in the DIY construction world.  Build with one of our DIY construction plans and let us worry about the logistics of the design.  You simply have fun and marvel at what your hard work.  Thank you so much for reading and as always… happy building.

-Dan

Fireplace and Pizza Oven Review – Tucson

Fireplace and Pizza Oven Awesomeness

fireplace pizza oven granite flagstone gas fire patio cover pergola heater veneer diy
Relaxing by the DIY gas fireplace during a dinner party.

The other day, my wife and I attended a dinner party at the home of a previous fireplace and pizza oven customer.   We were able to spend some time outside enjoying the fireplace and just the awesomeness of the backyard.  Homeowner Tom helped me build this structure, so this is technically a DIY build in a sense.  Tom learned a lot and he was able to add lots of great value while we had a blast constructing his masterpiece.

Massive Structure Size

fireplace pizza oven granite flagstone gas fire patio cover pergola heater veneer diy
What an amazing and welcoming space in this backyard.

There is so much to his fireplace and pizza oven structure.  To get started, the whole circular structure is a whopping 31 feet in diameter.  It’s massive to say the least.  It surrounds a seven-foot-wide natural gas fireplace.  Inside the four-foot-wide firebox is an “H” pipe covered with bright red fire glass.  The fire glass color is great because, if you look closely at the picture, it turns blueish purple when it heats up.  Such a great look.


fireplace pizza oven granite flagstone gas fire patio cover pergola heater veneer diy
Fireplace is 7′ wide with the gas “H” pipe covered in red fire glass.

The front of the fireplace is covered with a great stone veneer and the remainder of the structure was stuccoed to match the texture on Tom’s house.  The seating is all smoothed flagstone cut to match the curvature of the seat back wall.  On the hearth, there are several low voltage lights that add that extra something.  It looks amazing every night, whether there is a fire blazing away or not.

Pizza Anyone?

fireplace pizza oven granite flagstone gas fire patio cover pergola heater veneer diy
What an amazing backyard for parties and even some quiet time.

The left side of the structure holds the pizza oven built around a BrickWood Ovens DIY mold.  It didn’t get any easier than that mold to build around and then wait until the mortar cured.  The pizza oven is covered in stucco that is painted the same color as the rest of the structure.

To the left side of the pizza oven, we added a piece of polished granite, so Tom could roll out his pizza dough and prepare his pizzas.  No need to run into the house every time, the counter is right there.  Seeing how much Tom and his family has used the fireplace and pizza oven makes me smile that they are building lots of great memories.  The parties with family and friends are a lot of fun and the quiet nights in front of the fire are special for them too.

fireplace pizza oven granite flagstone gas fire patio cover pergola heater veneer diy
Conversation and drinks around the DIY outdoor gas fireplace.

Check us Out

fireplace pizza oven granite flagstone gas fire patio cover pergola heater veneer diy
The view of the Tucson valley from this backyard is amazing.

If the idea of a fireplace and pizza oven sounds like something you would want to step into, there is a great place to go, Backyard Flare.  You can look through the great design ideas and also figure out what you want in your backyard.  Big or small, every fireplace structure looks great.  We want you to begin living in your backyard again.  What better way to start than by building your own fireplace and pizza oven?

If you have any questions about anything, please let me know.  I am always excited to hear from a fellow DIYer, or someone wanting to learn.  You can certainly do it yourself and beautify your backyard space.  I can be reached at dan@backyardflare.com and as I always say, “Happy Building”.

Dan

DIY Outdoor Fireplace Review – Georgia

Georgia On My Mind

Welcome back my fellow DIY’ers and welcome to this edition of, “That Awesome DIY Fireplace” where we introduce a DIY homeowner, tell you what state they reside in, and show you how awesome they were at building their own outdoor fireplace.  This one is awesome to say the least.

DIY outdoor fireplace veneer fire construction plan
John’s completed DIY Outdoor Fireplace in GA

Who is Our Contestant?

Let’s go to the southeast, beautiful Georgia to be precise, to introduce homeowner John.  John had a bare space out his backdoor that needed a little sprucing up.  After checking out the construction plans at www.backyardflare.com, John decided to build the Pima II outdoor fireplace, and he purchased the plans.

Getting Started

concrete diy slab foundation outdoor fireplace
Getting ready to pour a concrete slab for the outdoor fireplace.

John had to clear a grassy area to get ready for the footprint slab to be poured.  Once he mapped out the positioning of the fireplace, John excavated the area and did his ground prep.  John built a wooden frame and added gravel and steel beneath the concrete.  After pouring the concrete, he removed the wood, and he had his footprint slab ready for some mortar and block to be stacked.


concrete slab diy backyard grass wood
Concrete slab is ready for cinder block.

John spent the next few days building the cinder block structure, following the construction plans to a tee.  John paid attention to detail with the mortar gaps and even though he hadn’t done much block work, he built beautifully.


cinderblock concrete slab backyard grass diy outdoor fireplace
First row of cinder blocks are down.


cinderblock concrete slab diy outdoor fireplace grass backyard
Firebox was established for John’s DIY outdoor fireplace.

When John was getting the cinder block structure finished he began thinking about his finish material.  John added his firebrick to the inside of the firebox without mortar gaps between them.  He took the recommendation of Backyard Flare and used high heat construction adhesive to adhere the firebrick to the firebox walls.

DIY outdoor fireplace backyard patio veneer construction cement mixer hearth chimney grass fence firebrick cornerstone
The work site was super busy with lots going on. Veneer was like a jigsaw puzzle, finding the perfect piece for each spot.

Finishing the DIY Fireplace

DIY outdoor fireplace planter grass fence mulch chimney hearth fire grate firewood backyard
John finished with his fireplace and he cleaned up the work site. Anticipation for the first fire!

John picked out a great veneer with a dark tone.  The chimney and hearth portions were covered first, with the keystone added just above the firebox, centered.  The seating material was adhered to the top of the hearth with matching grout, before the center section of the fireplace was covered with veneer.  The mantel was stuccoed for texture and the top of the chimney was adorned with a very cool cap stone.

Adding the Small Touches

DIY outdoor fireplace veneer backyard patio mulch chimney hearth flagstone grass trees
John added veneer to the whole structure giving it a really nice 360 degree look. It looks amazing from all angles.

Dark colored mulch was spread all the way around the fireplace and up to the edge of the very green grass.  Two planters were added to the sides of the structure, which will probably have great looking flowers in them someday.


DIY outdoor fireplace mulch backyard grass fire grate planter veneer flagstone chimney
John’s first fire in his DIY outdoor fireplace. He is so proud that he did it himself.

DIY outdoor fireplace veneer fire construction plan
John’s completed DIY Outdoor Fireplace in GA

John bought a very decorative fire grate and added a few logs to it in anticipation of his first burn.  Oh, and what a beautiful sight it was when John started his first blaze.  He was so excited to share these pictures because he wanted to show off his DIY labor and show that it was possible to build it yourself.

Want to Build A Fireplace of Your Own?

We sure hope you like John’s fireplace and that it inspires you to think about one of these fireplaces in your backyard as well.  It’s really not out of reach to achieve a stunning outdoor living space.  John believes that if he can do it, anyone can do it.  If you have the DIY mindset, we can help you achieve greatness.  We have assisted hundreds of homeowners who are weekend DIY’ers, realize their potential to build fireplaces just like John’s, so you can do it too.  Visit Backyard Flare to learn more so you can begin your journey too.

Thanks so much for reading about another great DIY fireplace build.   We’ll bring you more soon, and as always …happy building.

DIY Outdoor Fireplace Review (2) – AZ

Let’s Take a Trip to Visit a Gorgeous Outdoor Gas Fireplace

Hello all you DIY’ers and welcome to this edition of, “That Awesome DIY Fireplace” where we introduce a DIY homeowner, tell you what state they reside in, and show you how awesome they were at building their own outdoor fireplace.  We’re going to see a stunning outdoor gas fireplace in this article.

Introducing Our DIY Homeowner

We venture down the street and across the tracks from Backyard Flare headquarters to introduce homeowner Jim, who wanted a short in stature outdoor gas fireplace. Jim specifically wanted to burn natural gas.  Jim was restricted to natural gas and a short finished height by his homeowner’s association due to his home’s location on the golf course.  Jim’s backyard was on the 12th tee so there is quite a view.

Jim contacted Dan at Backyard Flare and explained his fireplace design and restrictions.  No sweat at all for the Backyard Flare team.  Dan did a couple site visits to Jim’s backyard and they came up with a plan of action. Dan was contracted to build the fireplace, but Jim was able to save a bit of money because he helped Dan through the process …and Jim learned a lot, very quickly.  It’s always a blast when homeowners can help because they learn and have a great sense of accomplishment.

Getting the Area Prepped

After the fireplace location and width was determined, a diamond blade was used to cut through the existing flagstone patio.  This area was excavated and framed for the concrete slab with rebar inside the pour.  An inexpensive Harbor Freight cement mixer was used which made this job relatively quick for two people.

saw cut flagstone concrete pad
Patio flagstone was cut to make way for the concrete slab.

wheelbarrow used to dump concrete slab rebar
Dan is using a wheelbarrow to dump concrete into the wood form for the concrete slab.


Once the concrete cured for a couple days, Dan and Jim started laying block in a running bond (staggered) pattern.

cinder block fireplace mortar DIY outdoor fireplace
The running bond pattern was used to build the structure.

diy outdoor fireplace with arched lintels
The firebox and storage voids were built with arched lintels made from concrete.


The firebox in the middle was sandwiched between two wood storage voids on either side.  An electrical line was routed through the blocks to install a 110v outlet. This outlet was used to plug in a power transformer for the structure and backyard ground low voltage lighting.

diy outdoor gas fireplace with stucco
The fireplace was covered in a stucco finish prior to the stone veneer being applied.

level measuring tape flagstone cutting with a diamond blade
A level was used as a straight edge to mark the cuts on the flagstone.

Lot’s of Finishing Options Were Added

When the structure block work was completed, firebrick was added to the inside of the firebox.

diy outdoor gas fireplace with flagstone and stucco golf course arizona
The flagstone was added to all horizontal surfaces of the fireplace.

The natural gas line was plumbed up the backside of the structure and a shutoff valve was added inline before it was installed into the back wall of the firebox.  This gas line stubbed out a few inches inside the lower right corner of the firebox.  Gas tubing was added to an H pipe and a few test burns were done before anything was solidified.


The wire for the structure lighting was routed to the front of the hearth and to the inside of the storage voids, figuring out where each light would be located.  The front face of the structure was adorned with a beautiful stacked stone, which was mortared in place.  The remainder of the structure was covered in a smooth coat troweled stucco, which was later painted.

Natural Stone Added So Much

The horizontal surfaces were covered in a gorgeous light tan flagstone which Dan and Jim cut with a chisel method for a rougher edge.  This was a bit time consuming and much slower than a saw cut front edge, but completely worth it in the end.

diy outdoor gas fireplace stacked stone golf course arizona
The finished fireplace sure makes a statement in this backyard.

With the leftover flagstone, Jim extended the flagstone patio to the far-right side of the structure and filled the joints with matching mortar.  After it was pressure washed, you can’t even tell where the old flagstone patio and the new came together. Totally amazing.

A vertical piece of flagstone was added to the front of the firebox after it was chiseled to resemble a mountain range in Jim’s home state of Colorado.  This piece of stone helped contain the local river rock that was added to the top of the H pipe.  This rock completely hid the pipe, making it look as if the flames “originated” from the rocks.

Tying the Structure to the House Decor

For continuity in the backyard, the fireplace stucco was painted to match the house.  New outdoor furniture was added to the patio and many nights have been spent eating, drinking, partying, and relaxing in the backyard.  So many golfers stopped to see the fireplace and to offer kind words, complementing Jim on his design.

With the ambiance of the lighting in the voids and quick start of the natural gas in the firebox, Jim and his wife have been able to say, “hey want to have a fire?”, and enjoy it in a matter of seconds.  Easy on and easy off is what Jim wanted and it turned out great.

diy outdoor gas fireplace stacked stone golf course arizona
This backyard was transformed with this fireplace overlooking the gorgeous golf course.

You Ready to Build One?

We sure hope you like it too, so let us know how this DIY fireplace inspired you?  Are you ready to build your masterpiece like Jim did?  Even though this outdoor gas fireplace included natural gas, low voltage lighting, and chiseled flagstone, it can all be done by you too.  If you have the DIY mindset, we can help you achieve greatness.  We have assisted hundreds of homeowners who are weekend DIY’ers, realize their potential to build fireplaces just like Jim’s.  You can do it too. Visit Backyard Flare for more information and DIY construction plans.

Thanks so much for reading about another great DIY outdoor gas fireplace build.   We’ll bring you more soon, and as always …happy building.