Holy cow, it’s been a while since I have written on the blog and I am feeling like there is so much to say. As always, we are so humbled by what we see our amazing DIY customers building using our DIY construction plans. We love the pictures we are constantly receiving.
We have so many that we want to show off and we know that you will find some inspiration from them. We are amazed constantly that even though most of our customers have little to no masonry experience, that they can build these awesome DIY projects.
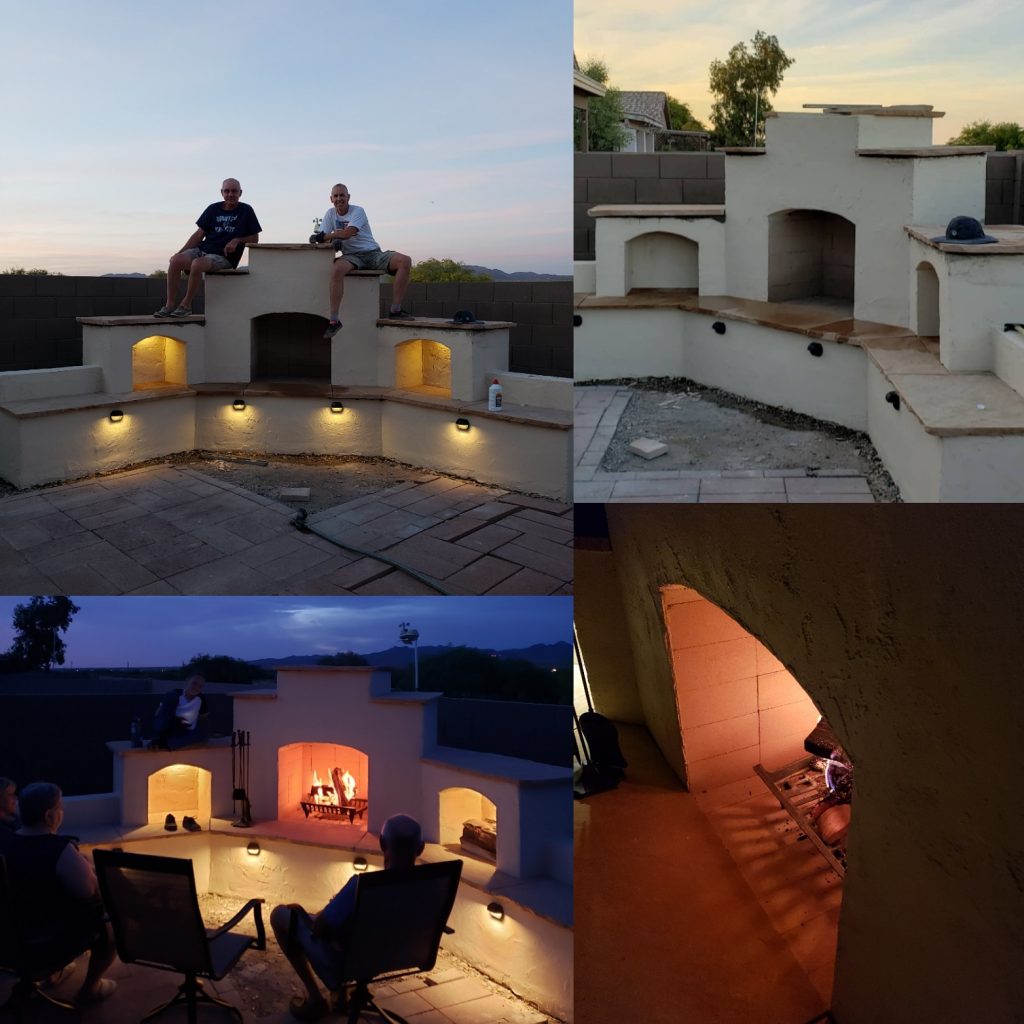
We, like so many others, have social media accounts that allow us to show off and brag about our very talented customers. It is very important to understand that the pictures we post are of DIY outdoor fireplaces built using Backyard Flare DIY construction plans. These builders are also everyday homeowners who want to save thousands of dollars and build it themselves.
Check Us Out – DIY
Our Instagram page is updated frequently and we know you’ll get lots from it. Our Pinterest page is a great resource for additional photos and information. Please check us out and please like and subscribe to these sites. You’ll be notified when we post more great info and pics. Who knows, we could even post a picture of your fireplace for the world to see.
We know that we can provide the knowledge and we’ll be the cheerleader for you to be successful in your DIY fireplace project. Let us know if you have any questions and we will do our best to get you an answer. Thanks and as I always say…”HAPPY BUILDING”. -Dan
Hey there. I am assuming you are an aspiring DIYer and that’s how you found yourself reading this blog post about DIY outdoor fireplaces. I’m Dan and I founded Backyard Flare quite a few years ago. Since then, I have been helping DIY homeowners achieve their dreams of building outdoor fireplaces. It’s so much fun to see the finished projects and share in their achievements.
There are so many questions to answer too, and I would love to address them all. In due time I guess. Since we need to start somewhere, I figured that I will address one question per blog post for a while. I’ll start with one of the most common questions. Should I build angled or squared walls in my firebox?
Why No Angled Walls in the Firebox?
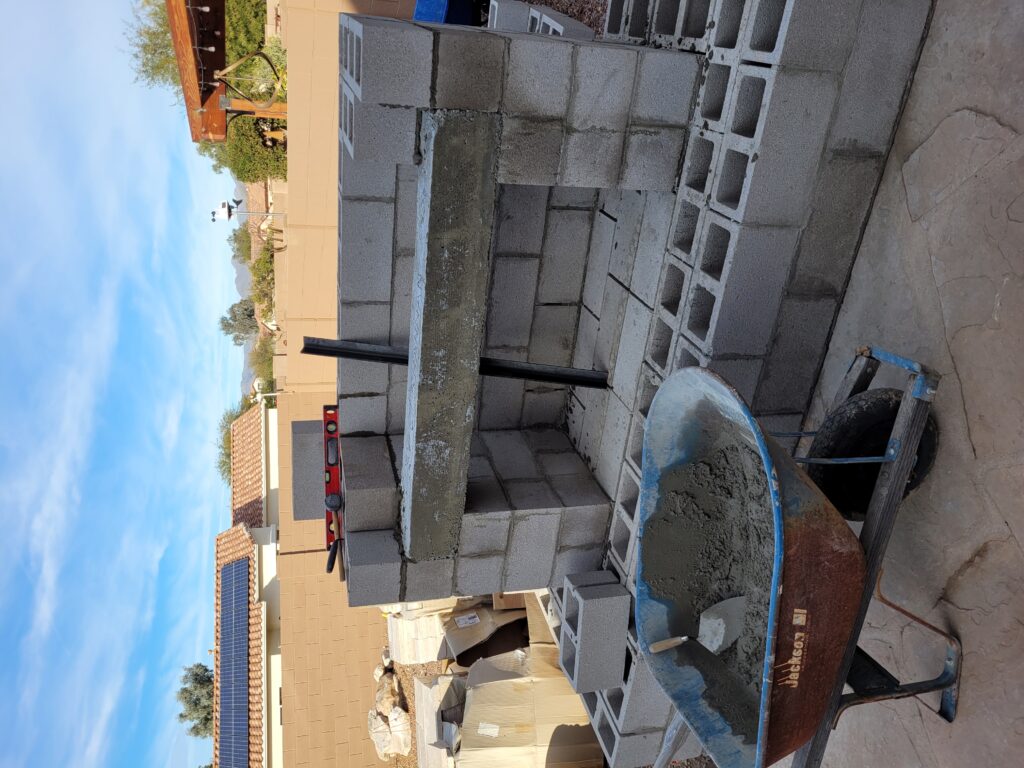
I get this question more than most. One of the first things most people do before stepping into a new DIY project is do some online searches for content and information. With regard to outdoor fireplaces, one thing that surfaces a lot are angled walls in fireboxes, commonly referred to as a Rumford design.
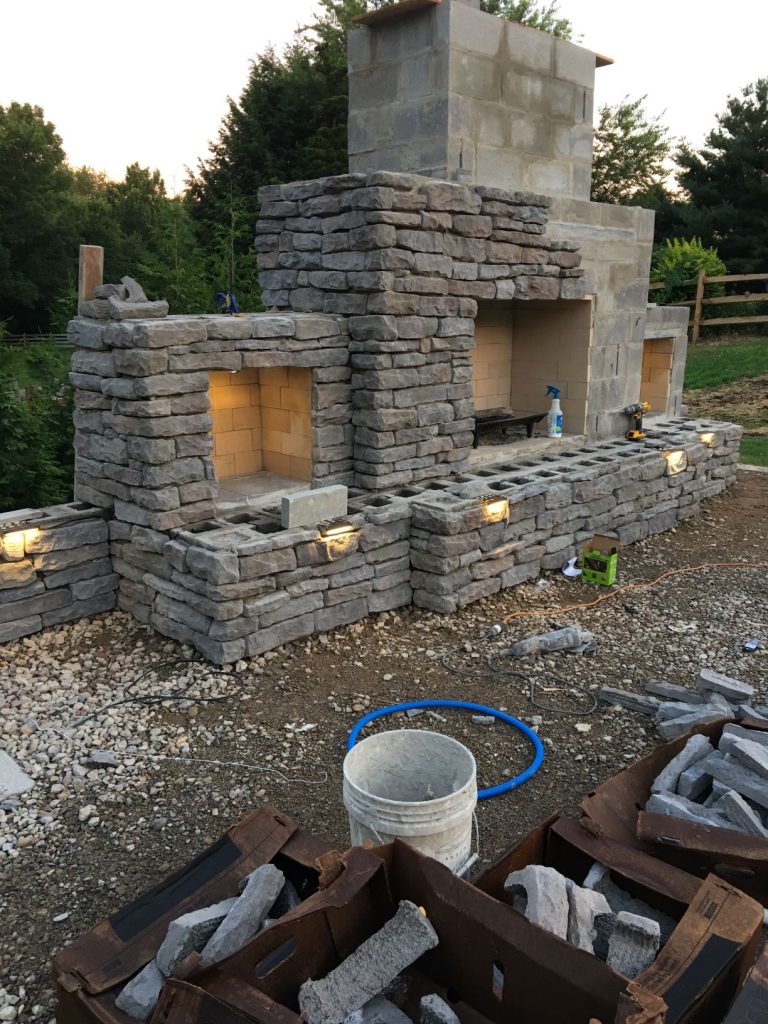
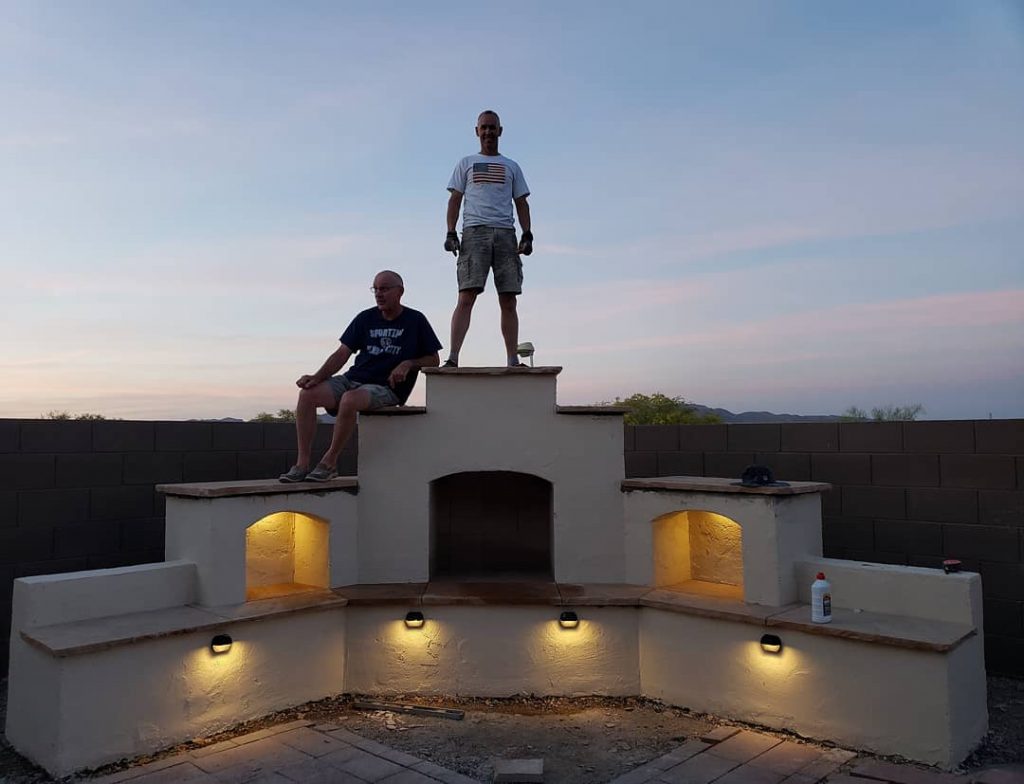
Squared wall firebox built by DIY homeowner
This design is really cool and there is some functionality to it within reason. Mostly, a Rumford design is meant for indoor applications. To build angled walls on an outdoor fireplace is just not necessary. Some will say that they prefer to build that way for the looks, and my response is always the same. Go for it.
You Don’t NEED Angled Walls Actually
Here’s why. If you examine an angled wall fireplace, you will most likely have a lot of internal stuff, maybe a smoke shelf, possibly a damper, and a lot of narrowing. That’s all fine and dandy on an indoor fireplace where you have control over wind and breezes. But not outdoors!!!
Wind and breezes affect every fireplace performance regardless of how it’s constructed; angled walls or squared walls. We prefer to maximize the size of our fireboxes with squared walls. This allows us to get the fire grate behind the lintel, so more smoke follows the draw and path of least resistance. Basically, that means up the chimney.
No one likes it when smoke billows out the firebox and up the front face of the structure. It’s actually unsightly and frankly, it’s annoying. We have seen more issues with Rumford built outdoor fireplaces with this than square box designs.
Verdict?
We the jury find for squared walls on our DIY outdoor fireplaces. There you have it folks, the verdict is in. Now there is always room for more discussion on this topic, so we are always available. If you’d like more info or if you’d like to reach out with additional questions, email Dan at dan@backyardflare.com. Or find more information at www.backyardflare.com your home of the best DIY outdoor fireplace construction plans on the market.
As always, happy building everybody. Go DIY something!!!
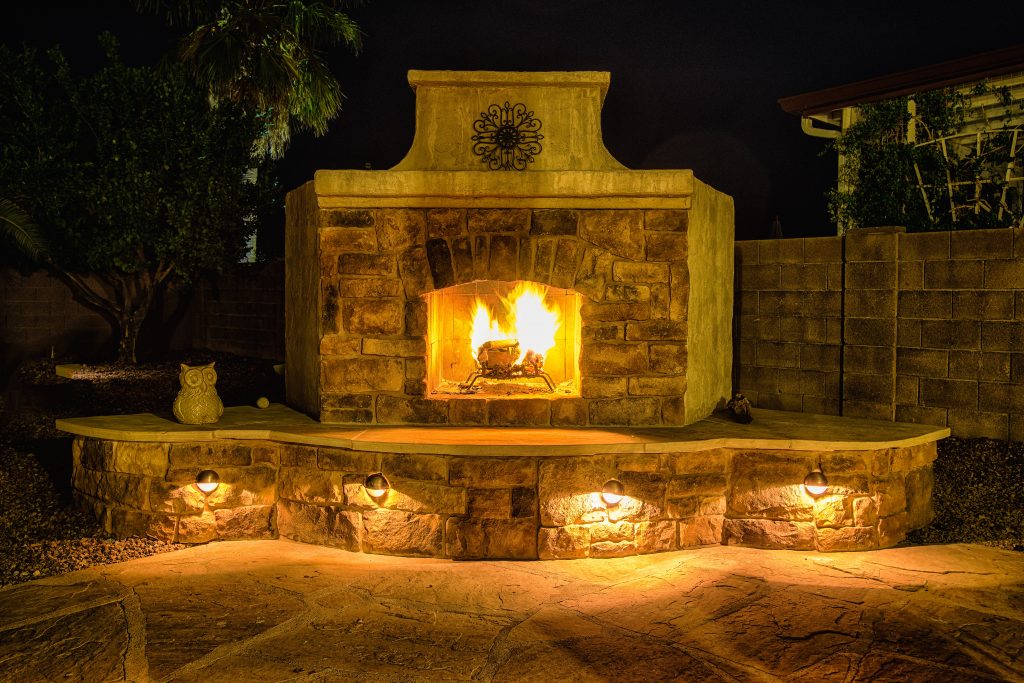
Are you looking for a focal point in your backyard space?
So, you are wanting to build an outdoor fireplace in your backyard? Are you wanting that special section of your backyard to pop? There are so many things to figure out. And so many variables and design types to consider. Where do you go for a DIY construction plan? Well, it’s good you found this article. We have the answers for you and a great method of building.
Enter Backyard Flare. We have heard from DIY homeowners all over the place that they have struggled to find a construction plan for a functional and easy to build outdoor fireplace. We have lots of great designs to choose from on our website. From traditional designs to modern designs, we got you covered. And the best part is the support you’ll get from us.
What Do We Offer?
There is nothing more annoying than trying to get ahold of a business and never hearing back or them just not answering emails or phone calls. We are different and we strive to be the best company with the best customer service. And we feel we have lived up to that standard.
When you begin your outdoor fireplace planning process, look to us first. We are here for answers even before you purchase one of our comprehensive construction plans. Let us know what you need answered and what we can help you with. We want you to have the knowledge and confidence even before you purchase.
Nothing to Lose
Having said all this, try us out and see for yourself what the hype is all about. We can set up a free phone call consultation to discuss your upcoming fireplace build. It’s a lot of fun and we know you’ll learn something too.
Once you’re ready to look at different designs, go to www.backyardflare.com, and start envisioning your backyard with a stunning focal point. You will also be able to look through our gallery of gorgeous builds by our very talented DIY homeowner customers.
Awesome Inspiration
If you want even more examples of what our customers have built using our construction plans, check out the following links too. Our Facebook, Pinterest, and Instagram pages have lots of great ideas, content, and pictures to drool over. So many great looks!
We look forward to hearing from you and would love to set up a consultation or just answer some questions. Email us at dan@backyardflare.com or call/text us at 520-269-9740 for more information.
This can be built by you on a budget. So doable with a DIY fireplace construction plan.
There are so many different ways to design and construct your backyard space and so many different price points that you can pick from. The comparison between two backyards that are built either by a construction company or a DIY homeowner is the price spent.
When the comparison comes to light on paper, you will see that the DIY build is much cheaper. This is mainly due to not having to pay for the labor associated with your build. If you do the work yourself, even as a weekend DIYer, you will spend more time building. But, you will save thousands of dollars.
Just How Much Can You Save
So here is the long and short of the DIY vs. contractor-built backyard. Let’s do a comparison of the pros and cons with each, and there are pros and cons for each that need to be noted. This article does not say that hiring a contractor is a bad decision, as that is completely up to you as the homeowner. What we are saying is that there are alternatives to paying for EVERYTHING to be built by a contractor. Enter the DIY homeowner… an individual that is willing to learn, get dirty, and a bit dirty at times.
Pros
Contractor – Fast build…sometimes; Professional and knowledgeable staff…mostly; They have the necessary tools; They can get permits faster if needed. DIY Homeowner – You will build knowledge and confidence; You will achieve the next level of DIY skill; You will save thousands of dollars; You’ll get it done your way without pushback; You will build on your timeline; You’ll have lots of fun.
Cons
Contractor – Slow build…sometimes; You may wait for them to show up on their timeline; They can be very expensive; You lose some control of the build and design. DIY Homeowner – Slower build time; You may not have all the tools; You may have to rent or buy some tools (Great problem when you have to buy a new tool); You may have to figure some things out along the way.
Thoughts?
So, based on that list of pros and cons, what do you think? We recommend you complete a list of the projects you want to tackle and see about a cost for each individual project. This will allow you to break the total build into chunks, because there may be certain sections of the project that you absolutely know you want to try.
The beauty of the DIY option is that you can always call a contractor or handyman in to help you after you start. Most DIY homeowners we find will continue the build once they start though and it’s probable that you will too.
What’s Next For Your Backyard?
If you are at all interested in building your own outdoor fireplace and you think you still need a bit of guidance, check out Backyard Flare online. We are the industry leader in comprehensive and easy to follow DIY construction plans for outdoor fireplaces and outdoor kitchens. It’s a portion of your backyard that will be the focal point, so don’t skimp on a good plan to follow.
There are so many things to evaluate with regard to your backyard construction. Our hope is this article has helped you a bit with trying to figure out which way you want to go with either a DIY or contractor-built space.
We are here to assist you with any questions you may have, so please don’t hesitate to call us at 520-269-9740. We’d love to help you with your DIY outdoor fireplace or kitchen.
As always, happy building and we hope to hear from you.
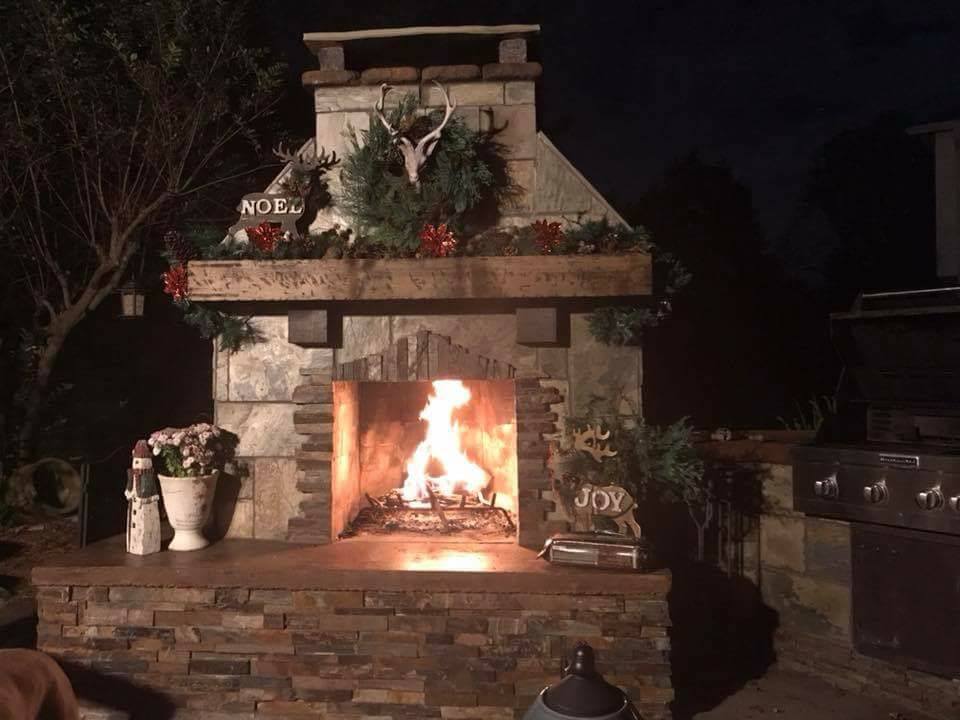
When you see an outdoor fireplace in a backyard, don’t you think relaxation and a hangout destination? We sure do, and we love to see our DIY customers using and enjoying the outdoor fireplaces they build. It’s so fun to light that raging fire and sit back with a beverage and blanket. Kick your feet up on the hearth, listen to the crackle and pop, and follow the dancing flames.
There are a few items that we think every outdoor fireplace owner should invest in, because they make the experience more enjoyable, and frankly, more manageable. Now that may seem a bit broad, so let’s get right down to it. Here are three things that you should buy and why.
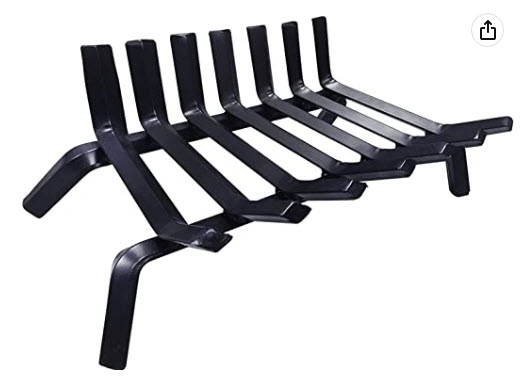
#1 – Fire Grate
When you attempt to light a fire, you need oxygen as one of the three components. In order to get oxygen below the wood that you’re burning, it is necessary to elevate the wood just a few inches and contain it. This is the job of a fire grate. These wrought iron metal grates are super resilient and they will last you for years. Let us introduce the Amagabeli fire grate, available in 21″, 24″, and 30″ widths. One will fit into any size firebox you have, and it looks great too.
Amagabeli fire grate available in 21″, 24″, or 30″ widths
#2 – Fireplace Tools Set
Now that you used the grate to contain the raging fire, you will need a set of useful tools to manage the fire. These tool sets almost always have pokers, tongs, and even little shovels and brooms for the ash. Many of the sets come with a decorative rack to store the tools and they look super nice on the seating surface of the structure. Look no further than the Amagabeli 5 piece wrought iron set that will last a lifetime.
Amagabeli 5 piece set
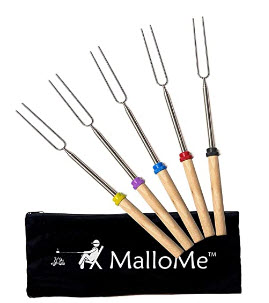
#3 – Marshmallow Sticks
Oh yeah, nothing says fun over a fire more than roasting marshmallows. Then do you sandwich it between graham crackers with chocolate? Sure you do. But it’s always better to extend that marshmallow over the fire with a telescoping and reusable stick. We use the stainless steel MalloMe sticks that telescope to 32″, so you and your kids can stay a good distance from the fire. They are color coded so each person can have their own dedicated stick. Never a more fun way of enjoying a backyard fire.
Extendable to 32″
So there you have it, our three great picks and must haves for your DIY outdoor fireplace. Make your fire experience a great one. And as always, go to Backyard Flare, LLC for all your DIY construction plans and useful info for building your masterpiece.
Okay all you DIYers, are you ready for another amazing DIY outdoor project? Maybe a DIY outdoor fireplace is what your backyard needs. Have you wondered how to build an outdoor fireplace? Well, we have what you need to build on your own and not worry about the inflated cost of using a contractor. That’s right, no contractor.
Build your DIY outdoor fireplace and then veneer it however you like. There are no rules.
We believe YOU have what it takes to build it yourself, and we want to prove it to you. Now let’s go ahead and throw out some disclaimers. Number one – it is fun and rewarding so if you don’t like that, this is probably not for you. Number two – it does require a lot of lifting. There is NO WAY around that unfortunately. All joking aside, this is manual labor, and you will be challenged at times. We often say that if you can lift a 60lb bag of mortar or concrete off the ground, then you can do it physically.
What’s Next?
So you’ve made the decision to build an awesome DIY outdoor fireplace in that perfect spot in your yard. Great to hear. What’s next you ask? Well, you need to check out Backyard Flare, LLC for your favorite design and DIY construction plan. And the best part is that there are lots of really cool designs to choose from. Modern designs, traditional designs, wide designs, narrow designs, short designs, and even super tall designs. Then there are corner designs, outdoor kitchen combo designs, and even designs that you can put a TV on.
So much fun to build
If you are going to build in a relatively small area, then you may want to look at the Phoenix or Pima designs.
If you want a bit more width and want some firewood storage voids, then maybe the Tortolita or Winslow designs are for you.
If you want a corner design, then we suggest the Cholla or Douglas designs.
If you are looking for a massive structure for that WOW factor in the yard, then look no further than the Santa Cruz, Maricopa, Tombstone, Mohave, or Saguaro designs.
We Got You Taken Care Of
So, you’ve found your favorite design at www.backyardflare.com and are ready to move forward. Now what? We’re so glad you asked. It’s as easy as purchasing the DIY construction plan and asking any additional questions. You buy the materials listed in the construction plan, and tools needed. Then you get busy building as you follow the DIY construction plan, step by step. It’s like following a Lego book on steroids, but with a lot of written and descriptive instructions also.
We love to stay involved in your builds and we can walk you through and assist with hurdles or speed bumps encountered along the way. Just call, email, or text us and let us know what you need. Now that’s some awesome customer service!!!
You Got This
Again, we know you have what it takes to build the DIY outdoor fireplace of your dreams, and we are here to help you with that journey. There are so many things to consider, and we want to be the help you rely on to get it done. Now, what’s your favorite design? Find out at Backyard Flare.
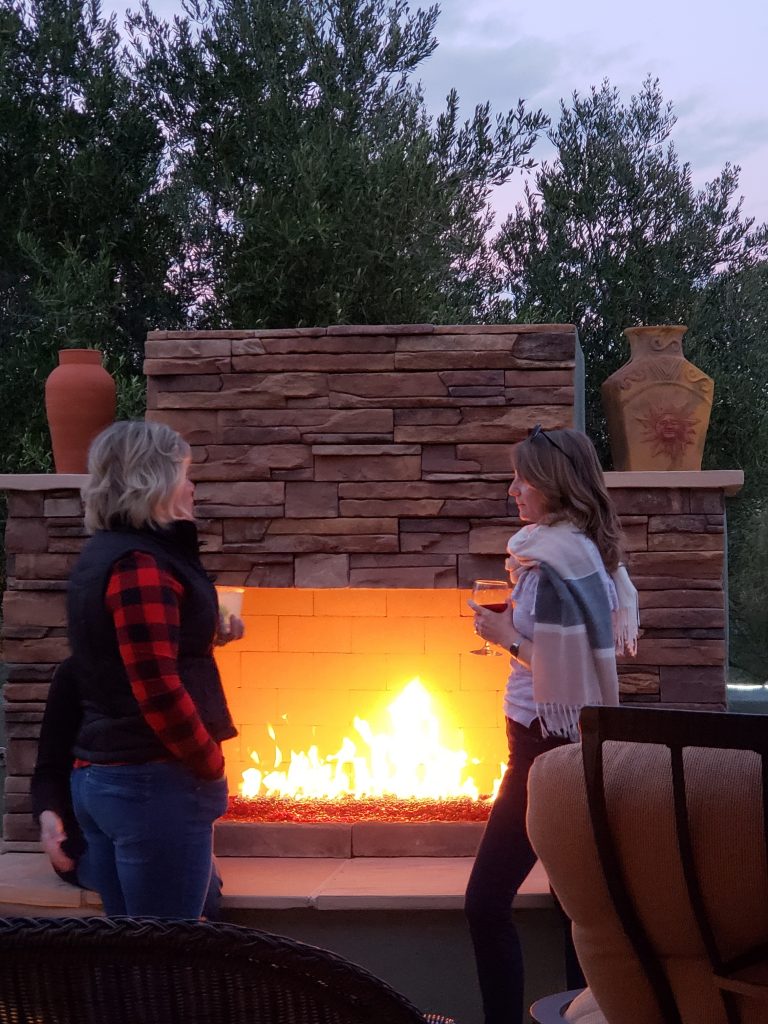
When it comes to DIY stuff, we love to think of possibilities. We started Backyard Flare because we had a dream that every backyard could be fabulous. Every backyard should have a statement piece that sets it off. Basically, we believe that all backyards deserve to have a wow factor. Your backyard is part of the “ALL”. A DIY outdoor fireplace may be the answer.
Conversation and drinks around the DIY outdoor fireplace.
And that backyard build doesn’t always have to be expensive. It doesn’t have to cost an arm and leg, or your next born, to build. We know this because we came up with budget but elegant build methods for DIY outdoor fireplaces and outdoor kitchens.
How about you?
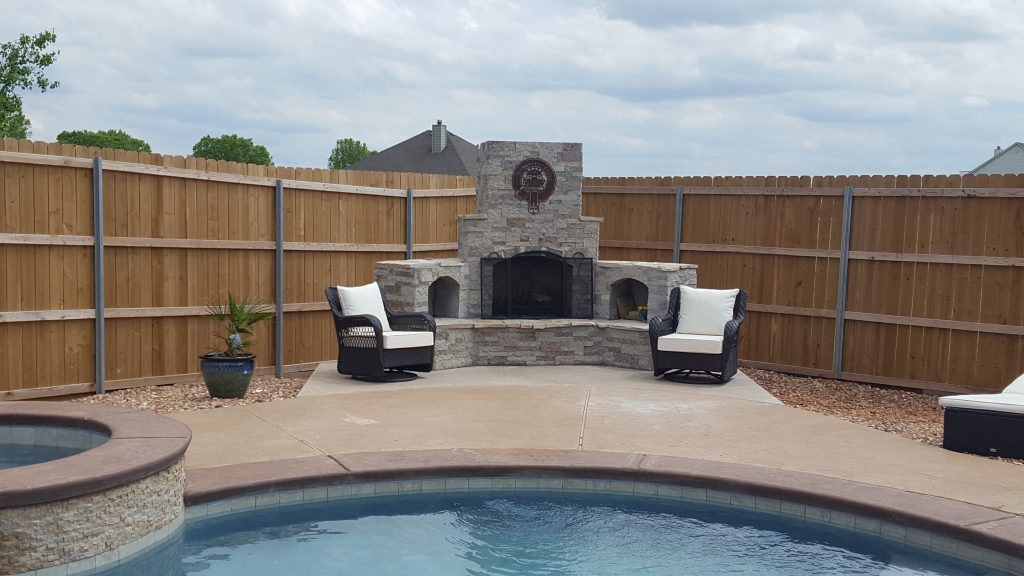
Ever wonder if you had what it took to build a DIY outdoor fireplace? Let us answer that question for you. We know you do have what it takes because most of our customers have never built with cinderblock and mortar and they’ve built beautiful structures. Use one of our easy-to-follow DIY construction plans and start building today. There’s no better time than the present.
This is our Cholla design built by a DIY homeowner
Ready for your DIY Outdoor Fireplace project?
If you are thinking that you want a fun, rewarding, and budget minded DIY project, look no further than Backyard Flare. We can help you with mentorship opportunities while you build. We will be there for you along the way with help, tips, answers, etc… Yep, you’re not alone in your quest for a gorgeous DIY backyard space. Go to www.backyardflare.com today and start your journey or get ahold of us using the contact found on the website. We’d love to hear from you. Thanks for reading and as we always say, “happy building”.
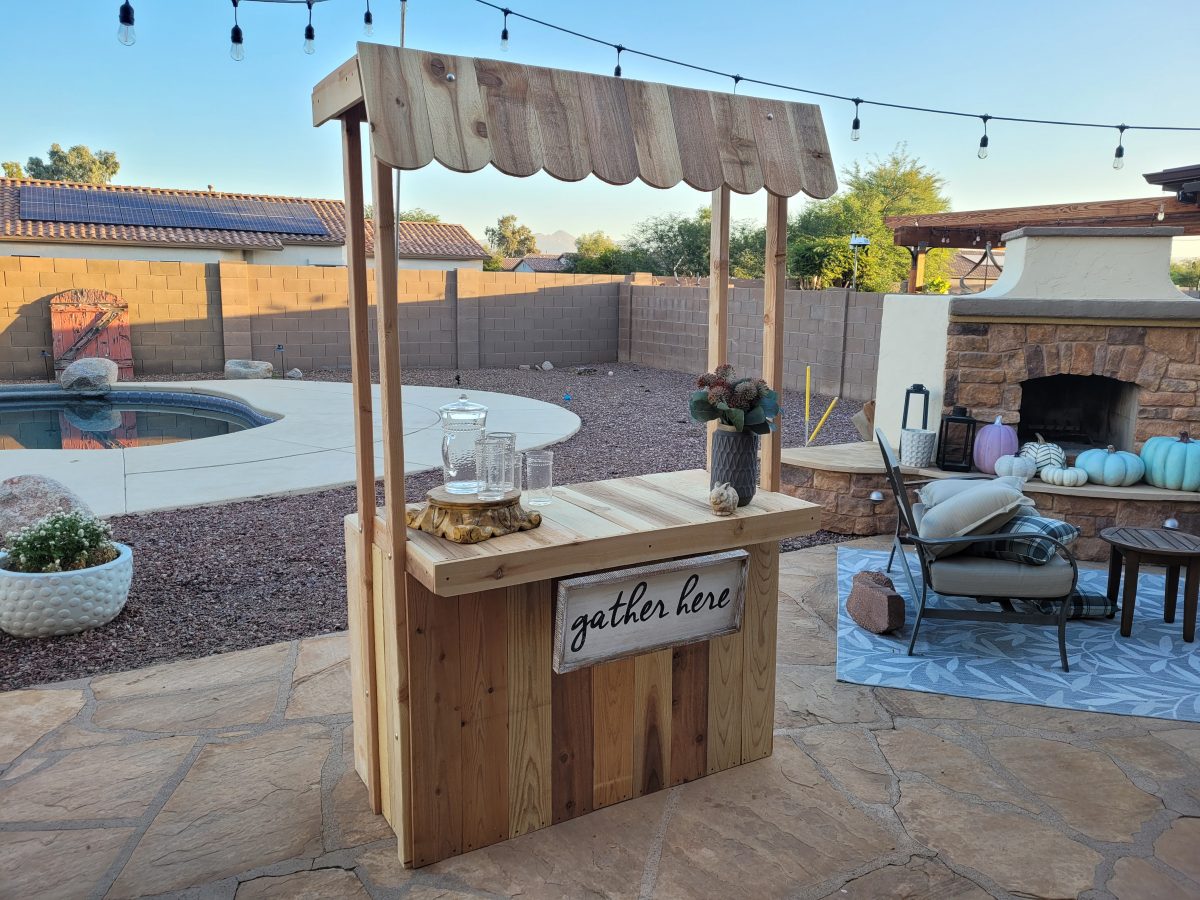
This project was so much fun. Want to learn more? Keep reading about our DIY hot chocolate stand build and how you can build one just like it.
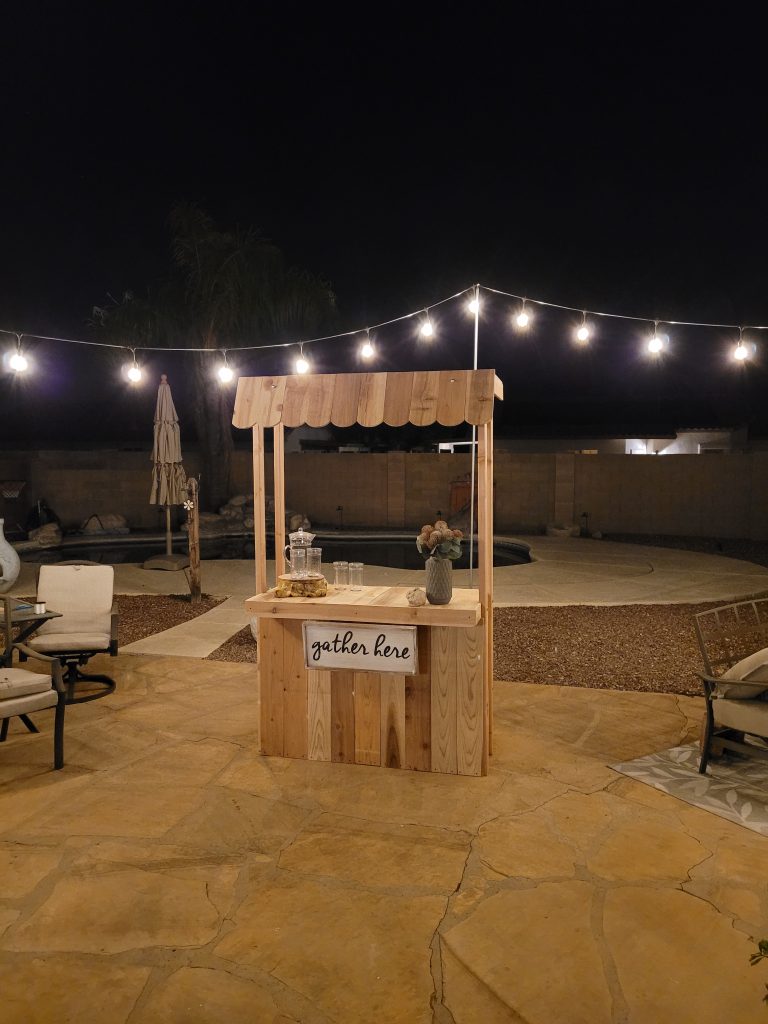
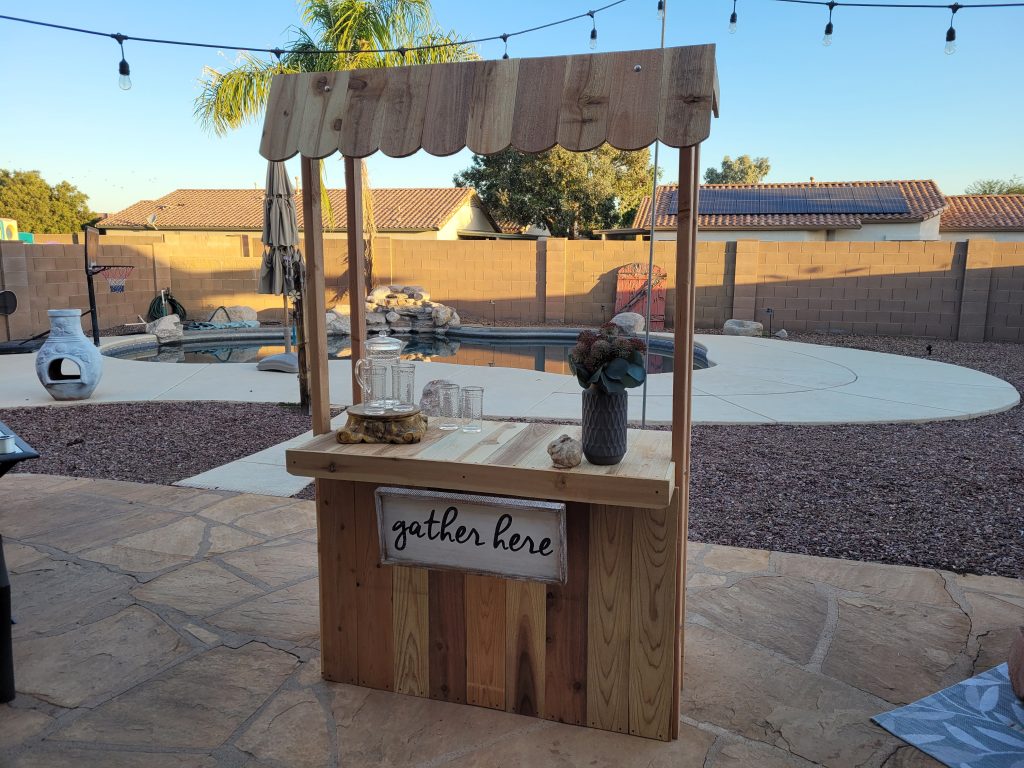
Build your own budget beverage bar project in just a few hours
Here we go again
The DIY bug hit us again here at Backyard Flare. This time we stepped outside the cinderblock and mortar world and we used a bit of wood. A few years ago we built a DIY beverage bar, and we used it primarily as a hot chocolate stand in the fall and winter months and as a lemonade stand in the spring and summer months. It was also used in craft fairs and weddings as a prop and for a decorative cool vibe. Friends and family would also borrow it all the time to use in their events and parties.
That first stand was really well built and it disassembled and broke down to a pretty small footprint for storage. Several carriage bolts held the bar together and it had a lot of structural integrity. A teacher friend ended up buying it from us to use as her desk and a focal point in her elementary school classroom, so we decided to build another one.
We Built it Again
This time, though, we documented the entire build with tons of detailed pics and we created a very comprehensive DIY construction plan for you. The plan has diagrams and the detailed pics that show you and written instructions that explain the build process. We are so proud of how it turned out and I’m sure these photos will show how well it was built. You can build one too as you follow along the 50 pages of DIY step by step plans. Yeah, I said it right. The plan is 50 whole pages.
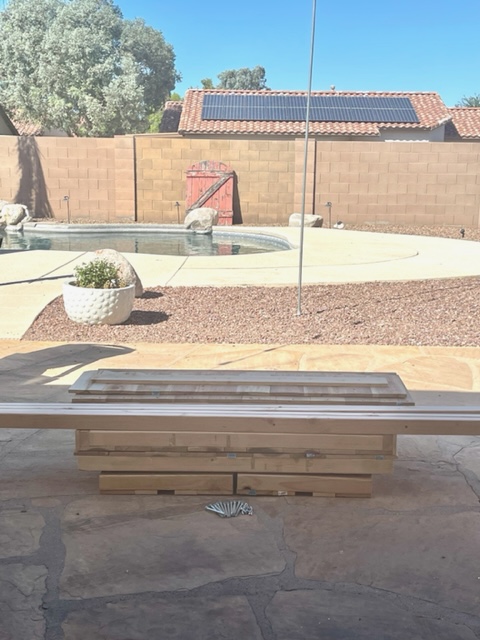
We started our stop watch at the beginning of the construction and we turned it off when the build was complete. The build time from start to finish was a mere 7 hours on a Saturday morning and afternoon. My wife and I used the backyard patio as the build site as we didn’t need a huge area to work in.
You Ready to Build One Too?
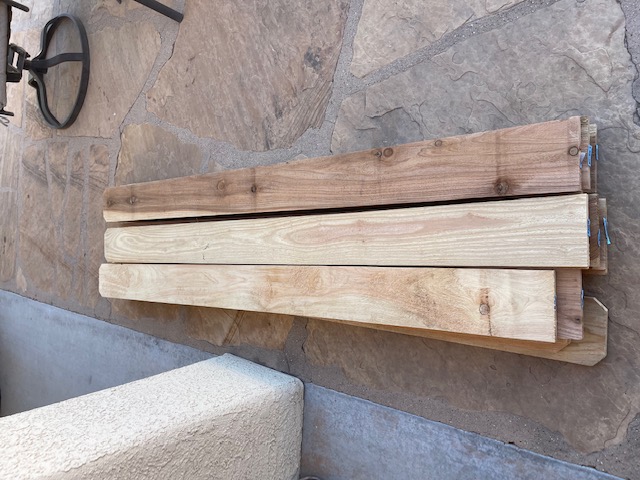
We picked out some really nice pieces
The comprehensive DIY construction plan includes a materials list for everything needed to build this exact bar. Everything was purchased at Lowes and we confirmed that our local Home Depot had the same size pieces of wood available too. The best part is that we only spent $170 for all the materials used. Yep, all of it. Really, that’s all. Hard to believe; we know.
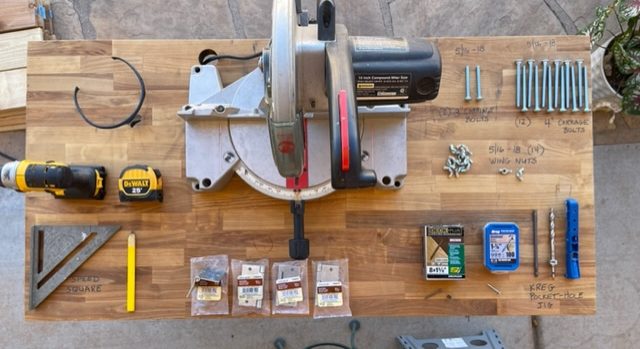
Here are the tools and the supplies other than wood that we used
The tools list in the DIY construction plan also shows each tool used to build the bar, so you will know exactly what you’ll need, to do it the way we did. Most of these tools can be rented or even borrowed if you don’t have them.
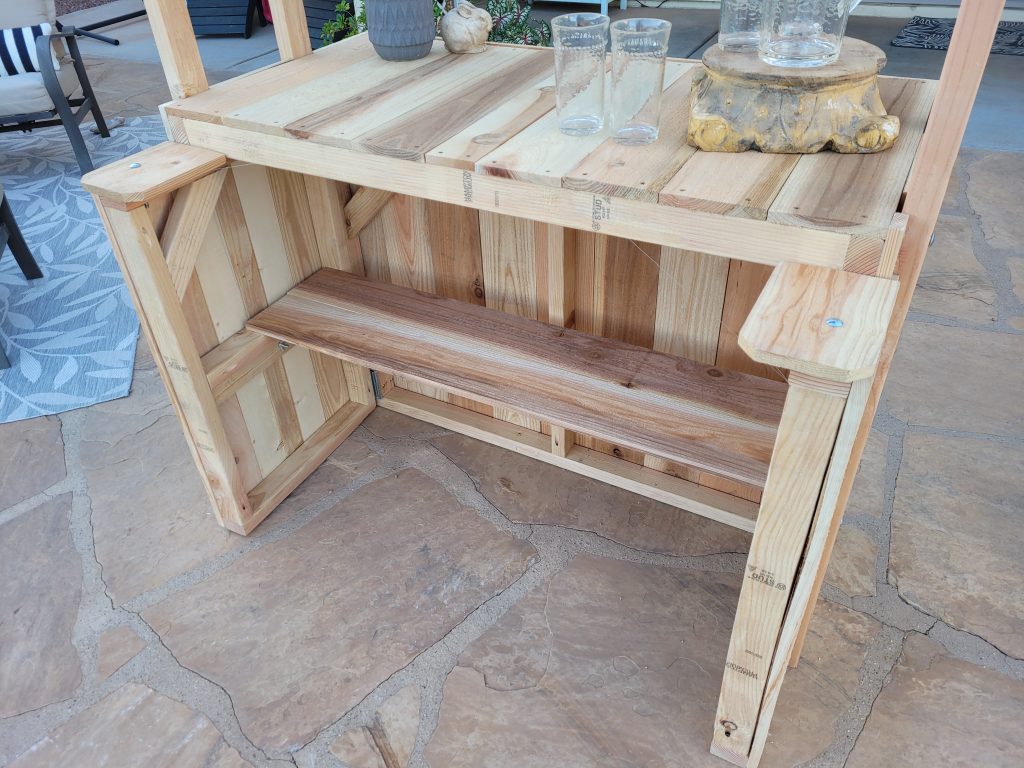
You even have a shelf inside the working part of the bar
Dimensions
This beverage bar weighs over one hundred pounds so it is not a tip hazard. The width is 48″ and the height of the structure is almost 7′ as designed. The scalloped topper added a ton of character to the stand and we can’t wait to use it.
For parties, we will use it in our backyard and in the winter months, we will use it for hot chocolate while people tour the Christmas lights in our neighborhood. It’s become kind of a tradition over the years. So much fun to interact with jovial and interesting people. And there’s no better way to do it than over a cup of steaming hot chocolate topped with marshmallows and whipped cream.
So Easy to Assemble and Disassemble
It’ll fit in most cars when broken down. Super easy to store
From the broken down storage position, the hot chocolate stand is assembled in under 7 minutes and no tools are required. It’s all held tightly together using carriage bolts and wing nuts. So easy and fun. The best part is that it only requires one person to assemble it.
Do you have an event such as a festival, wedding, craft fair, etc… that would look great with this inexpensive addition? Or do you have a business or VRBO that would benefit from this budget but elegant build? We would love to hear what you are thinking.
So easy for any level of DIYer
Please go to www.backyardflare.com for your copy of the beverage bar construction plan and start building today. The construction plan is only $24.99. We would love to hear from you.
Man, I love building things, both big and small. Like I stated in the header, “DIY Rocks…Nothing More”. I look around my home and I am amazed at what my wife and I have been able to build and remodel. The list is long, from hanging new doors, flooring throughout, adding cabinets to the laundry room, tile work, paint, baseboards, wall additions, wiring and plumbing, etc…
DIY Rocks
There really hasn’t been a room or area of our home that we haven’t had a direct impact on, DIY style. The inside has been a blast to build, but it doesn’t stop there. We love our backyard outdoor living area too and we do use it a lot. I would say we use it almost everyday, with the exception of mosquito season. That’s just miserable.
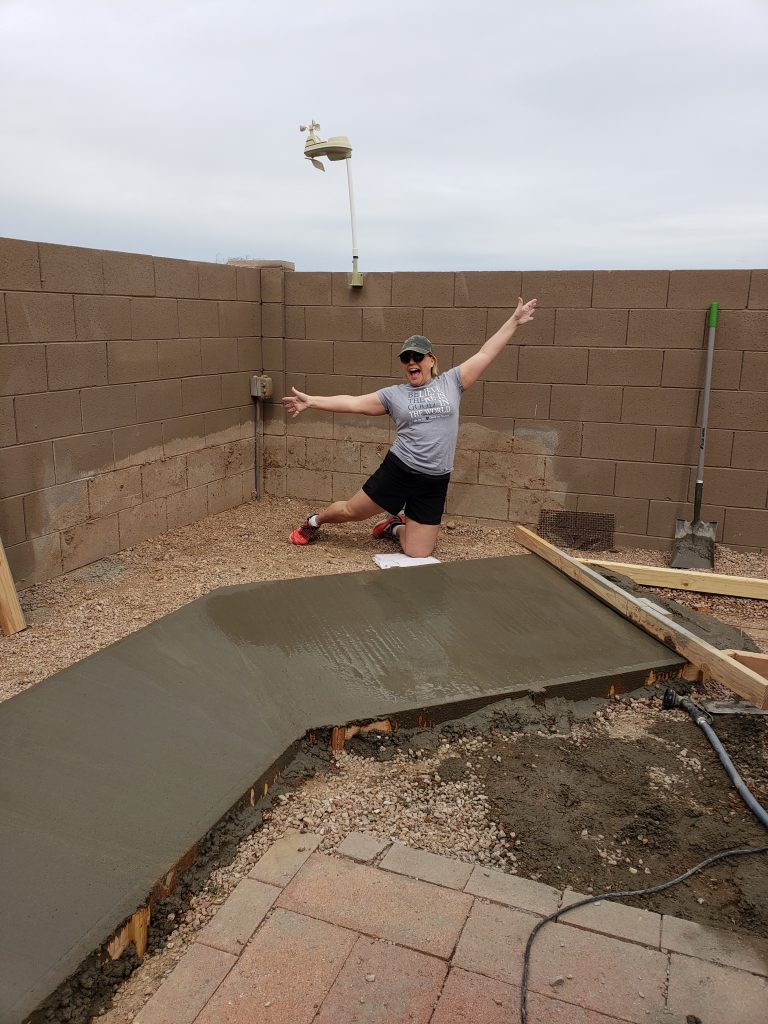
Building Our Backyard
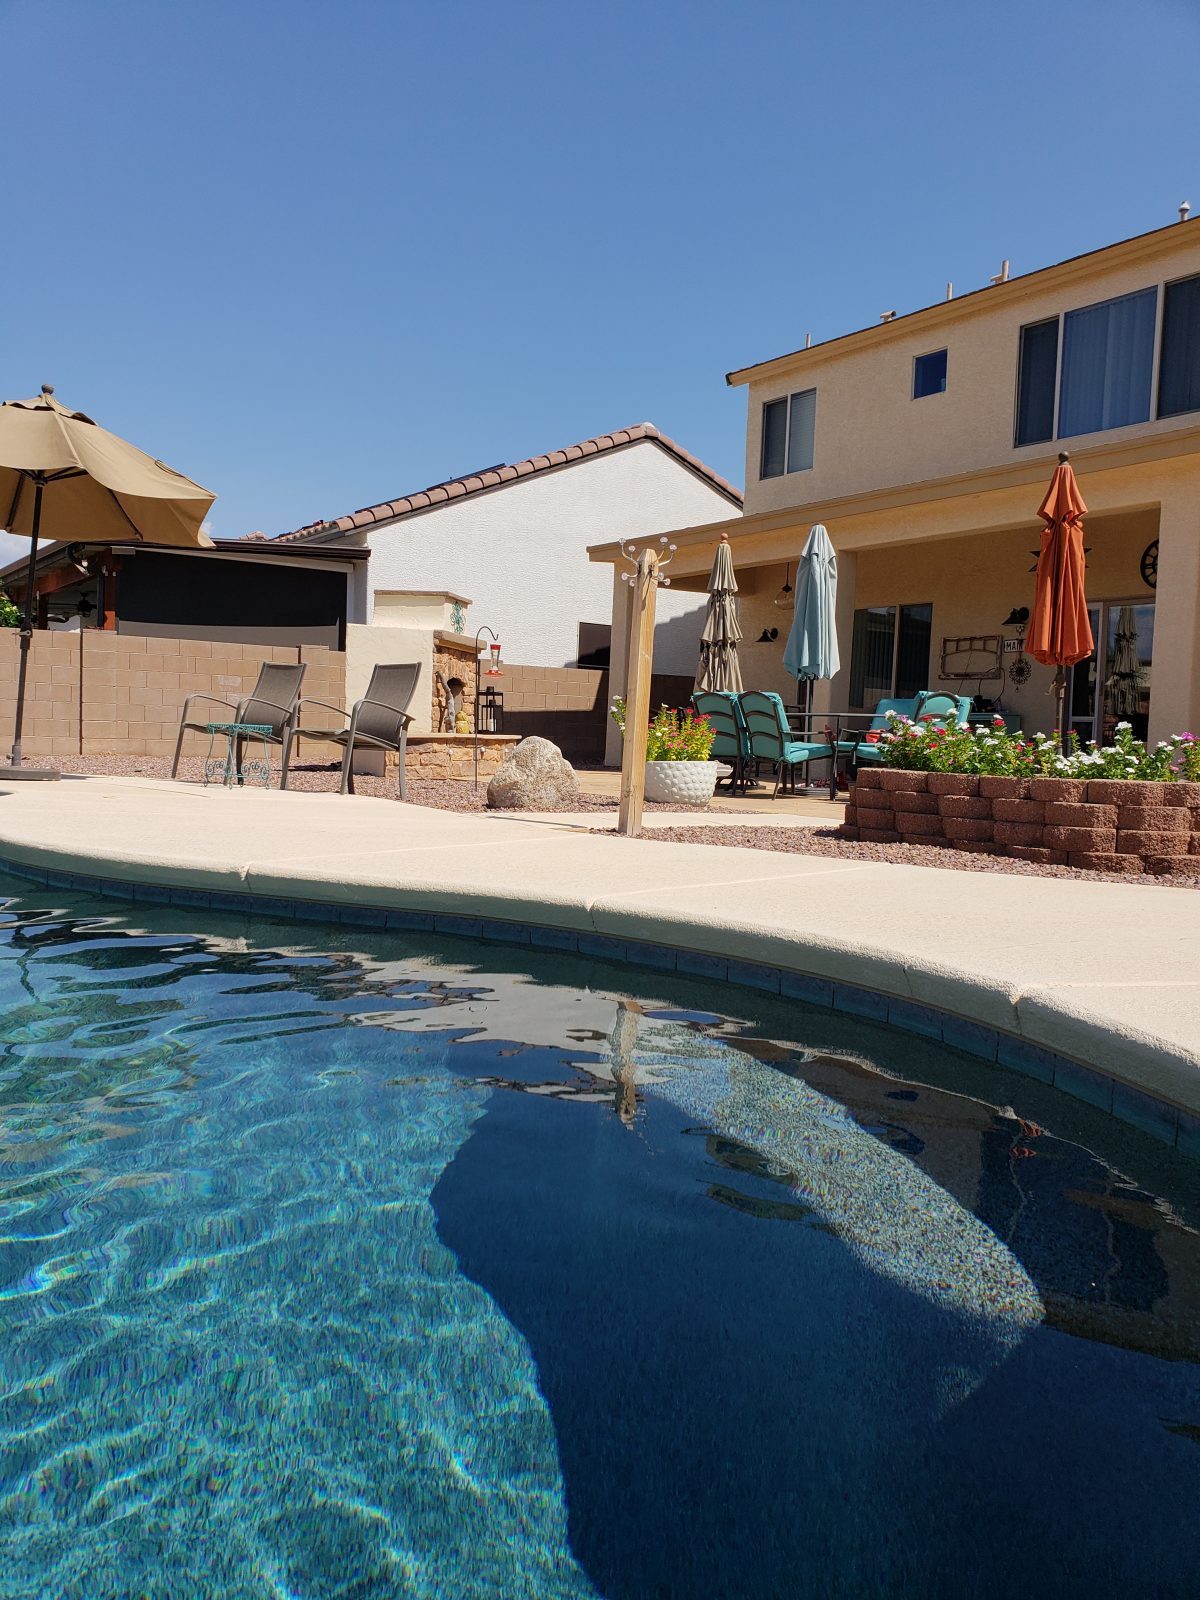
Years ago it took a lot of thought to build our backyard and with the numerous layout possibilities, we had to pick what we liked. The pool was first and because it was the biggest feature, it took up the first big chunk. Then we built our outdoor fireplace and outdoor kitchen. They went on opposite sides of the large flagstone patio, which framed the backyard area closer to the house.
Pool went in first due to its size
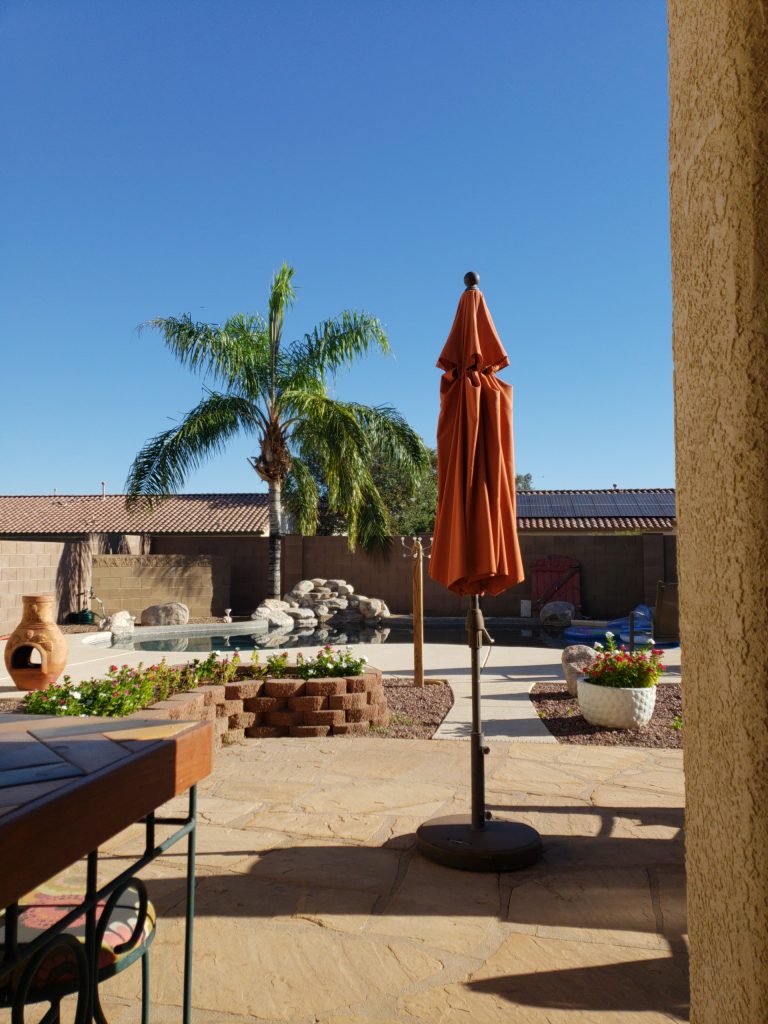
The outdoor kitchen framed one side of the flagstone patio
We enjoyed the layout for many years but we started to get a little bored with it. My wife and I started talking about a backyard refresh. This will not be a small endeavor as most of the backyard will be altered.
The fireplace framed one side of the flagstone patio nearer the house
But we are going to be doing the bulk of the work. Now, as a habitual DIYer and DIY business owner, I am not intimidated by the task. The only thing I will need to contract out will be some of the heavy lifting and trash services to haul away the old building materials. This will be the old pool decking, the old masonry that will be removed, and the flagstone patio that will be replaced with a more modern paver.
Are You Ready?
Maybe you’re in the same spot we are with regard to your backyard. Does your outdoor space need a redo, an upgrade, a refresh? It doesn’t have to be a daunting task, because we have DIY construction plans for your new outdoor fireplace and outdoor kitchen. DIY rocks can be your mantra too.
Even if you have never built with cinderblock and mortar, we can walk you through your build with step by step instructions and detailed diagrams. You will be able to follow the plans that will show you the exact placement of each and every block. There is no better way to build and you can classify yourself as a full-fledged DIYer. The BEST part is that you will save thousands of dollars if you do the work yourself.
We Are Here To Help
Don’t think you have what it takes? Go to our website, www.backyardflare.com and check out the gallery of outdoor fireplaces and outdoor kitchens built by Backyard Flare DIY customers. Anyone can do it with our help. Let us prove it to you.
We stand on what we design. We got you covered!
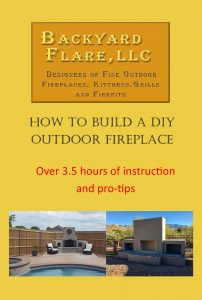
And if you need a bit more help, you can get our video tutorial series that will show you how to build an outdoor fireplace. We have strived to put together a whole package that a DIY homeowner can use to have outdoor building success. Why wait? Visit www.vimeo.com/ondemand/diyoutdoorfireplace today and watch our video trailer. We know you’ll be inspired to start your DIY project and we want to be a part of it.
Backyard Flare is second to none with customer service. You want to talk directly to someone about your project? Call Dan at 520-269-9740 now and discuss your project. Consults are free of charge. Never a better way to get started. We look forward to hearing from you.
As we always say, “DIY Rocks” and “Happy Building!!!!”
If you’re a homeowner and you love to save money doing things on your own, you are a DIYer by definition. This DIY status is great. But what if you don’t know the detailed build methods of what you are trying to do? Maybe a DIY Fireplace Video Tutorial is the answer.
There are so many great sources of information that will lead you to getting your DIY project completed. But so many times the information is vague and not complete. I’m talking about a DIY backyard masonry project. Where is the all inclusive tutorial information showing you exactly how to build an outdoor fireplace?
Where do you go to find the answers you are looking for?
We Have Your Solution
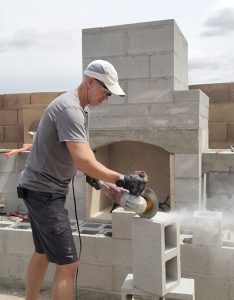
How to cut cinderblock the right way.
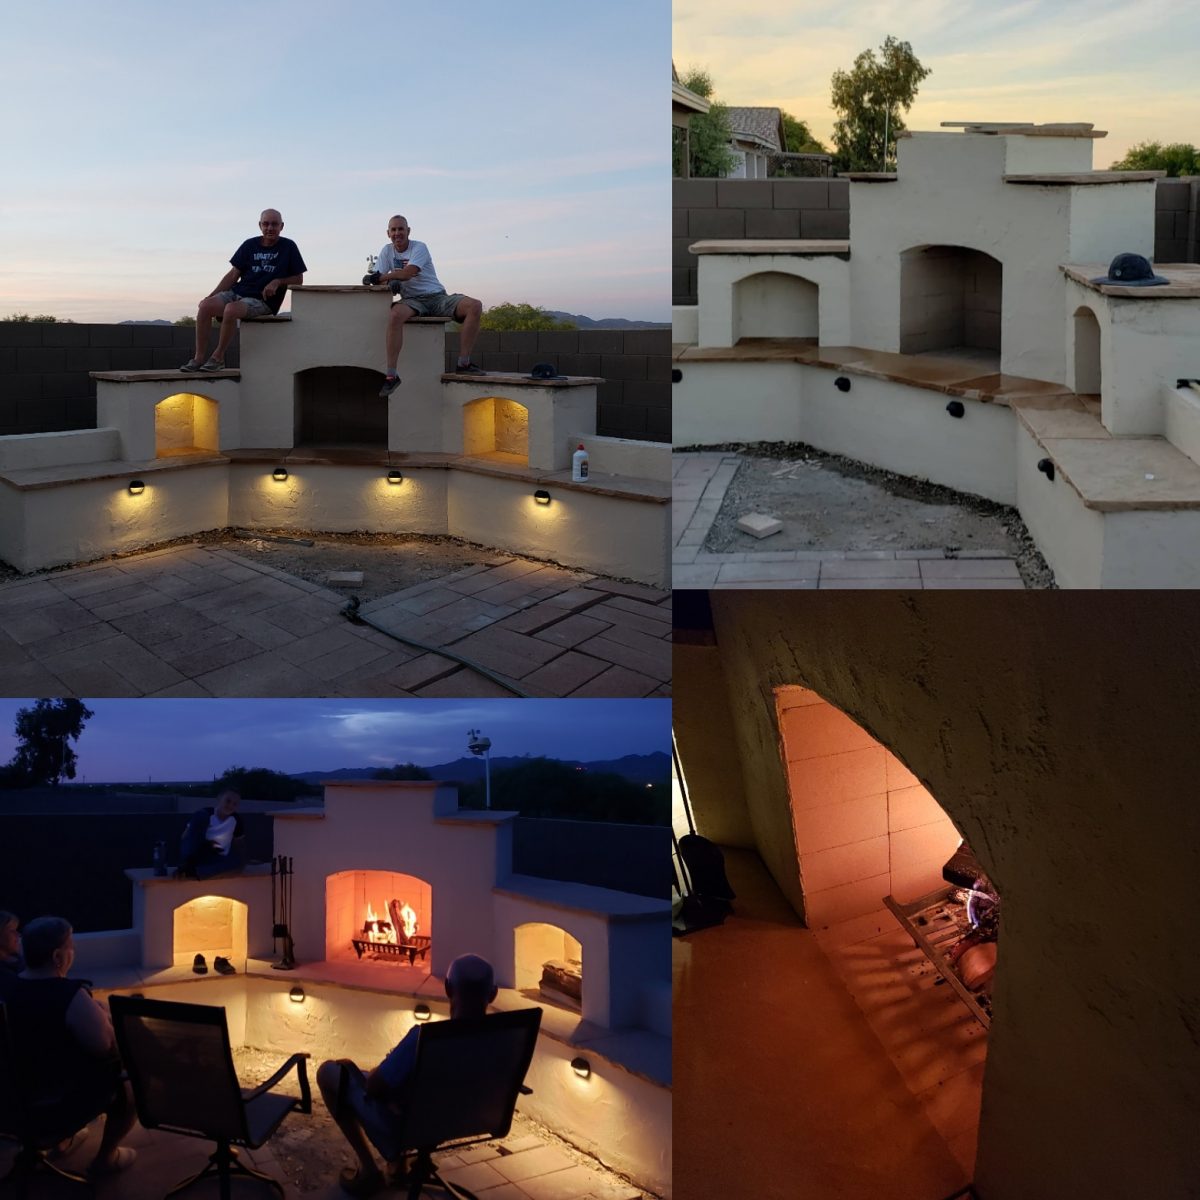
Well, here’s the answer. Dan at Backyard Flare, LLC in Tucson, Arizona, built a backyard DIY fireplace with a homeowner. They followed the Winslow design and construction plan offered at www.backyardflare.com. It was a great build as Dan got to work directly with a DIY homeowner and teach him along the way.
This DIY outdoor fireplace build took place over a week and the process was video and audio recorded for very detailed instructional steps. Each tutorial video segment was categorized and the videos show the exact way the building took place. It followed a masonry (block and mortar) method of construction. Everything was covered from the tools used and their safety, the materials used and explained in detail, and the build method involving the pouring of the arches. Metal and block cutting was explained and demonstrated, and mortar mixing and block laying was also covered. This video tutorial was made with you in mind, the DIY enthusiast who just needs a little bit more confidence and reassurance that you can do it.
Learning Has Never Been Easier
If you go to vimeo.com/ondemand/diyoutdoorfireplace and watch the trailer, you can see the up-close building that you can imitate in your own backyard. This is what a DIY Fireplace Video Tutorial needs to include. Watch Dan as he builds the fireplace and see how he explains the build process in detail. All aspects from the first blocks to the last and everything in between. The videos total 3 hours and 43 minutes of instruction.
Why Wait? Build Today!
If you want the best and most comprehensive tutorial video series showing DIY outdoor fireplace construction, then look no further. We know you’ll learn something. And the best part is that this tutorial isn’t just for the Winslow design as these building methods are used in all our DIY fireplace designs.
Get started on your fun and rewarding DIY outdoor fireplace project today. You’ll be glad you did because you will build a great outdoor destination and at the same time, you will add thousands to the value of your home.