Backyard Renovation Pricing

How Much $$$ Can Be Saved?
Backyard Renovation Pricing

Backyard Flare is dedicated to helping our customers.  We want you to have as much information as possible before you step into a backyard addition.  We want you to understand backyard renovation pricing.  One question I get quite often from inquisitive DIYers is how much money can be saved by not using a contractor to build an outdoor fireplace.  With this question, there is no “one” answer and the savings, albeit a guarantee, cannot be exactly quantified.  There are costs that will be a surety, such as labor, but each contractor bills a little bit different.  There is no exact savings amount, other than saying a lot, unless you have an itemized quote from a contractor that you then compare to what you will spend.

Now let’s break this down a step further.  Most contractors do an excellent job and I believe you will get your fireplace built if you choose to go the route of a contractor to get it done.  I can’t step on the back-breaking work that they perform day in and day out.  It’s a tiring business for sure and they definitely deserve a pat on the back and some kudos.

Backyard Renovation Pricing

Having said that, you may be wondering about how contractors bill for jobs.  If you have elicited the work of a contractor for anything in the past, you will notice that some will give you a written estimate and others will come over and throw a monetary figure at you after looking at the building area for a few minutes.

A written estimate is better for you, provided it is broken down into independent materials and labor costs.  This will tell you roughly what they think the materials will cost with their slight mark up.  Most contractors will make a few dollars on materials as well, with the understanding that they had to go load them, deliver them, and then unload them at your worksite.  It’s a lot of work so it’s an okay upcharge, I guess.

Tactics and More Tactics

The contractors that throw out a price with no explanation of materials and labor make me smile.  These contractors are betting that you will jump at the offer and that you won’t throw up any objection.  Long and short, they don’t want you to know the breakdown of the profit they are making. It’s okay to haggle and negotiate too.  Remember, this is your backyard, and they will be working for you.  You dictate whether they leave each day with trash all over the place and you will be watching them while they finish the build.

These two quotation methods from contractors drastically differ but both are widely used.  Some that don’t write the job estimate are good at what they do and will provide a breakdown if asked to.  Just remember that you will probably be a bit shocked at how much contractors will charge for labor. It will make up the majority of the quote.  It’s a good living for company owners, believe me on that one.

So What Do You Do?

So, you have an option.  Either go with a contractor or elect to try to build the fireplace with your own two hands.  This is where the music is queued, and we emerge at the top of a hill with a DIY construction plan.  We swoop down to your backyard and hand it to you, and then we stand off to the side, waiting for questions while you build.  The trailer for the movie seems so awesome, but deep down we know that the movie will probably never be made. I guess we’ll stick to creating the construction plans and to our design work.

We Think DIY is the Best Build Decision

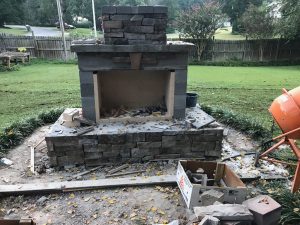
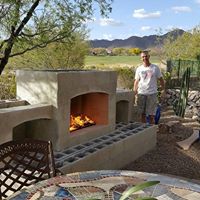
Enough already… we have more explanation to get back to.  When you build yourself, the labor that contractors charge won’t be an issue. There won’t be a subtraction from your bank account for labor as you’ll be the labor force behind the entire build.  This shouldn’t scare you either.  We have had a lot of customers who have done amazing at building their own fireplaces and they have never worked with mortar or block.

DIY Pima II Outdoor Fireplace with Stucco Mantel Firewood l
Jason’s DIY Pima II outdoor fireplace is built and ready to go.

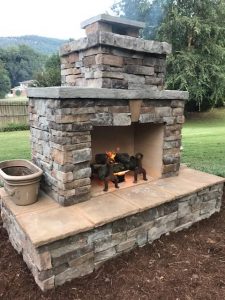
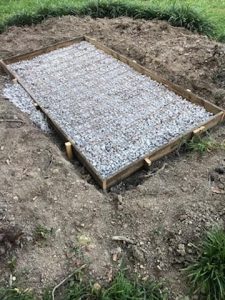
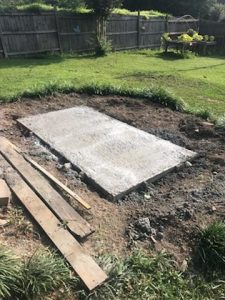
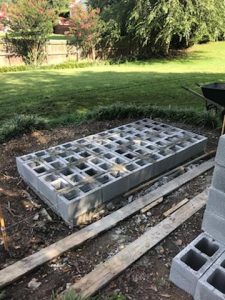
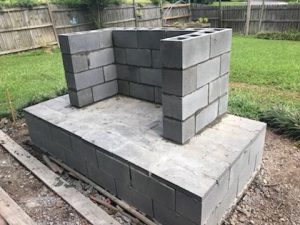
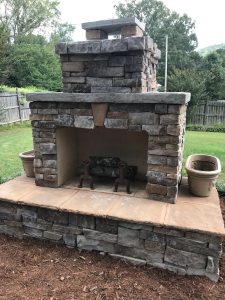
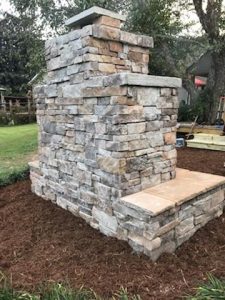
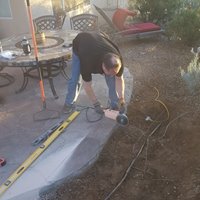
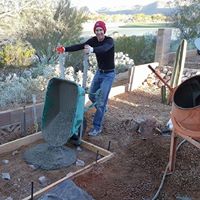
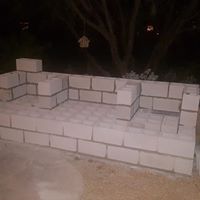
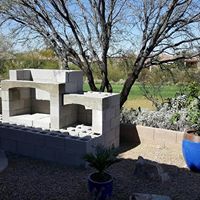
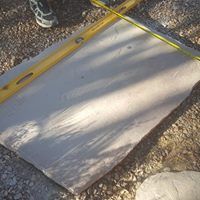
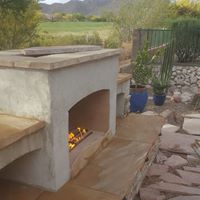
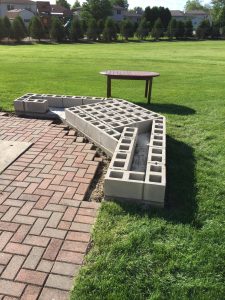
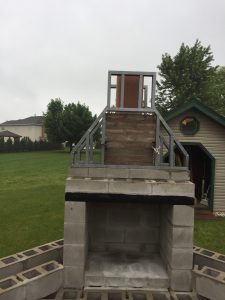
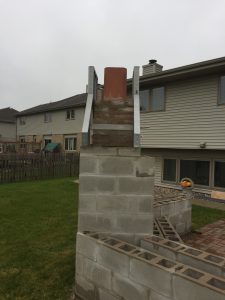
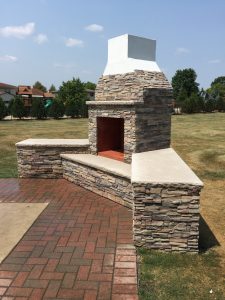
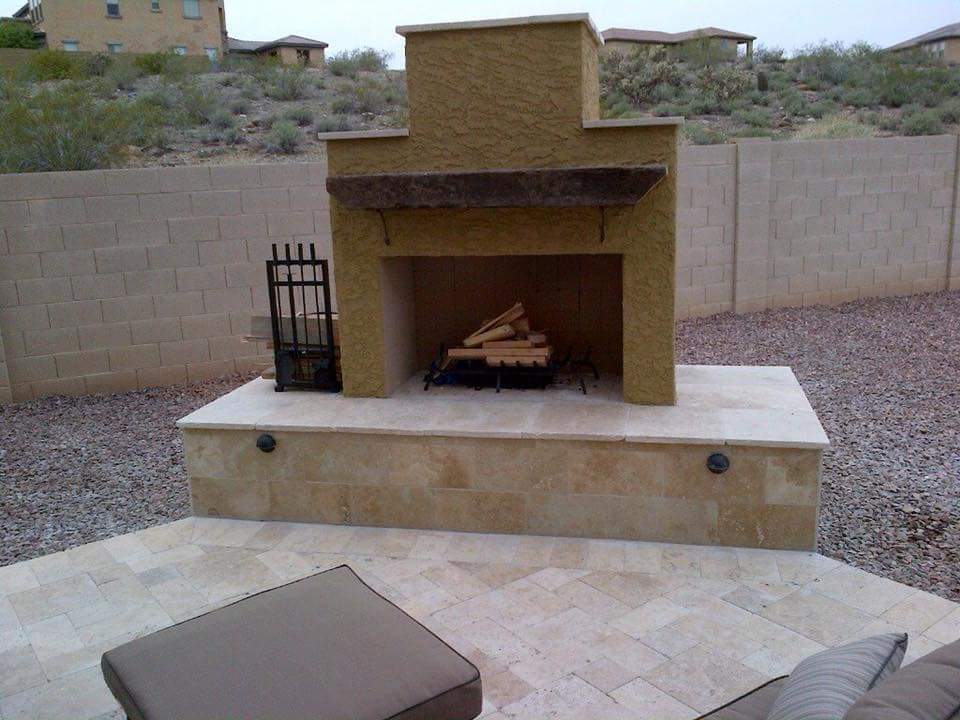
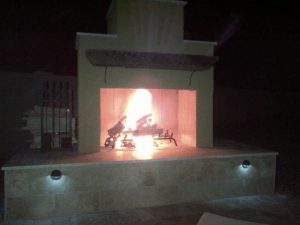
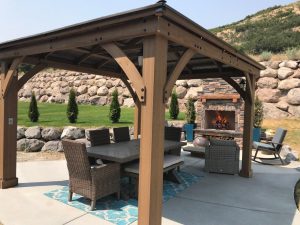
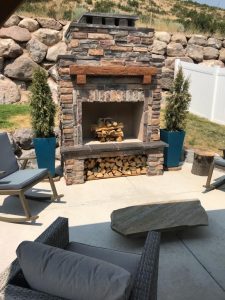
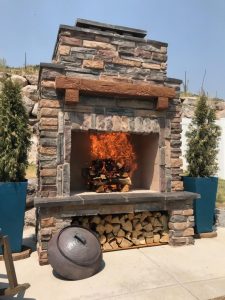
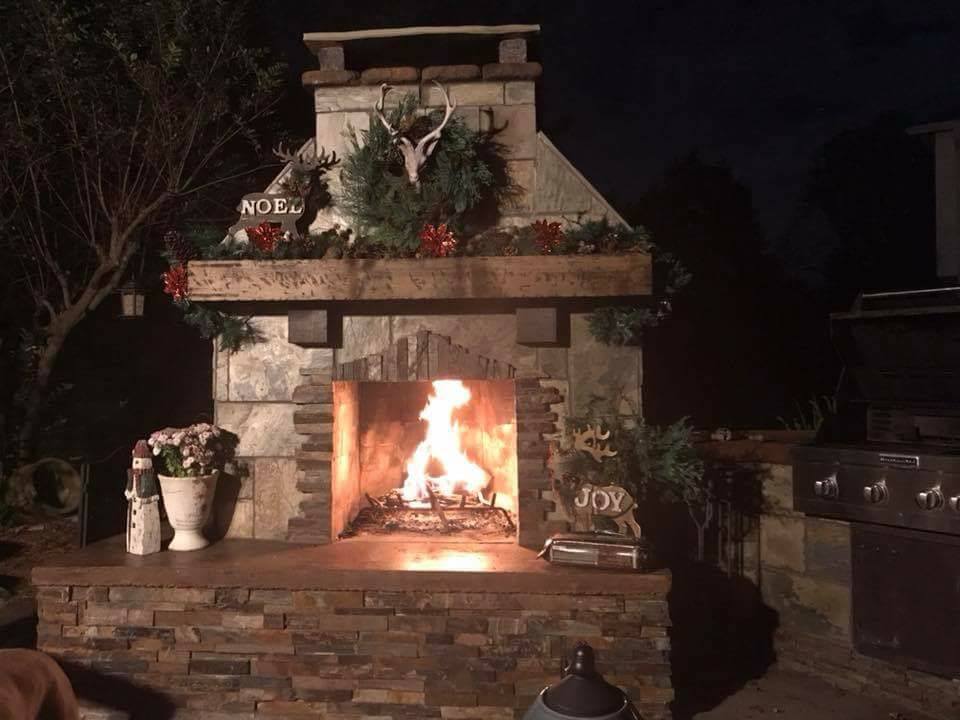
One such customer, Jason, sent us pictures of his DIY Pima II outdoor fireplace to share.  After sharing them on our Instagram page, we asked him some pricing questions about his DIY build.  Jason replied, “I got quotes for $7k-$9k to build this exact plan and I built it for $1,600-$1,800.  Two easy weekends with my dad.  It was super easy with your step by step guide.  I’m a banker by trade so I’ve never done concrete block work ever.”

We’re so happy that Jason had a great experience and that’s an amazing savings of at least $5,200.  That’s a lot of money still in Jason’s bank account and the best part is it sounds like he really had a good time with his dad while building the fireplace.  Backyard renovation pricing wasn’t a big deal to Jason because he opted to save the money and pay sweat equity instead.
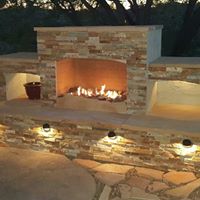
We’re Here to Help

DIY Pima II Outdoor Fireplace with Stucco Mantel Firewood and Lighting
Jason’s DIY Pima II outdoor fireplace is so inviting with a gorgeous fire.

Think about that when you contemplate your options.  Building your own DIY outdoor fireplace doesn’t have to be stressful or worrisome.  We have what you need to walk you through the process of a DIY outdoor fireplace.  Visit us at www.backyardflare.com for great design ideas and information.  We can help you with a great layout and will work with you personally to ensure you have the information you need to comfortably move forward in the DIY construction world.  Build with one of our DIY construction plans and let us worry about the logistics of the design.  You simply have fun and marvel at what your hard work.  Thank you so much for reading and as always… happy building.

-Dan

Fireplace and Pizza Oven Review – Tucson

Fireplace and Pizza Oven Awesomeness

fireplace pizza oven granite flagstone gas fire patio cover pergola heater veneer diy
Relaxing by the DIY gas fireplace during a dinner party.

The other day, my wife and I attended a dinner party at the home of a previous fireplace and pizza oven customer.   We were able to spend some time outside enjoying the fireplace and just the awesomeness of the backyard.  Homeowner Tom helped me build this structure, so this is technically a DIY build in a sense.  Tom learned a lot and he was able to add lots of great value while we had a blast constructing his masterpiece.

Massive Structure Size

fireplace pizza oven granite flagstone gas fire patio cover pergola heater veneer diy
What an amazing and welcoming space in this backyard.

There is so much to his fireplace and pizza oven structure.  To get started, the whole circular structure is a whopping 31 feet in diameter.  It’s massive to say the least.  It surrounds a seven-foot-wide natural gas fireplace.  Inside the four-foot-wide firebox is an “H” pipe covered with bright red fire glass.  The fire glass color is great because, if you look closely at the picture, it turns blueish purple when it heats up.  Such a great look.


fireplace pizza oven granite flagstone gas fire patio cover pergola heater veneer diy
Fireplace is 7′ wide with the gas “H” pipe covered in red fire glass.

The front of the fireplace is covered with a great stone veneer and the remainder of the structure was stuccoed to match the texture on Tom’s house.  The seating is all smoothed flagstone cut to match the curvature of the seat back wall.  On the hearth, there are several low voltage lights that add that extra something.  It looks amazing every night, whether there is a fire blazing away or not.

Pizza Anyone?

fireplace pizza oven granite flagstone gas fire patio cover pergola heater veneer diy
What an amazing backyard for parties and even some quiet time.

The left side of the structure holds the pizza oven built around a BrickWood Ovens DIY mold.  It didn’t get any easier than that mold to build around and then wait until the mortar cured.  The pizza oven is covered in stucco that is painted the same color as the rest of the structure.

To the left side of the pizza oven, we added a piece of polished granite, so Tom could roll out his pizza dough and prepare his pizzas.  No need to run into the house every time, the counter is right there.  Seeing how much Tom and his family has used the fireplace and pizza oven makes me smile that they are building lots of great memories.  The parties with family and friends are a lot of fun and the quiet nights in front of the fire are special for them too.

fireplace pizza oven granite flagstone gas fire patio cover pergola heater veneer diy
Conversation and drinks around the DIY outdoor gas fireplace.

Check us Out

fireplace pizza oven granite flagstone gas fire patio cover pergola heater veneer diy
The view of the Tucson valley from this backyard is amazing.

If the idea of a fireplace and pizza oven sounds like something you would want to step into, there is a great place to go, Backyard Flare.  You can look through the great design ideas and also figure out what you want in your backyard.  Big or small, every fireplace structure looks great.  We want you to begin living in your backyard again.  What better way to start than by building your own fireplace and pizza oven?

If you have any questions about anything, please let me know.  I am always excited to hear from a fellow DIYer, or someone wanting to learn.  You can certainly do it yourself and beautify your backyard space.  I can be reached at dan@backyardflare.com and as I always say, “Happy Building”.

Dan

DIY Outdoor Fireplace Review – Georgia

Georgia On My Mind

Welcome back my fellow DIY’ers and welcome to this edition of, “That Awesome DIY Fireplace” where we introduce a DIY homeowner, tell you what state they reside in, and show you how awesome they were at building their own outdoor fireplace.  This one is awesome to say the least.

DIY outdoor fireplace veneer fire construction plan
John’s completed DIY Outdoor Fireplace in GA

Who is Our Contestant?

Let’s go to the southeast, beautiful Georgia to be precise, to introduce homeowner John.  John had a bare space out his backdoor that needed a little sprucing up.  After checking out the construction plans at www.backyardflare.com, John decided to build the Pima II outdoor fireplace, and he purchased the plans.

Getting Started

concrete diy slab foundation outdoor fireplace
Getting ready to pour a concrete slab for the outdoor fireplace.

John had to clear a grassy area to get ready for the footprint slab to be poured.  Once he mapped out the positioning of the fireplace, John excavated the area and did his ground prep.  John built a wooden frame and added gravel and steel beneath the concrete.  After pouring the concrete, he removed the wood, and he had his footprint slab ready for some mortar and block to be stacked.


concrete slab diy backyard grass wood
Concrete slab is ready for cinder block.

John spent the next few days building the cinder block structure, following the construction plans to a tee.  John paid attention to detail with the mortar gaps and even though he hadn’t done much block work, he built beautifully.


cinderblock concrete slab backyard grass diy outdoor fireplace
First row of cinder blocks are down.


cinderblock concrete slab diy outdoor fireplace grass backyard
Firebox was established for John’s DIY outdoor fireplace.

When John was getting the cinder block structure finished he began thinking about his finish material.  John added his firebrick to the inside of the firebox without mortar gaps between them.  He took the recommendation of Backyard Flare and used high heat construction adhesive to adhere the firebrick to the firebox walls.

DIY outdoor fireplace backyard patio veneer construction cement mixer hearth chimney grass fence firebrick cornerstone
The work site was super busy with lots going on. Veneer was like a jigsaw puzzle, finding the perfect piece for each spot.

Finishing the DIY Fireplace

DIY outdoor fireplace planter grass fence mulch chimney hearth fire grate firewood backyard
John finished with his fireplace and he cleaned up the work site. Anticipation for the first fire!

John picked out a great veneer with a dark tone.  The chimney and hearth portions were covered first, with the keystone added just above the firebox, centered.  The seating material was adhered to the top of the hearth with matching grout, before the center section of the fireplace was covered with veneer.  The mantel was stuccoed for texture and the top of the chimney was adorned with a very cool cap stone.

Adding the Small Touches

DIY outdoor fireplace veneer backyard patio mulch chimney hearth flagstone grass trees
John added veneer to the whole structure giving it a really nice 360 degree look. It looks amazing from all angles.

Dark colored mulch was spread all the way around the fireplace and up to the edge of the very green grass.  Two planters were added to the sides of the structure, which will probably have great looking flowers in them someday.


DIY outdoor fireplace mulch backyard grass fire grate planter veneer flagstone chimney
John’s first fire in his DIY outdoor fireplace. He is so proud that he did it himself.
DIY outdoor fireplace veneer fire construction plan
John’s completed DIY Outdoor Fireplace in GA

John bought a very decorative fire grate and added a few logs to it in anticipation of his first burn.  Oh, and what a beautiful sight it was when John started his first blaze.  He was so excited to share these pictures because he wanted to show off his DIY labor and show that it was possible to build it yourself.

Want to Build A Fireplace of Your Own?

We sure hope you like John’s fireplace and that it inspires you to think about one of these fireplaces in your backyard as well.  It’s really not out of reach to achieve a stunning outdoor living space.  John believes that if he can do it, anyone can do it.  If you have the DIY mindset, we can help you achieve greatness.  We have assisted hundreds of homeowners who are weekend DIY’ers, realize their potential to build fireplaces just like John’s, so you can do it too.  Visit Backyard Flare to learn more so you can begin your journey too.

Thanks so much for reading about another great DIY fireplace build.   We’ll bring you more soon, and as always …happy building.

DIY Outdoor Fireplace Review (2) – AZ

Let’s Take a Trip to Visit a Gorgeous Outdoor Gas Fireplace

Hello all you DIY’ers and welcome to this edition of, “That Awesome DIY Fireplace” where we introduce a DIY homeowner, tell you what state they reside in, and show you how awesome they were at building their own outdoor fireplace.  We’re going to see a stunning outdoor gas fireplace in this article.

Introducing Our DIY Homeowner

We venture down the street and across the tracks from Backyard Flare headquarters to introduce homeowner Jim, who wanted a short in stature outdoor gas fireplace. Jim specifically wanted to burn natural gas.  Jim was restricted to natural gas and a short finished height by his homeowner’s association due to his home’s location on the golf course.  Jim’s backyard was on the 12th tee so there is quite a view.

Jim contacted Dan at Backyard Flare and explained his fireplace design and restrictions.  No sweat at all for the Backyard Flare team.  Dan did a couple site visits to Jim’s backyard and they came up with a plan of action. Dan was contracted to build the fireplace, but Jim was able to save a bit of money because he helped Dan through the process …and Jim learned a lot, very quickly.  It’s always a blast when homeowners can help because they learn and have a great sense of accomplishment.

Getting the Area Prepped

After the fireplace location and width was determined, a diamond blade was used to cut through the existing flagstone patio.  This area was excavated and framed for the concrete slab with rebar inside the pour.  An inexpensive Harbor Freight cement mixer was used which made this job relatively quick for two people.

saw cut flagstone concrete pad
Patio flagstone was cut to make way for the concrete slab.
wheelbarrow used to dump concrete slab rebar
Dan is using a wheelbarrow to dump concrete into the wood form for the concrete slab.


Once the concrete cured for a couple days, Dan and Jim started laying block in a running bond (staggered) pattern.

cinder block fireplace mortar DIY outdoor fireplace
The running bond pattern was used to build the structure.
diy outdoor fireplace with arched lintels
The firebox and storage voids were built with arched lintels made from concrete.


The firebox in the middle was sandwiched between two wood storage voids on either side.  An electrical line was routed through the blocks to install a 110v outlet. This outlet was used to plug in a power transformer for the structure and backyard ground low voltage lighting.

diy outdoor gas fireplace with stucco
The fireplace was covered in a stucco finish prior to the stone veneer being applied.
level measuring tape flagstone cutting with a diamond blade
A level was used as a straight edge to mark the cuts on the flagstone.

Lot’s of Finishing Options Were Added

When the structure block work was completed, firebrick was added to the inside of the firebox.

diy outdoor gas fireplace with flagstone and stucco golf course arizona
The flagstone was added to all horizontal surfaces of the fireplace.

The natural gas line was plumbed up the backside of the structure and a shutoff valve was added inline before it was installed into the back wall of the firebox.  This gas line stubbed out a few inches inside the lower right corner of the firebox.  Gas tubing was added to an H pipe and a few test burns were done before anything was solidified.


The wire for the structure lighting was routed to the front of the hearth and to the inside of the storage voids, figuring out where each light would be located.  The front face of the structure was adorned with a beautiful stacked stone, which was mortared in place.  The remainder of the structure was covered in a smooth coat troweled stucco, which was later painted.

Natural Stone Added So Much

The horizontal surfaces were covered in a gorgeous light tan flagstone which Dan and Jim cut with a chisel method for a rougher edge.  This was a bit time consuming and much slower than a saw cut front edge, but completely worth it in the end.

diy outdoor gas fireplace stacked stone golf course arizona
The finished fireplace sure makes a statement in this backyard.

With the leftover flagstone, Jim extended the flagstone patio to the far-right side of the structure and filled the joints with matching mortar.  After it was pressure washed, you can’t even tell where the old flagstone patio and the new came together. Totally amazing.

A vertical piece of flagstone was added to the front of the firebox after it was chiseled to resemble a mountain range in Jim’s home state of Colorado.  This piece of stone helped contain the local river rock that was added to the top of the H pipe.  This rock completely hid the pipe, making it look as if the flames “originated” from the rocks.

Tying the Structure to the House Decor

For continuity in the backyard, the fireplace stucco was painted to match the house.  New outdoor furniture was added to the patio and many nights have been spent eating, drinking, partying, and relaxing in the backyard.  So many golfers stopped to see the fireplace and to offer kind words, complementing Jim on his design.

With the ambiance of the lighting in the voids and quick start of the natural gas in the firebox, Jim and his wife have been able to say, “hey want to have a fire?”, and enjoy it in a matter of seconds.  Easy on and easy off is what Jim wanted and it turned out great.

diy outdoor gas fireplace stacked stone golf course arizona
This backyard was transformed with this fireplace overlooking the gorgeous golf course.

You Ready to Build One?

We sure hope you like it too, so let us know how this DIY fireplace inspired you?  Are you ready to build your masterpiece like Jim did?  Even though this outdoor gas fireplace included natural gas, low voltage lighting, and chiseled flagstone, it can all be done by you too.  If you have the DIY mindset, we can help you achieve greatness.  We have assisted hundreds of homeowners who are weekend DIY’ers, realize their potential to build fireplaces just like Jim’s.  You can do it too. Visit Backyard Flare for more information and DIY construction plans.

Thanks so much for reading about another great DIY outdoor gas fireplace build.   We’ll bring you more soon, and as always …happy building.

DIY Outdoor Fireplace Review – IL

Fireplace Review Time

Hello all you DIY’ers and welcome to this edition of, “That Awesome DIY Fireplace” where we introduce a DIY homeowner, tell you what state they reside in, and show you how awesome they were at building their own outdoor fireplace.

Who is Our DIY Builder?

We venture to Illinois to introduce homeowner Mario, who decided to build the Douglas Mini design.  Mario reached out to Backyard Flare and ordered his DIY construction plan.

Douglas Mini DIY outdoor fireplace
Mario started with the footprint on his concrete slab.

Mario’s backyard has a great looking grassy area with a brick patio.  The corner of the patio needed a new addition though, so an outdoor fireplace was the obvious choice.   Mario started building his fireplace as per the construction plan and got to the top of the firebox lintel.

Modification Time

Mario elected to make some modifications to the chimney portion of the build to give the top an angled look.

Douglas Mini outdoor DIY fireplace angled chimney
Metal framework was added to create the angled chimney.

To achieve these angles, Mario used metal stud for the framework, using small self-tapping screws to tie the metal sections together.  It’s very important to make sure the angles are the same on each side.


Douglas Mini DIY outdoor fireplace with metal angled chimney
The metal framework was symmetrical on the front and back.

Finishing the Fireplace

Mario finished his fireplace with a beautiful stone veneer and natural stone horizontal surfaces.  The firebox was finished in a red firebrick, providing a cool look.  Mario bought a metal fire grate and it looks like a perfectly cut piece of aspen pine is laying there ready for a good burn.

The brick patio was laid back down to the front of the hearth, giving it an almost seamless look.  If you look closely, the angles of the chimney match the door on the shed behind it.  I really think Mario did this on purpose to tie the backyard together.  It really works, and we love it.

Douglas Mini DIY outdoor fireplaces backyard
Great Douglas Mini design outdoor fireplace built by a homeowner using a construction plan from Backyard Flare.

Are You Ready to Build?  Now is a Great Time

How has this DIY fireplace inspired you?  Are you ready to build your masterpiece like Mario did?  Backyard Flare can help you with any worries or concerns of the masonry word, and even with design help.  We have assisted hundreds of homeowners who are weekend DIY’ers, and we can help you realize your potential to build a fireplace just like Mario’s.  You can do it too.

Check back on our blog page periodically and follow us on Instagram and Facebook for additional photographs and information.  We love to share great pictures and we really enjoy bragging about our customers, so we hope to hear from you.

Thanks so much for reading about another great DIY fireplace build.   We’ll bring you more soon, and as always …happy building.

Dan Heston

DIY Outdoor Fireplace Review – AZ

DIY Outdoor Fireplace Review

Hello all you DIY’ers and welcome to this edition of, “That Awesome DIY Fireplace” where we introduce a DIY homeowner, tell you what state they reside in, and show you how awesome they were at building their own outdoor fireplace.  They do it all by themselves with a little help from us here at Backyard Flare.

Let’s Go Down to Arizona

We venture not far from Backyard Flare headquarters in Arizona to introduce homeowner Jason.  A DIY guy who decided to build the popular Pima II fireplace design using the proven Backyard Flare outdoor fireplace construction plan.

Pima II outdoor fireplace stucco tile
Gorgeous Pima II outdoor fireplace built by Jason in AZ.

Jason has the traditional landscape rock in his yard as most of us do in southern Arizona.  A stunning tile patio was built with a perimeter tile of the same type.  The Pima II fireplace is built on a 45 degree angle to the patio.  The fireplace measuring just wider than eight feet is a perfect addition to this space and with wrap-around seating, lots of horizontal surface is available.

To keep continuity, Jason used the same tile for the patio to wrap up the hearth of the outdoor fireplace.  This tile then extends to the horizontal seating surface, which gives it a great finished and well thought-out look.  Jason added electrical line for low voltage lighting in the hearth, giving the fireplace a subtle look at night even when it’s not being used.  This outdoor fireplace is backyard furniture for sure, providing a great focal point.

Stucco Is a Cost Saving Veneer Choice

For the main vertical firebox and chimney sections, Jason elected to use stucco as the finish material.  In Arizona, as with many other states, this matches the home’s exterior, which also keeps the theme going throughout.  With the texture and darker earth tone paint, it blends really nice with the natural desert landscape seen behind Jason’s block wall.  The horizontal sections of the chimney and the top were covered with matching tile, which was saw cut with a diamond blade.  Super simple by the way.

Pima II outdoor fireplace with lights and fire
When the sun goes to sleep, the lights come on and the fire burns. how beautiful.

Jason wanted to add some pop, so he finished the front of his outdoor fireplace with a gorgeous piece of distressed wood for his mantel.  Wanting to match other elements, Jason used metal brackets underneath the wood.  These metal brackets match the metal fireplace tool set and the metal fire grate in the firebox.  Jason got ready and stacked a pile of pine in the firebox, ready for a great nighttime burn.  I’m sure the neighbors stare out their back doors at the glow from the chimney and they smell the sweet smell of burning pine.

Help is Available

How has this outdoor fireplace inspired you?  Are you ready to build your masterpiece like Jason did and transition your backyard space?  Backyard Flare can help you with any worries or concerns of the masonry world, and even with design help.  We have assisted hundreds of homeowners who are weekend DIY’ers, realize their potential to build outdoor fireplaces just like Jason’s, and you can do it too.

Thanks so much for reading about another great DIY outdoor fireplace build.   We’ll bring you more soon, and as always …happy building.

Dan Heston

DIY Fireplace Reviews – FL and UT

It Started in Florida

Let’s talk about two beautiful DIY fireplaces built by the same people, years apart, in two different states.  These fireplaces transformed their backyards into such welcoming areas.  But first, let’s meet our player

outdoor fireplace pizza oven DIY
Combo fireplace and pizza oven DIY

s.  Husband and wife team, Marko and Kelly, were customers of Backyard Flare years ago and they built a stunning DIY outdoor fireplace and pizza oven combo when they lived in sunny Florida.  They used a Backyard Flare construction plan and the backyard was positively changed forever.  The structure drew lots of accolades from Backyard Flare followers and it was definitely a beautiful, one of a kind, fireplace.  It’s easy to see why so many people were raving about it.  It was so different than most.

DIY outdoor fireplace pizza oven
The red color on the oven adds so much to this design.

I have seen lots of pizza ovens and most are earth tone colors.  Marko and Kelly decided that a bold and deep reddish color would look great on their oven instead of keeping it like everyone else’s ovens.  I have to say, I was impressed with the color choice. It worked so well with the surrounding area and it brought a pop of color not seen anywhere else in their yard.  Coupled with the dark tones of the accent tile and the light color stucco, it was a hit.  I’m sure it made a huge impact in the sale of their home, bringing in more money on the sale, than they would have had with a plain Jane backyard.

And then They Moved

Now fast forward a few years, with Marko and Kelly relocated to the great state of Utah.  They bought a new home and needed to bring the backyard up to a standard they were used to.  The new fireplace structure, although smaller than the Florida fireplace, is no less impressive.

Utah outdoor fireplace diy pergola
Utah backyard with DIY fireplace and pergola

The fireplace sports a square topped firebox and an equally wide firewood storage void under the hearth.  Natural stone is on the horizontal surfaces, including the top of the fireplace.  Keeping with the earth tone feel, Marko and Kelly added a wood mantel and a beautiful faux stone veneer.

outdoor fireplace diy wood mantel storage
This fireplace sports a wood mantel and a firewood storage void.

It’s not just the fireplace that brings the total feel to the backyard.  The natural flagstone table in front of the fireplace draws the earth tones to the patio. A huge pergola with a large outdoor table is the perfect place to have an outdoor dinner or just a place to sit and really relax. The white picket fence in the background with the bold green grass, adds contrast to the whole picture.  The large boulder wall behind the fireplace and the slight hill with natural vegetation adds to the rustic look as compared to the veneer on the fireplace.  The bold color on the pots to the sides of the fireplace make the structure appear to be wider than it is.

DIY outdoor fireplace fire
In action with a raging fire.

This is such a beautiful fireplace and I am sure this backyard will create lots of great memories.  Great job Marko and Kelly.  We are sure you will continue to enjoy your backyard paradise and we hope you will continue to share your fireplace with us.

Kudos Go Out

Special thanks to Marko and Kelly for sharing these great photos with us and allowing us to share them with the world. Also, thank you to all our faithful readers out there and to those who just found us.  We can help you with your outdoor fireplace dream.  Visit our website at www.backyardflare.com for some great inspiration and fireplace ideas.

Check us Out on Social Media

Please follow us on Facebook and Instagram for lots of cool info and fun pics and video.  Thanks for reading and as I always say…happy building.

-Dan

DIY Summer

Get Excited

Oh my gosh, I am excited about this DIY summer.  So many people are diving into great DIY outdoor fireplace and outdoor kitchen projects.  We have received countless emails and calls about custom fireplaces and are really pumped to see these structures built.  There are so many great ideas and backyard spaces that are begging for a stunning outdoor fireplace.  Do you have one of those spaces?  If you said yes, we want to hear from you too.

The best part about a late spring and summer build is that you can take your time on the construction.  By doing most of the building during the hotter parts of the spring and summer, there won’t be any rush to complete the structure.  Your construction can be solely a few hours each weekend or sporadic hours throughout the week.  Those cooler days will arrive and when they do, the fireplace will be ready to go.

I was at a graduation party a couple days ago and it just so happened to be at a friend’s house where I built Backyard Flare’s second ever fireplace.  This structure is absolutely huge.  I remember building this structure in the heat of the Arizona summer, under the beating rays of the sun.  Plenty of water was consumed and I think we are still paying off the credit card bill from our purchase of sunscreen.  We killed a saw while cutting block and even drew a little bit of blood during the build.  Those things at the time were a nuisance, but now I look back on them and smile, remembering all the fun we actually had during construction.

Reminiscing an old DIY Summer

During the graduation party, I ventured out into the backyard and walked around the fireplace to reminisce.  It was built on an old basketball court after the homeowner’s kids grew up and moved out.  I wanted to stoke up a fire, but because the temperature was still in the 90s, I decided that that wasn’t necessary.  I took a few pics to show my wife that the fireplace still looked great after more than ten years.

DIY Outdoor fireplace in Tucson.
Decade old outdoor fireplace in Tucson, Arizona.
DIY outdoor fireplace with stucco and tile finish
The memories around an old fireplace are great. Build your own memories.

What I’m getting at is that a well built outdoor fireplace or kitchen becomes backyard furniture in a sense. A decade later, a fireplace will still be there, begging to be used.

Contact Us

Let us know how we can help if you are interested in stepping into a fantastic DIY build.  Visit us at www.backyardflare.com, email us at dan@backyardflare.com, or call Dan at 520-269-9740.  We would love the opportunity to help you design a beautiful fireplace or kitchen.  Take care and as always…happy building!


Dan Heston

Decorate For the Season

Create Your Christmas Fireplace

Oh my…the Christmas season is in full swing and decorations are being added to everything indoors.  Why not add some spice to the outdoors too?  Add some small things or even some big things to your fireplace and make it spectacular.  Some people add great decor to their structures and turn them into a “Christmas Fireplace”.  We have seen some spectacular outdoor fireplaces this 2017 Christmas season that we just have to share.

Outdoor Fireplace Christmas
Amazing reds and greens make this outdoor fireplace pop with the Christmas spirit.

Does it get much better than a decorated outdoor structure with signs of noel and joy?  I don’t think so.  Check out the mantel covered in red berries and a green pine wreath above it. With the vases full of flowers, this fireplace makes me want a warm glass of cider or some hot chocolate with extra marshmallows.

Outdoor Fireplace
Beautiful DIY outdoor fireplace decorated for the Christmas season

It doesn’t take much to turn an already gorgeous outdoor fireplace into a seasonal masterpiece.  Another wreath makes this fireplace step right into the Christmas season and the lighting overhead adds a lot too.   By adding reds and greens, as well as lighting and images of Christmas, you will turn a nice space into an even more welcoming space.

What are some of your holiday decorating ideas?  Write a comment and let us know and even share a picture of how you designed.  Thanks and we hope you have a great holiday season.  Merry Christmas and Happy New Year.

Care to add a DIY fireplace to your backyard?  Visit us at www.backyardflare.com for great information and ideas for your next project.