DIY Outdoor Kitchen Build

Getting Started

Well, this 2020 spring sure snuck up on us.  Down here in the southwest, the temps are getting into the 70s already in March, so we are looking at some DIY projects.  We have decided that an DIY outdoor kitchen is what my father-in-law’s backyard needs.  He’s super excited and we started talking and discussing the build and what we would want in the structure.

DIY Outdoor Kitchen with Charcoal Grill
Getting started with the excavation.

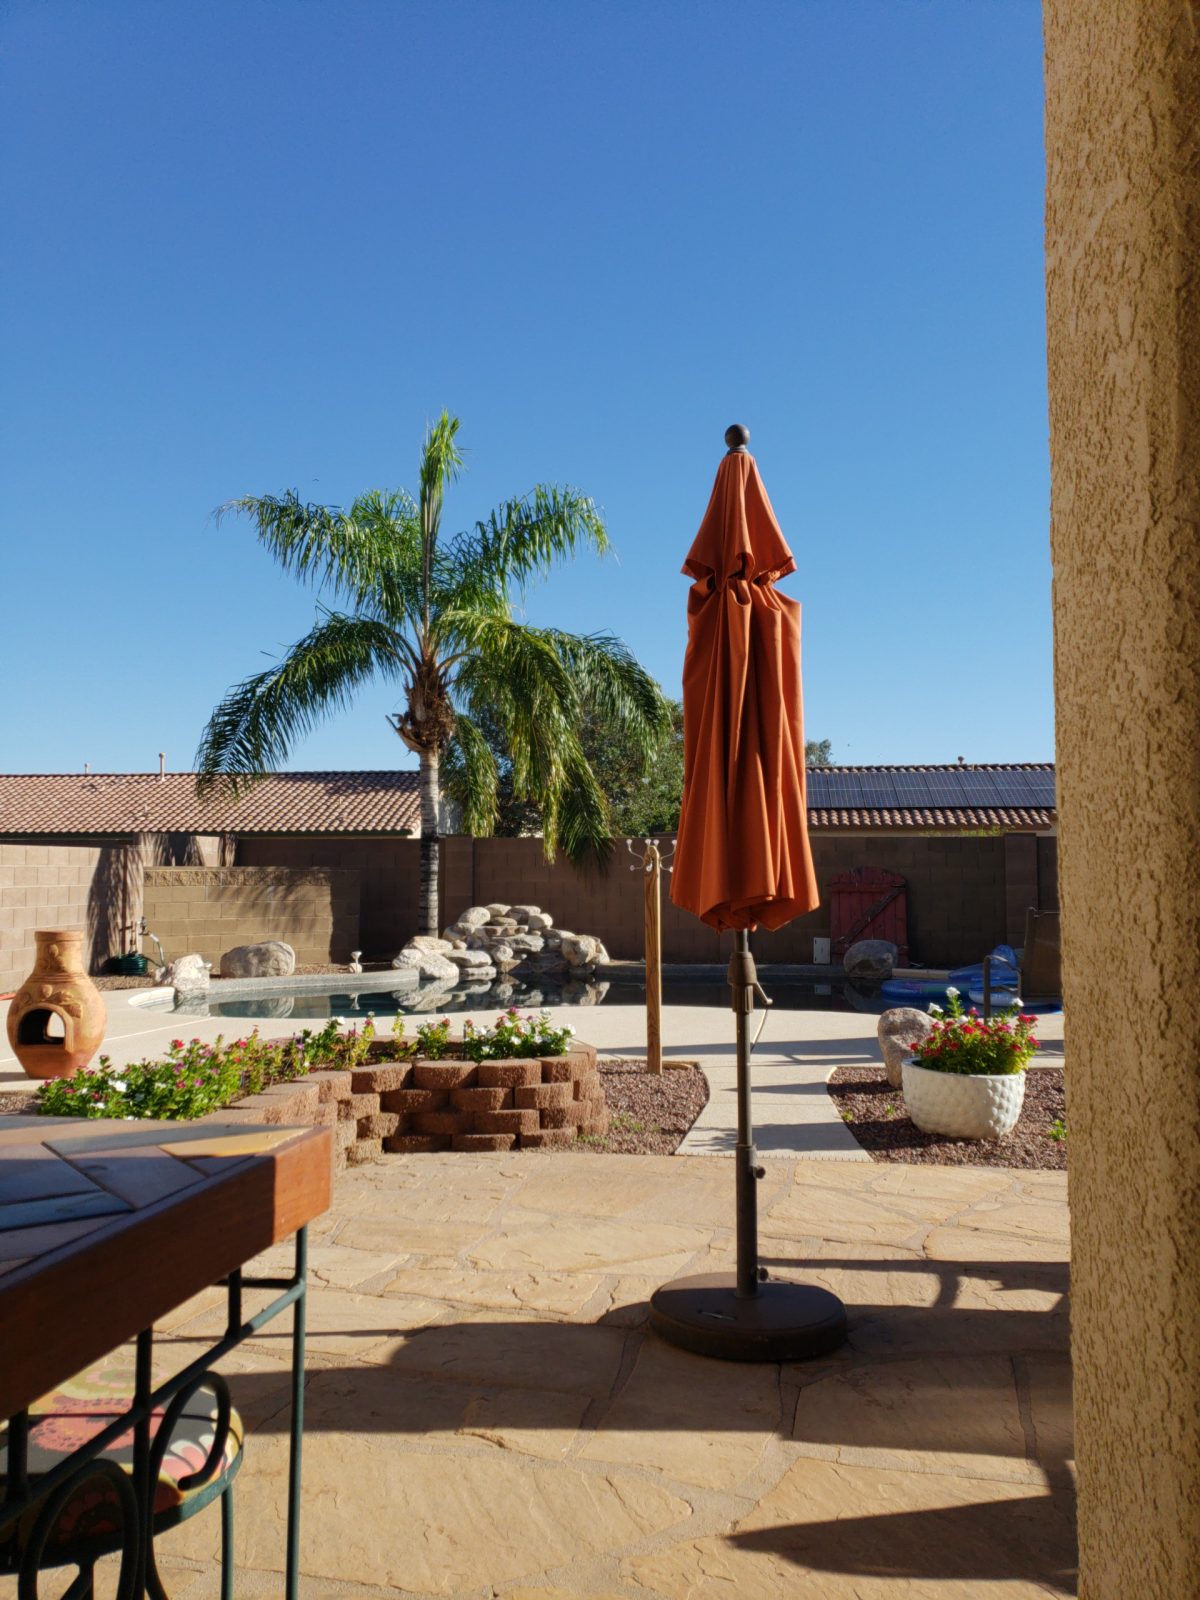
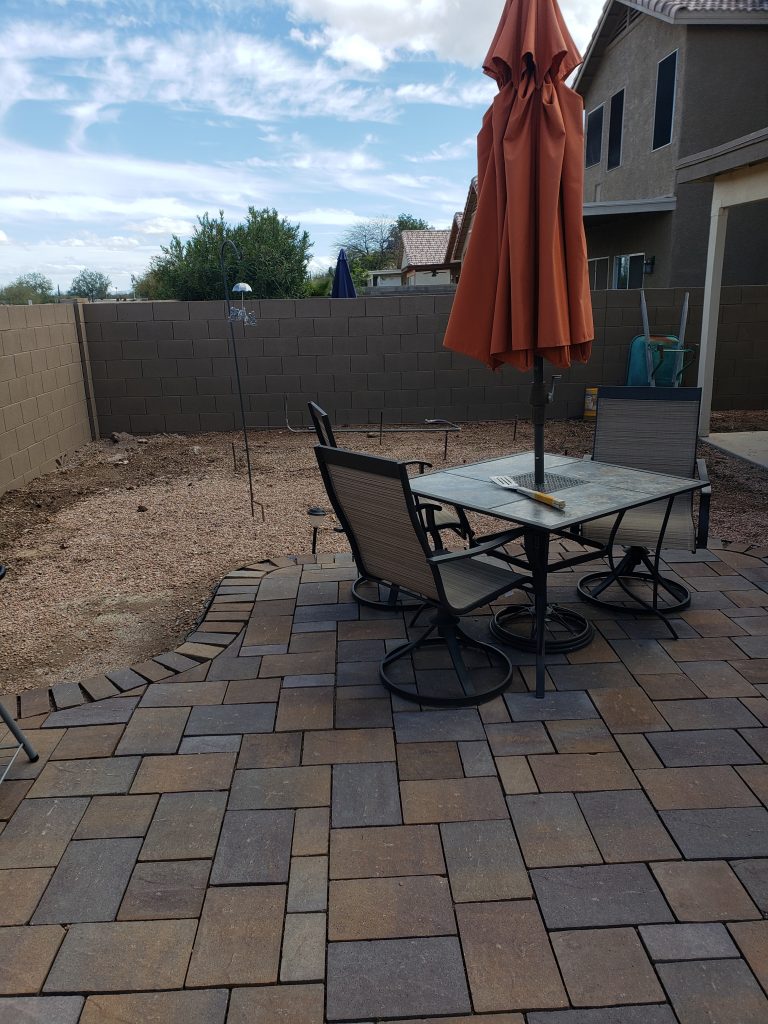
We have a few hundred square feet to work with, so we have some different shapes and configurations available to us.  There is a gorgeous mountain view to our east, so we definitely want to keep that on our mind when we design the layout. 

Initial Thoughts

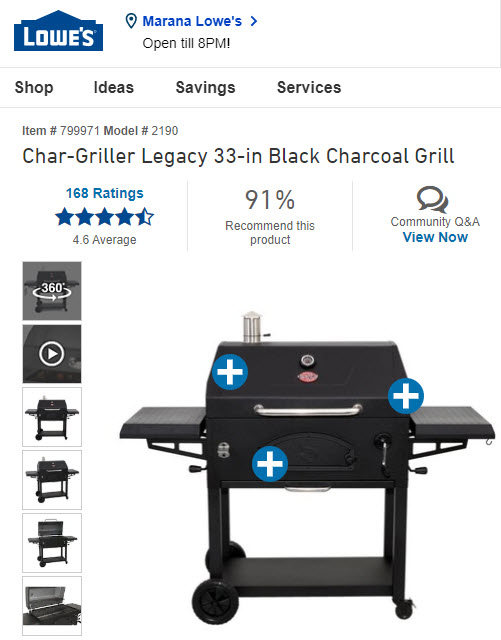
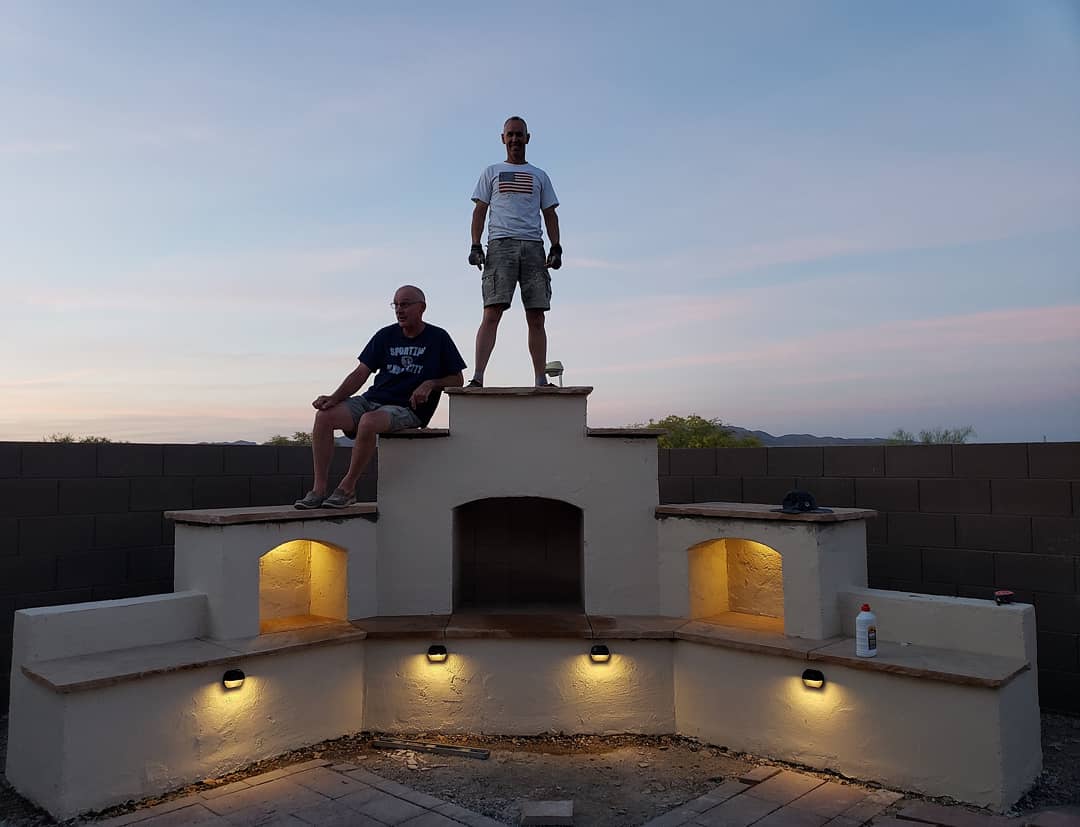
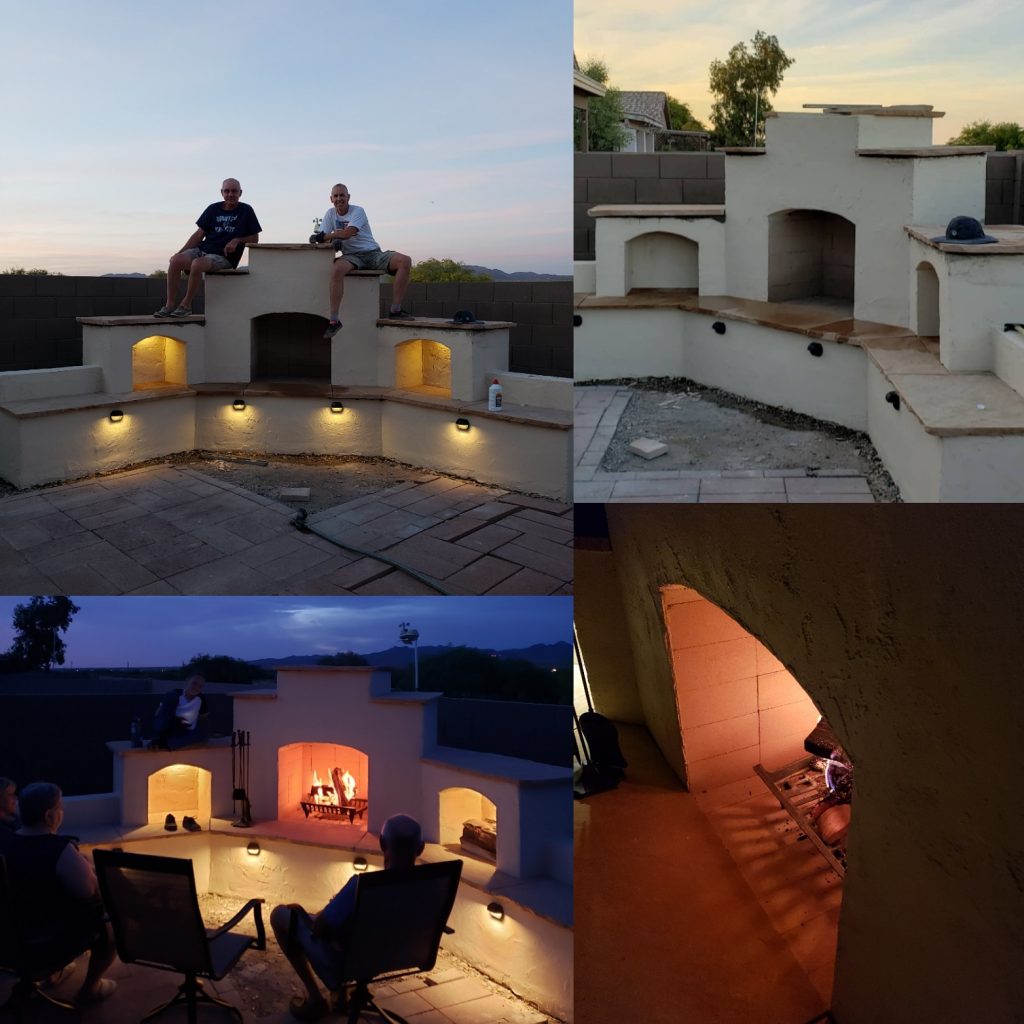
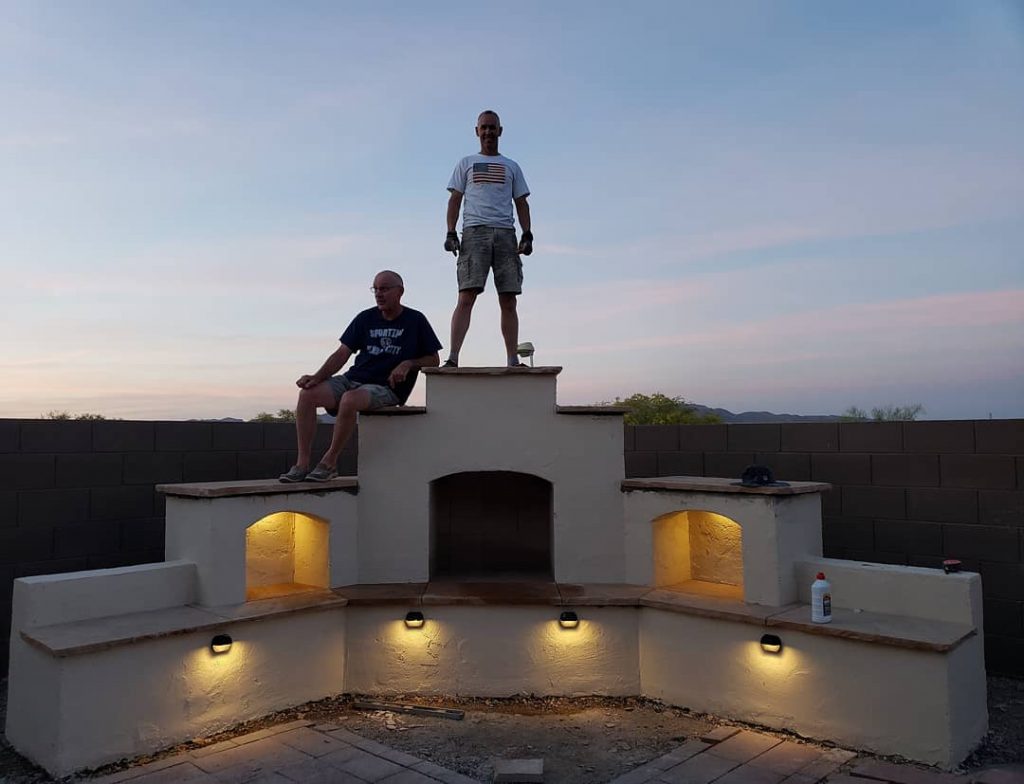
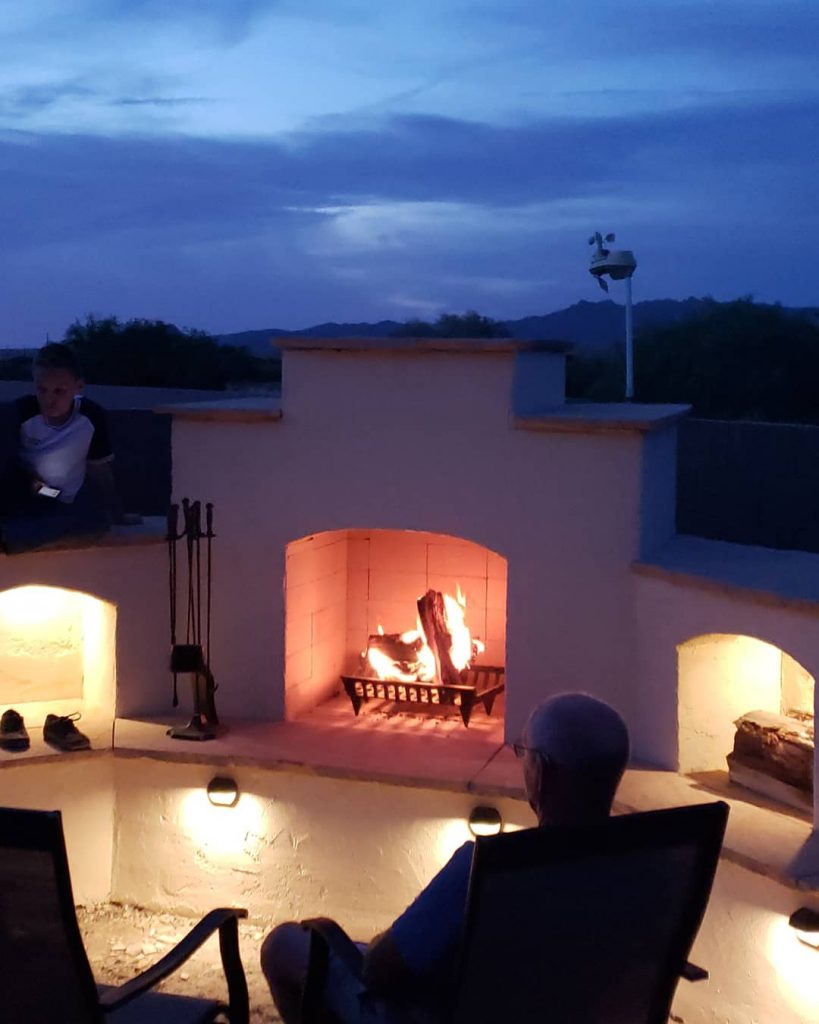
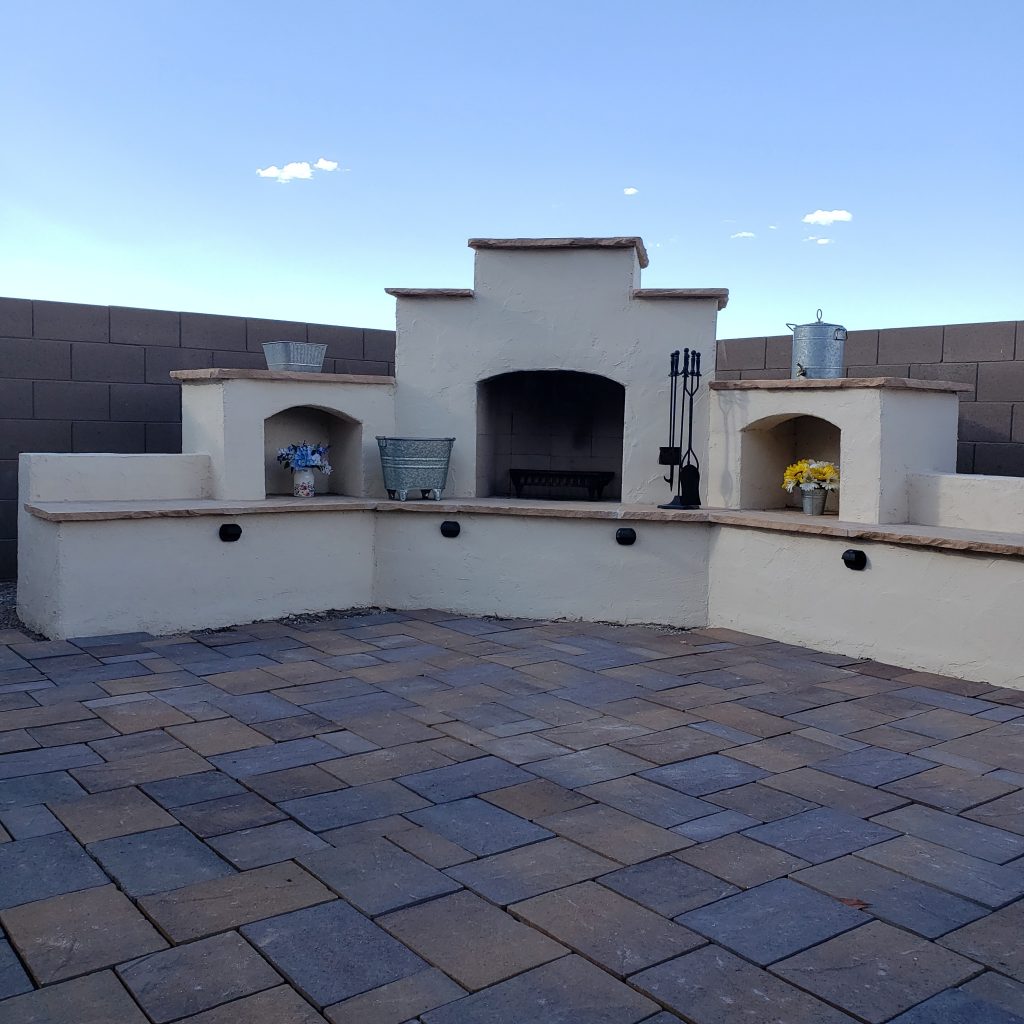
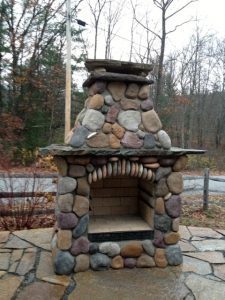
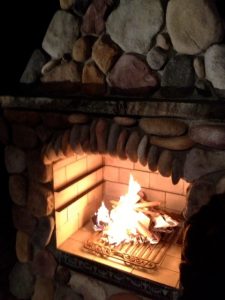
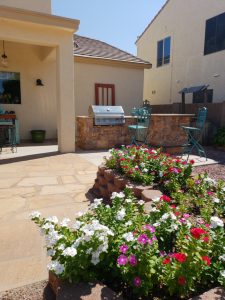
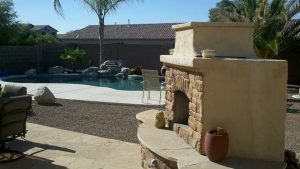
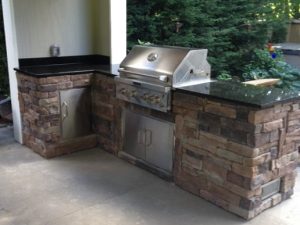
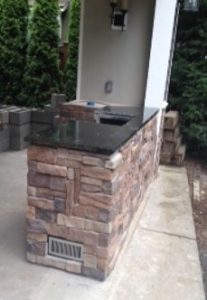
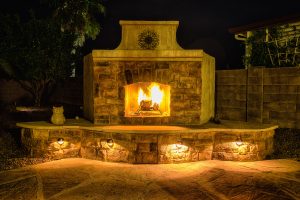
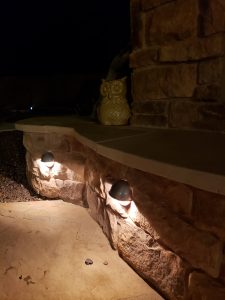
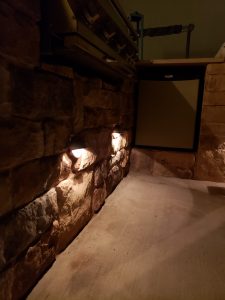
First and foremost, my father-in-law loves to cook on charcoal, so we are headed in that direction with the grill.  We picked out a Char-Broil brand structure that we’ll modify to fit the space.  That’s a real cool way to build and very economical, so we’ll be getting into that in some future posts.  Secondly, we are looking to match the exterior of the outdoor fireplace that we built last year on the opposite side of the backyard.  In order to do that, we’ll be putting stucco and outdoor lighting on our DIY outdoor kitchen, with flagstone as our counter material.  By using the same finish material on the grill and fireplace, it’ll look like we built both structures at the same time and the overall look of the backyard will look well thought out. 

We decided that a raised bar area would be a nice addition to the DIY outdoor kitchen, so the structure will have to be big enough to accommodate that extra feature.  An “L” shape is something we feel will work so the guests sitting at the bar will have the mountain view to look at while they talk to the grill chef and enjoy their favorite beverage.

Starting the Construction

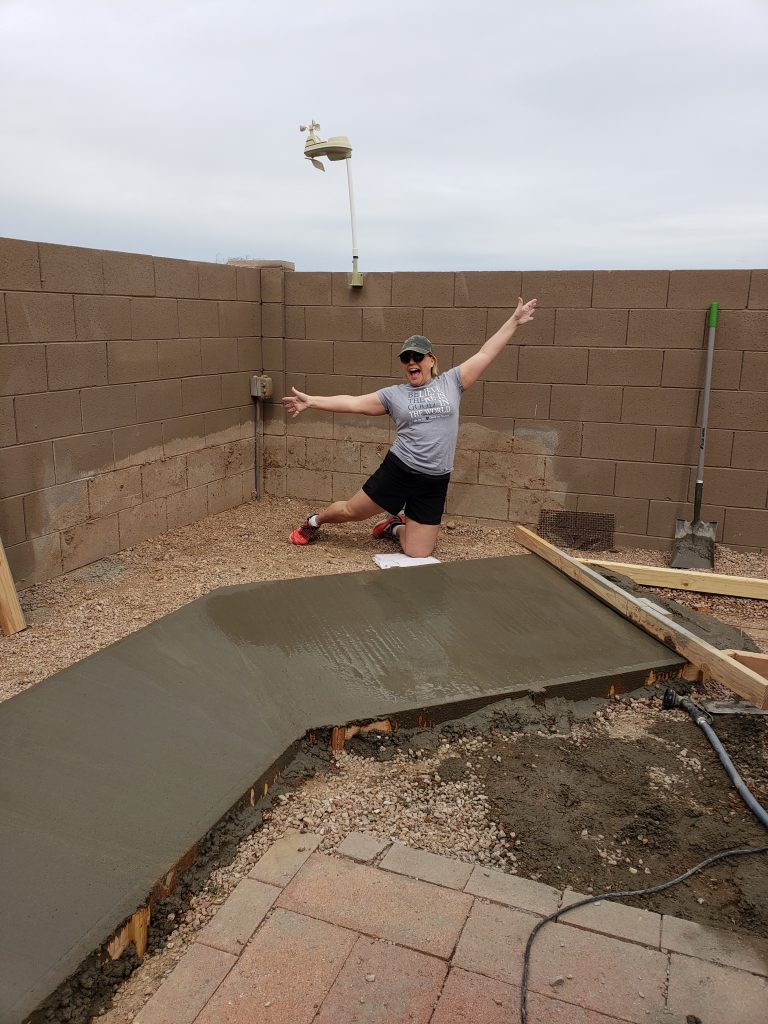
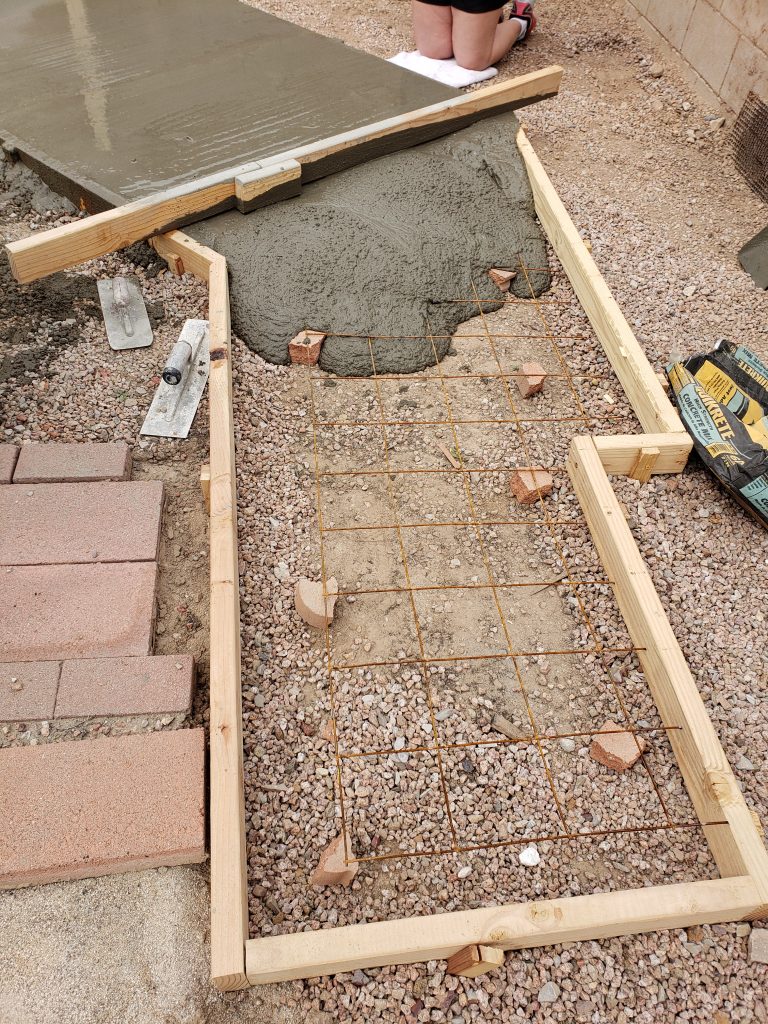
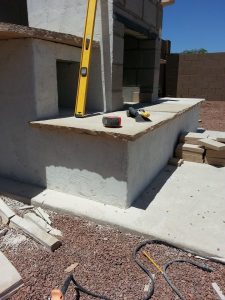
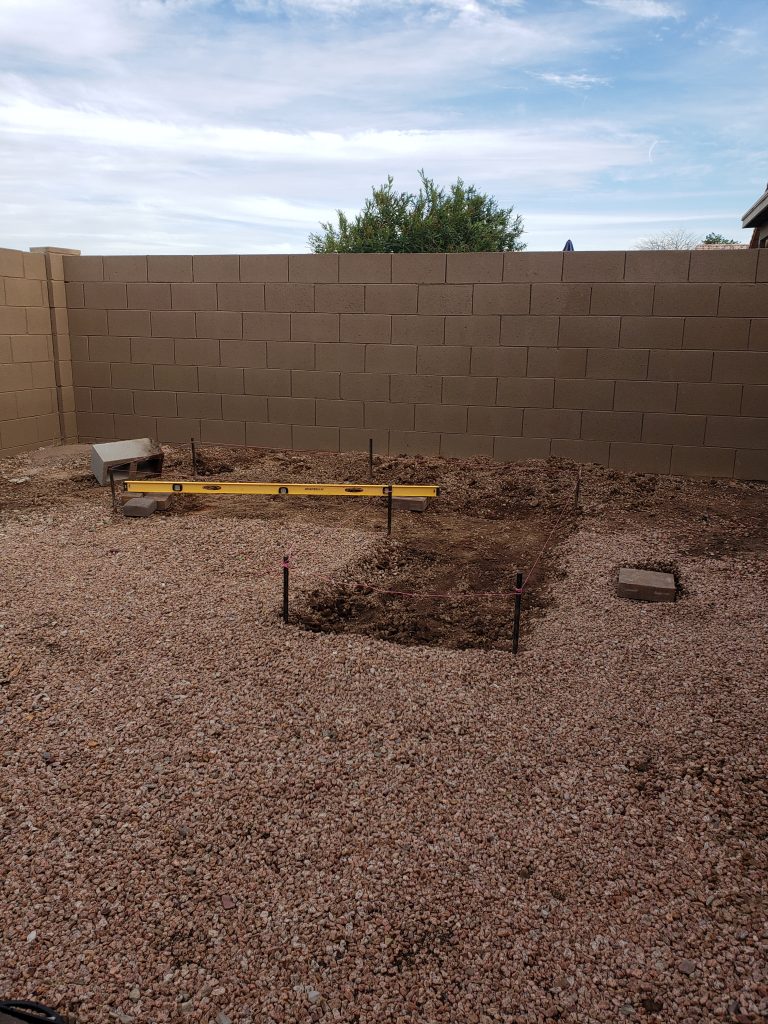
We staked out the rough dimension of the “L” shape grill and then started figuring out the level of the future concrete slab.  This is important so our patio pavers are the same height of the patio to the house.  The excavation of the site started with a quick dig out of the slab dimension. 

Using a really long level, 6-footer, we laid out random pavers from the existing patio to the farthest side of the DIY outdoor kitchen structure.  This would tell us how much digging we would need to do to get it uniform and level. 

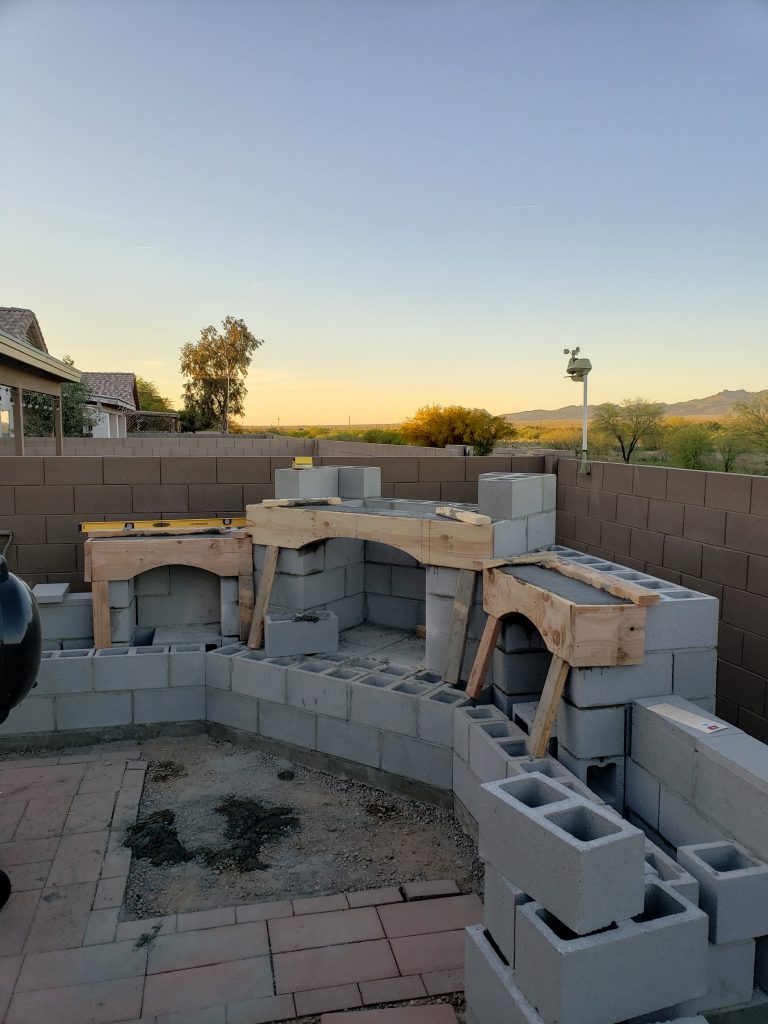
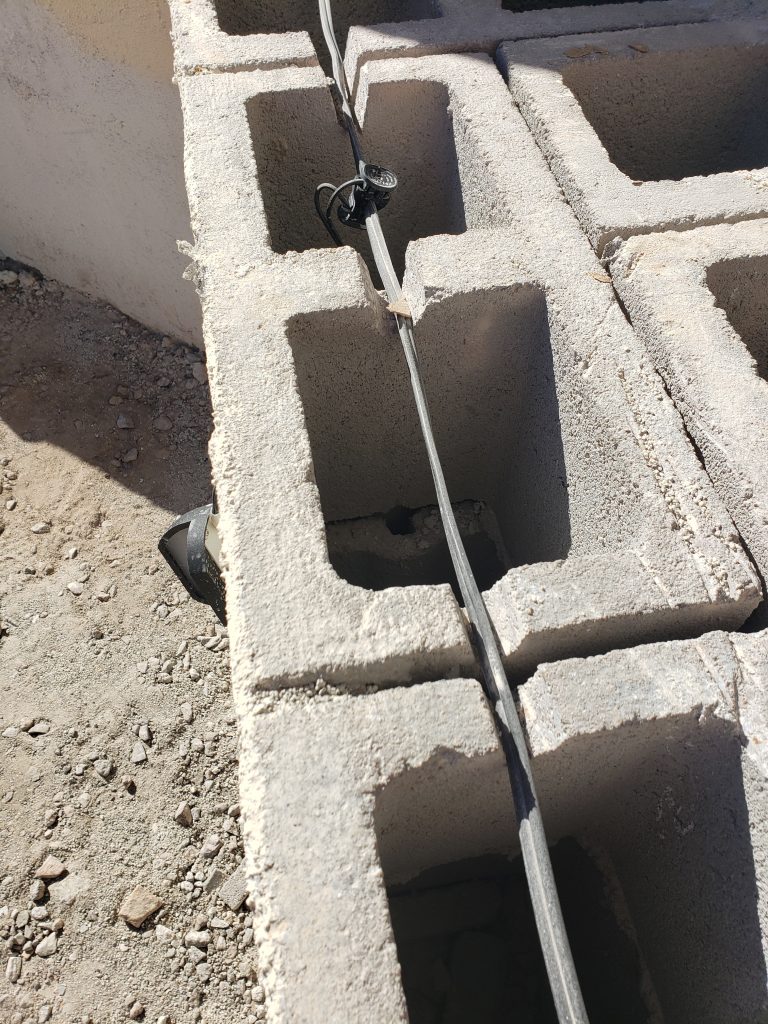
Drawing and Block Count/Order

CAD drawing of the DIY outdoor kitchen

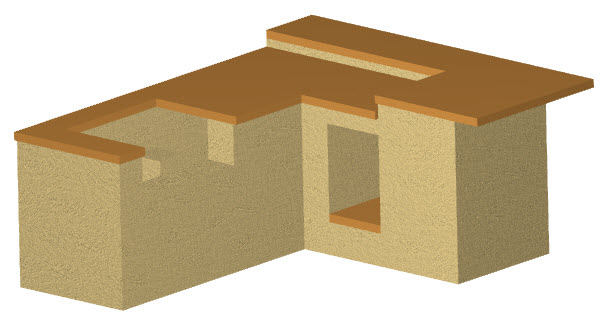
Dan at Backyard Flare drew up the grill structure using CAD and concept and then used the drawing to calculate the type of blocks and exact number of each block needed.  Dan figured the mortar and concrete need as well, and then called Lowes to place the order for delivery.  The best part is that almost all the building materials and even the grill will be delivered right to the side of the house, which is where the gate is located leading to the backyard.  The materials purchased, including the $75 delivery fee, was only $505, and that included the grill.  Wow, how much more economical can it get?

Follow along on our future posts as we build.  You’ll be amazed at how easy and inexpensive it can actually be to build on your own.  The DIY world is yours to explore and we can help.  If you’re interested in building your own backyard paradise, let us know how we can help.  Get your construction plan today and begin building your DIY outdoor kitchen tomorrow.  Happy building. 

Inexpensive DIY Outdoor Fireplace

Our Arizona Backyard Fireplace

Hello all you DIYers and enthusiasts of backyard fireplace and transformation.  I wanted to write a bit about one of our latest ventures, a corner Arizona outdoor fireplace with storage voids that I built at my in-law’s house in Arizona.  The backyard isn’t huge, only about 30 feet deep from the back of the house to the back wall, so we decided to offset the fireplace in the corner to not block the mountain view.

Doesn’t Have to be Expensive!

The best part of this whole build is that we really designed and built on a budget, building as inexpensive as possible without substituting quality.  In total, we spent just over $1,600, and that included the poured concrete slab, lighting, and all finish work.  It really is amazing at what you can build and how cheap the overall cost can be when you enter the DIY world.  So, let’s break it down.

The Backyard Fireplace Building Begins

Concrete slab for DIY outdoor fireplace
Getting the slab poured is lots of fun.
Wood form with steel and concrete for outdoor fireplace
Use wire mesh or rebar in your concrete pour to add strength to the slab.
Man pouring concrete for outdoor fireplace
Concrete is a dirty job but lots of fun at the same time.

We knew the footprint of the backyard fireplace so we worked with disturbing only that area. We excavated the site and prepared the ground for the concrete slab, using steel in the pour.  Once the concrete cured for a few days, we began laying the block as per the construction plan, which showed literally where every block went.  So easy!  We established the entry point at the back of the structure for the low voltage lighting wire to come in and routed that wire through the structure.

Masonry construction outdoor fireplace with storage and concrete lintels
We filled wooden jigs with concrete to create the arched lintels.

The storage voids and firebox were arched and that was completed by building wood jigs, supporting them in place, and pouring concrete into them to create the lintels.  The arches really made the three openings come to life, so we are happy we made that decision.

Finish Work Decisions

DIY outdoor backyard fireplace at night with fire
Just an amazing night with family and friends.

When the rough build was completed, we lined the firebox with firebrick in a stacked pattern to change it up and covered the whole structure in smooth coat stucco.  The stucco was then painted to match the color of the house, so it tied everything in.  Almost all horizontal surfaces were covered in a gorgeous honey brown flagstone that we chisel cut for a rustic edge.  The LED lighting was added to the front of the structure and inside each storage void, where it was connected to the low voltage wire.  We are so happy we made the decision to add lights because it makes the whole structure come to life even when not in use.

Finished DIY outdoor fireplace with painted stucco and brick patio
Finished DIY outdoor backyard fireplace with painted stucco and brick patio

The patio spanning the front of our backyard fireplace was completed in a random pattern with colored concrete pavers.  It sure made the whole sitting area complete, giving it a finished look.  We have enjoyed the fireplace even through the summer with ambiance fires, so we’re not letting the warm nights slow us down.  Sitting at a distance is the way we do it when it’s warm outside.  Just make sure you and your guests have your drink of choice while you sit and relax.

Want to Build a Backyard Fireplace Too?

We hope you love our backyard fireplace and all of what we built as much as we do and that you are inspired to step into this as well.  Backyard Flare, LLC is the leader in DIY outdoor fireplace construction plans.  Whether you are an accomplished mason or someone who has NEVER worked with block and mortar, you can build our designs.  Open the construction plan and begin building your own backyard fireplace.  We are confident that you too can build a masterpiece, so get going on your design ideas. 

Backyard Lighting

Outdoor lighting on DIY outdoor fireplace at night
Beautify your DIY outdoor fireplace with lighting.

There are many ways to install backyard lighting in your outdoor space.  In this quick tutorial, we’d like to specifically go over our method of installing low voltage lighting in a outdoor fireplace structure.  We are currently building an amazing DIY outdoor fireplace at my in-law’s house in Marana, Arizona, a suburb of Tucson, and it is turning out beautiful.  To include that “extra something”, we made sure to add a little lighting to the fireplace, so it really shows off the structure at night.  Backyard lighting makes the world of difference when added tastefully.  Just a little goes a long way.

Bring Your Backyard To Life

Even when we aren’t enjoying the warmth of a fire, we want to be able to look out the window into the backyard and see the fireplace, and the lighting will really make that happen.  The backyard lighting also gives off enough ambient light, so the backyard isn’t completely dark.  We want to be able to go outside and walk around the backyard at night without having to turn on all the exterior patio lights.

Lowes? Yep…They’re Everywhere

Here at Backyard Flare, we love to shop at Lowes Home Improvement because they have so much variety in their departments.   Follow them on Instagram at @loweshomeimprovement for great pics and design ideas.  For the lighting on our structure, we ventured to the outdoor lighting aisle and we picked up a Hampton Bay 150W transformer, a 100-foot spool of low voltage lighting cord, and six Hampton Bay LED lights.  The total was about $125, but you’ll see that it was worth every penny.

Backyard Lighting Installation

So, let’s get into the installation method.  To understand low voltage lighting, it is important to know that it’s like powering a light bulb with a battery.  A transformer will plug into a wall outlet, but the alternating current from the outlet will be converted in the transformer to direct current, like a battery.  The 100-foot power cord is attached to the back of the transformer like you would attach speaker cord to a receiver, only a screw driver is used after the ends of the wires are stripped. 

We routed the cord to the structure, and it entered on the back-left side.  We ran it through the structure, cutting grooves into the tops of the cinder blocks for channels where necessary.  The cord ran everywhere we wanted lights, and then it exited the back-right side of the fireplace.

Light Positioning

Low voltage lighting cord in a DIY outdoor fireplace. LED lighting and cinder block
Run the power cord through the structure by cutting grooves into the block.

Once we figured out exactly where we wanted the lights, we used a 3/8” masonry drill bit and drilled holes big enough to pass the LED light connector through the block.  Inside the block, the lights’ push pin connectors were attached to the power cord and… we had light.  The lights were attached to the front of the structure using wall anchors in the block.  To install the wall anchors, we drilled more holes using a ¼” masonry drill bit.  It’s just like adding them to drywall, but with a little bit more dust. 

We made sure to add a light on the inside of each storage void too so the voids would be back-lit.  It added a lot of appeal to the look of the structure and sure made a huge impact at night.  The addition of light to an outdoor fireplace or kitchen is super simple and we know that you can do it.  We sure hope this helped you out and that it eased your hesitation to add lighting to your structure or backyard.  If you’re interested in building your own DIY outdoor fireplace or outdoor kitchen, visit us at Backyard Flare for the best and most comprehensive outdoor construction plans on the market. 

Show Us What Your Lighting

We would love to see some of your outdoor lighting.  Please send pics of your projects to dan@backyardflare.com.  Thanks for reading, and I hope you learned something here.  Until next time, have fun on your outdoor projects and happy building.

Dan Heston
Backyard Flare, LLC
Tucson, Arizona
www.backyardflare.com
www.diyoutdoorfireplaces.com
520-269-9740

3 Ways to Improve Your Backyard

Check Out Your Backyard

Okay, so the weather is improving right?  Well, at least in a lot of areas it is.  It will be time for some outdoor attention at your house.  Your backyard and even your front yard will be begging for some kindness, and there are a few things you can do to make it look fantastic.  Here are three things you can do to add appeal to your outdoor space.

Let’s Get Busy

  1. Clean up the clutter and dirt. I can’t stress this enough.  Clutter and stuff laying around makes a space look messy.  Whether the clutter is toys, yard tools, or just a pile of pool towels, picking it up and putting it away will make a huge impact.  That’s where I always start.  I address the easy stuff first.  Now you’ll be able to address the horizontal surfaces of the backyard, the patio, a table top, etc.  Get a wet rag and wipe off.  Step one finished. 
  2. Trim your bushes and trees.  I have a palm tree and a lemon tree in the back corners of my backyard.  At times, the palm tree will have one or two hanging down and they will be starting to dry and turn brown.  These low hanging nuisances are easily trimmed with a pole saw and it changes the look drastically.  This palm stands like royalty behind my swimming pool waterfall, so when it looks trimmed and tidy, it makes a huge difference.  The lemon tree blooms constantly here in Arizona, so we have to cut off branches that almost touch the ground under the weight of the fruit.  We pick the lemons and then trim some of these low hanging branches, transforming the underside of the tree.  Step two finished. 
  3. Pick your weeds.  Here in Arizona and in many areas in the southwest, we have rocks in our backyards.  I guess you can say we don’t really have yards as most would define them…grass.  When the rainy season arrives, I swear my neighbor throws handfuls of weed seeds over the wall, while snickering like the Grinch.  Then he waits until the weeds grow and laughs as I address the problem.  By picking weeds, I get back to the clean and organized look of a rocked backyard space.  It’s amazing how much better it looks.  Step three finished.

Now Get Started

By doing these three simple things, I get my backyard to a clean, organized, and welcoming oasis, worthy of a party.  The beauty is that it doesn’t cost me anything other than a bit of sweat equity to transform my backyard.  Perform this three-step ritual a few times a year and your backyard will continue to impress all who venture there.

By doing these three simple things, I get my backyard to a clean, organized, and welcoming oasis, worthy of a party.  The beauty is that it doesn’t cost me anything other than a bit of sweat equity to transform my backyard.  Perform this three-step ritual a few times a year and your backyard will continue to impress all who venture there.

Hopefully You’re Inspired

We hope you will use these quick and easy steps to work on your outdoor backyard presence.  Send us before and after pictures of your outdoor space, cluttered and then clean.  We would love to share in a separate blog post how our readers are making their backyards an extension of their home lives.  Send pics and your story to dan@backyardflare.com and thanks for reading and we hope to hear from you.

Dan Heston
Backyard Flare, LLC

DIY Outdoor Fireplace and Concrete Pads

Concrete or Dirt? That is the Question

cDIY Concrete slab in backyard with grass wood
Concrete slab is ready for cinderblock.

The other day my phone rang and it was a customer of Backyard Flare that had purchased a DIY construction plan for the Pima II design.  This customer was looking for information about whether he needed to build the fireplace on a concrete pad or whether he could just build it on the dirt.  This question comes in quite often so I wanted to address it again.  Concrete pads are necessary for a masonry outdoor fireplace.

Where You Live is Important

DIY concrete pad deck level outdoor fireplace
Finished concrete is ready for block work

Think about all the places you have been and the ground you have walked on.  There’s Arizona with ground so hard that it almost takes a jack hammer to dig down a couple inches.  Then there’s Florida with gorgeous sandy beaches, but that sandy soil reaches inland too.  You have the northeast states that have frost lines so deep, that it’s a wonder that it ever thaws out. And we can’t forget the northwest that gets a lot of rain that could create washout conditions.

There is our dilemma with phone calls relating to how thick or whether a concrete pad is necessary.  Even here in Arizona, I always build my outdoor structures on concrete.  This is for peace of mind so if there is any ground settling, the structure will hopefully be okay.

If a masonry built structure settles, and it has been built on a running bond (stair step) block pattern, the cracking will look like a stair step going up.  The blocks will often separate at the seams, not crack.  This is not the way you want your outdoor structure to end up, because you spent your hard labor to build it.

What should you do?

DIY outdoor fireplace, stone seating
DIY outdoor fireplace on new poured concrete pad.

Do it right from the beginning and pour some concrete. Support that structure and keep it from settling and cracking.  Now you say, that’s all fine and dandy, but how thick does the concrete need to be? There’s an issue with that portion of the concrete pad question in that there is no “one answer” to that question.  There is no recommendation that we can give you because your geographic area and soil will dictate the answer.

Remember all the different soil types we cited a few paragraphs ago?  There are so many variables that exist that will need to be addressed and recognized before a concrete pad thickness answer can be formulated.  Our advice is to seek out some professionals in the concrete industry and ask.  Go to Home Depot or Lowes and see if there is a person who used to pour concrete for a living that is working there in retirement.  They are sometimes a wealth of information.  Go to the internet and search for recommendations based on your soil type and geographic area.  Again, lots of information.

Test Time

So, what have we learned?  I always recommend a concrete pad for an outdoor masonry built fireplace or kitchen.  There is no hard and fast recipe that applies to everyone that they should follow to pour the pad, so go find your local resources.  They’re out there.

If you would like to discuss your backyard outdoor fireplace or kitchen and would like to learn more about the DIY world we love so much, visit Backyard Flare.  We can help make it a reality, saving you thousands of dollars.  Give your backyard a face-lift and beautify your outdoor space.

Thanks for reading and as always, happy building.

Dan Heston
Backyard Flare, LLC
Tucson, Arizona

You Can Do It

Feeling Apprehensive?

You can do it!!!  I remember receiving a phone call from Shelley who said she lived in New Jersey.  Shelley explained to me that she was single, in her sixties, and that she lived on a piece of property that had a small creek running through it down the hill from her backyard.  Shelley explained that she really wanted an outdoor fireplace but that she was super apprehensive about doing it herself.  Because of the limited knowledge she had about masonry construction, Shelley was concerned with her age and ability to do the physical labor.  I asked her some questions about her ability to lift and explained what the project would require.

Shelley Said Yes to the Outdoor Fireplace

We talked it through, and by the end, Shelley was ready to take on the challenge.  A DIY outdoor fireplace does not have to be intimidating or seem out of the realm of possibility if you have the right tools, preparation, and a good plan.  A construction plan that is…something that will take the guess work out of the project.  If you are physically able to lift a 60-pound bag of mortar, or if you have someone who can do it for you, that’s the first step.  If you’re willing to step into a work site with an open mind, then you too can do what Shelley did.

DIY stone outdoor fireplace
Talk about charming. This backyard patio was transformed into a great sitting destination.

Shelley built her very own DIY outdoor fireplace and although it was small, it made a huge impact in her backyard and it is definitely a focal point.  Do you agree, and do you think you want to join the DIY world?  She had us do some special design work to make the fireplace what she wanted.  We angled the chimney on all sides and designed the firebox to be low on the structure, which gave it a neat look.

It Was Fun According to Shelley

DIY outdoor fireplace plan
The fireplace sits on the edge of the patio with the treeline in the background.

After building the structure, Shelley said that she took her time and didn’t push hard to get it done quickly.  She said that if she could do it in her sixties, then anyone could do it.  This is a testament that most people have the capability to do more than they truly think.  There is an inner construction worker in most of us.  Give your insecurities to us and let us provide you with a DIY construction plan.  If you follow it, you to will be able to build a beautiful outdoor fireplace just like Shelley did.

DIY outdoor fireplace with fire
Shelley built her first fire and started making memories.

If you are wanting to learn more about the process of building a DIY outdoor fireplace, visit us online at Backyard Flare.  We know that you can do it and that we can help.  A construction plan may be exactly what you need to overcome the fear of building so you can DIY too.  Thanks so much for reading and we hope to hear from you soon.  Leave a comment and let us know if you think you’re up for a DIY project.

As always, happy building,

Dan

3 Ways to Improve

3 Ways to Improve the Look of Your Backyard

swimming pool umbrella palm tree flagstone planter
An uncluttered and clean backyard is a welcoming backyard.

Okay, I’m going to get right into it today.  Not need to beat around the bush here.  Your backyard…and mine…needs help probably.  Your backyard might be old, dated, tired, messy, and it needs a little “pick me up”, so why not get started?  There are quite a few things that you can do that will make a HUGE difference and at the same time not break the bank.  Here are 3 ways to improve the look of your backyard.

Start By Picking Up the Place

First, pick up the clutter.  If you’re like most of us, you have odds and ends laying around.  You may have a section of your yard that is dedicated to compiling the old car parts or the old bikes that haven’t been ridden in years.  Chances are that if you haven’t needed them in the past year (or five) you won’t need them at all in the future.  Collect them and put them on Craigslist so you can make a few bucks too.  Just cleaning up a cluttered corner will make a huge difference.

Unsightly Patio or Deck?

swimming pool patio umbrella fireplace deck planter
A clean backyard draws you in for an extended stay.

Second, sweep up the patio or deck area of your yard and then look up.  Are there spider webs hanging around the lighting fixtures or the underside of the patio cover?  Take down those spider houses with a broom and make a change up high.  Get a hose or high pressure sprayer and clean up the whole area that is attached to the house.  This includes patios, brick work, decks, patio covers, and even the back of the house itself.  You’ll be amazed at how much dirt your house holds onto.  A quick wash down may bring the color back to your home’s exterior too.

Time to Pick and Trim

Flagstone patio red door grill kitchen flowers
Cleaning low and high will make it look more inviting.

Lastly, pick the weeds growing in your flowers and trim your bushes and trees.  The branches and clippings will usually take a while to get rid of if your garbage can isn’t big enough to handle a lot, but the yard will sure open up.  Getting rid of low hanging branches and unwanted ground plants will make an immediate positive impact on the overall look of the yard.

The best part is that these three de-clutter and cleaning tasks are virtually free to do.  They shouldn’t cost you any money, just a little time and sweat equity.  In the end, you’ll have a nicer, cleaner, and more welcoming backyard area.

Who knows, your clean backyard may go on to inspire other projects.  Start small and work your way up to a finished backyard sporting an outdoor fireplace or outdoor kitchen.  You’ll love it in the end and you’ll marvel at the hidden gem that was under all that dirt and clutter.

Check Us Out

If you are interested in any construction plans for an outdoor fireplace or an outdoor kitchen, look no further than Backyard Flare.  We specialize in easy to follow DIY construction plans that will take virtually all the guess work out of the build.  Follow the plans, finish the structure, and begin relaxing in your backyard.

Call or text Dan at 520-269-9740 or email him at dan@backyardflare.com for additional info, special deals, and some fun discussion.  As always, have fun and remember, happy building.

DIY Outdoor Fireplace Review – PA

We Love DIY Outdoor Fireplaces

Hello again all you fellow DIY’ers and welcome to this edition of, “That Awesome DIY Fireplace” where we introduce a DIY homeowner, tell you what state they reside in, and show you how awesome they were at building their own DIY outdoor fireplace.

diy outdoor fireplace kits phoenix backyard masonry firebrick
Finished backyard party area complete with a DIY outdoor fireplace and outdoor pavilion, kitchen and bar.

Let’s go to the northeast, beautiful Pennsylvania, to introduce homeowner Mike.  Mike had a very cool outdoor pavilion space with a long entertainment bar, bar stools, outdoor kitchen; and it was party central.  To the side of that space, Mike had a bare corner concrete spot that begged for something like a fire structure.  In April 2018, Mike visited www.backyardflare.com, and picked his favorite design, the Phoenix fireplace.  He wanted a smaller footprint for the fireplace structure but something big enough to not feel dwarfed by the surrounding features, which were trees and a wrought iron fence just outside the corner of the concrete slab.

Construction Starts

diy outdoor fireplace kits phoenix backyard masonry firebrick
Rough build of Phoenix design DIY outdoor fireplace is done.

Mike started laying block, paying attention to the block layout and instructions of the construction plan. Before he knew it, Mike was a DIY mason who had never really tried to do a project of this caliber.  Mike stated that he just needed a little bit of help and that the construction plan was what he needed to give him the confidence to start.

Mike kept a super clean work site and made sure he didn’t let the mortar remain on his concrete pad for very long.  This made the final cleanup easier than it would have been, saving time and aggravation in the end.

Adding the Final Touches – Detail Work

When Mike was finished with the rough build, he started the lining of the firebox with firebrick.  This process was pretty quick and before he knew it, Mike was ready for the final veneer material.

diy outdoor fireplace kits phoenix backyard masonry firebrick metal art firebrick
Mike finished his DIY outdoor Phoenix design fireplace. Getting ready for a party.

Mike chose to cover his outdoor fireplace with a stucco finish.  Mike’s technique was to go with a smoother final finish.  The seating was covered with dark stone material giving a great contrast to the white color of the structure.

Mike added a smoke arrestor to the top of the chimney to catch and extinguish embers that tried to escape from the top.  With the fireplace facing right into the entryway of the outdoor pavilion, Mike’s party central area became even more stunning.

Mike added a very cool fire grate in the firebox and a piece of chain suspended metal art to the front of the fireplace.  With a raging fire, behind the fire screen, it is just gorgeous.

metal art fire screen DIY outdoor fireplace kits phoenix backyard masonry firebrick
Nighttime fire in Mike’s outdoor fireplace.

We Know Mike is Now a Mason

Mike told Backyard Flare, “your plans were fantastic”, and that he wasn’t a mason.  We beg to differ and debate that last statement.  We see what Mike did and with no previous masonry experience.  Mike, you’re a mason now and we’re very proud to include you into the Backyard Flare DIY family.

We sure hope you like Mike’s fireplace and that it inspires you to think about one of these fireplaces in your backyard as well.  It’s really not out of reach to achieve a stunning outdoor living space.  Mike said he wasn’t a mason, but we know it’s just the unknown.  We’ll help you through it.  If you have the DIY mindset, we can help you achieve greatness.  We have assisted hundreds of homeowners who are weekend DIY’ers, realize their potential to build fireplaces just like Mike’s.  You can do it too.

Thanks so much for reading about another great DIY fireplace build.   We’ll bring you more soon, and as always …happy building.

Dan Heston
520-269-9740


Five Ways to Make a Beautiful Backyard

Five Ways to Make a Beautiful Backyard

There are so many ways to make a beautiful backyard and so many different things to make it a ‘one of a kind’.  If a backyard was just a standard layout and everyone did the same thing, where would the fun be?  For as long as people have been living in houses, they have strived to create outdoor living spaces full of functionality and beauty.  Backyard popularity and the drive to create the perfect outdoor space has always been there, and I feel the things to build, construct, and add are more abundant now than ever.  So many options and so little time.  Here is Backyard Flare’s list of ‘Five Ways to Make a Beautiful Backyard’.

Outdoor Fireplace

Outdoor fireplace beautiful backyard
Outdoor fireplace with flagstone seating and stone veneer.

First and foremost, we love outdoor fireplaces and bang for your buck, they are amazing.  They seem to be the one thing outdoors that will bring you a massive return on your investment.  What you may spend a few hundred dollars on could gain thousands in return at time of sale.  Outdoor fireplaces are our bread and butter and it’s what we think about day and night.  We are always talking to DIY homeowners about different layout possibilities and available building footprints.  It seems like people are building fireplaces in spaces small and large.  Even places that seem to not work for a fireplace, people seem to build in.

Now, you don’t have to build a massive structure to have it be the focal point.  If you position your fireplace in a way that the flame is visible from inside your house, it becomes a very cool feature in that you can build a fire for ambiance.  It’s so peaceful to have a fire crackling and you don’t even have to be sitting next to it to enjoy it.

Outdoor Kitchen

Outdoor kitchen beautiful backyard
Outdoor kitchen with drop in grill and access doors.

Holy cow, who doesn’t like to grill?  I don’t know anyone right off the top of my head.  Most homeowners will have a small Weber grill or a cheap standalone grill on their back patio.  Over time, it will probably be in a state of rust and full of cobwebs.  It’s probably because the backyard wasn’t welcoming.  It wasn’t a place where the homeowners wanted to spend their time.  Ah, but build a nice outdoor kitchen and it becomes a destination… a “cooking” destination.

beautiful backyard
Outdoor kitchen with black granite countertop.

Adding an outdoor kitchen, can be as simple as encasing your existing standalone grill, with countertop to the sides.  More extravagant structures may have a raised bar area with stools, a refrigerator, a sink, or even a pizza oven added.  The possibilities are endless and will de

pend on how much room you have to work with.  The layout could be rectangular, built like an “L” shape, or even a “U” shape.  Drop in grills can be purchased for reasonable costs if you look around enough, and you can opt for propane or natural gas.  Building a sunken pit into your structure could even accommodate the use of charcoal, which in our opinion tastes wonderful.

Outdoor Lighting

beautiful backyard
Lighting adds a great look to any fireplace

Spend some time looking into your backyard at night and think about where you would add low voltage lighting.  Adding a transformer and some perimeter lights in the yard can add a lot of character.  Upward lighting on trees and bushes can add visual depth that all but fades away at night.

Outdoor lighting fireplace beautiful backyard
Lighting along the front of a fireplace hearth.

If you add the lighting to a structure such as a fireplace or outdoor kitchen, you will bring those structures to a focal point.  Many homeowners will incorporate lighting throughout their entire yard and through structures, having it illuminate all at the same time.  This is a really elegant look.

Lighting outdoor kitchen beautiful backyard
Lighting brings out the beauty at night on the outdoor kitchen.

Potted Plants

Potted plant beautiful backyard
Colorful flowers in a white potted and textured pot.

The right pot or three with colorful flowering plants puts the finishing touch on many backyards.  The flowers provide a visual pop of color not usually found anywhere else in a backyard.  With colorful pots or textured pots, you can add lots of cool looks.  Change the flowers each season for different colors or type of plants.  If you add a drip line into the pot, you’ll be able to minimize the maintenance time and possibly forgetting to water the plants.  They don’t tend to live very long if they don’t get water.

Shaded Seating

Adirondack chair beautiful backyard
Comfy Adirondack chairs begging for usage.

Last on our short list for a beautiful backyard but not even close to being the least important, add some shaded seating to your outdoor space.  On cool mornings, I will grab a cup of coffee and sit in my Adirondack chair with my feet propped up.  This chair lives under my patio cover, adding lots of protection from sun fading.  When I want to venture out from the confines of the patio cover, I can relax in one of my teal colored padded chairs.  The rectangular shaped glass table sports a teal colored umbrella providing great sun protection for most of the day.

Outdoor chair beautiful backyard
Teal padded chairs and umbrella around glass table.

Just adding a few different places to sit comfortably in your backyard will offer the look of a welcoming area.

Over time, with these few things added or built in your backyard, you will have transformed your outdoor space and you will hopefully have a beautiful backyard that begs for usage.  Lots of usage.  And who knows, maybe you’ll add all five recommendations, completely renovating it to the envy of all your neighbors.

If you have any questions about any of the suggestions, or if you want to build an outdoor kitchen and/or outdoor fireplace, visit www.backyardflare.com.  We’ll help you with your project and provide you with a very comprehensive DIY construction plan.  Most if not all the guesswork will be gone.

The Perfect S’more

The Perfect S’more

Is there a day that goes by where you don’t contemplate the perfect S’more or the ingredients that it takes to construct one?  I don’t think so, as these quandaries are what keep lots of people up at night.  I often lie there for hours at a time, beads of sweat collecting on my forehead, while I count marshmallows and small squares of chocolate.  Did I break the graham cracker perfectly, so the two sides are equal? Is the marshmallow gooey enough?  The perfect S’more…oh my…so much to consider.

Funny to think about, and “no” I really don’t drive myself into crazed sleeplessness over something as simple as a S’more.  Having said that, I thought this would be an amusing blog post to write about how to build the perfect S’more and to get some feedback on what constitutes your perfect S’more.

So Many Questions

What is the perfect roast level of the marshmallow?  How much chocolate is necessary for these tasty and crunchy dessert sandwiches?  These seem like crazy questions and an over analyzation of a simple sweet snack, but really think about what you do when you build the perfect S’more.  You make a lot of micro decisions when you are in the S’more frame of mind.

Marshmallow on a stick
Marshmallow on a Stick

You will usually impale a helpless marshmallow on a skewer or metal stick and hold it over the open flame without mercy.  The question lies; however, do you hold it just outside the flame or catch it on fire?  Do you require a golden brown slow roast, or do you prefer the stick mounted flaming marshmallow ball like a torch used by Indiana Jones?  How long do you let the marshmallow burn before you blow out the flame?  Is there a point when too much burn is too much, and intending to start over, you resort to flinging the sticky mess off the stick for the dog to devour?

Chocolate
Perfect Milk Chocolate

Do you prepare your graham cracker and chocolate before the marshmallow torture or do you yell at others in panic to get your cracker and chocolate ready?  If you’re like most, you do the latter.  You were so focused on the marshmallow torture and open flame that you “tunnel-visioned” yourself out of paying attention to the chocolatey crunchy portions of the sweet treat. Remember that your failure to prepare the cracker and chocolate should not constitute an emergency on the part of your family and friends.

S’more (Some More) Questions

Do you forget and leave the graham crackers open, so the dog gets into them, “Pavlov Dog Style”?  Do you viciously eat a good portion of the chocolate beforehand, and then realize that there may not be enough to go around?  Are you the one that puts the hot and sticky marshmallow skewer down on the chair in haste not realizing that it will glue itself to the seat cushion?

The Perfect S'more
Building the Perfect S’more

With so many things to consider, should we as humans even be stepping into the tough decisions necessary to build the perfect S’more?  Is it better done as a team event?  This blog post has not done anything except make me hungry for a S’more and nervously anxious at the thought of building one.  I hope the next time you decide to make the perfect S’mores that you talk it over first with your guests.  Think about logistics and have a game plan before indulging in such glorious delicacies.

S'more
S’more Time Anyone?

Or just have fun.  S’mores are a great way to share memories with family and friends.  Leave a comment and let us know some of your S’more memories or thoughts.  We’d love to hear them.

Build Your Own Marshmallow Fireplace

Please visit www.backyardflare.com if you are interested in a DIY fireplace or outdoor kitchen construction plan.  They are perfect places to build a fire necessary for your marshmallow torture.  Thanks for reading, and as always…happy building.

Dan