DIY Outdoor Fireplace Review – AZ

DIY Outdoor Fireplace Review

Hello all you DIY’ers and welcome to this edition of, “That Awesome DIY Fireplace” where we introduce a DIY homeowner, tell you what state they reside in, and show you how awesome they were at building their own outdoor fireplace.  They do it all by themselves with a little help from us here at Backyard Flare.

Let’s Go Down to Arizona

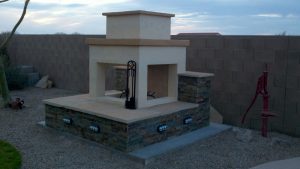
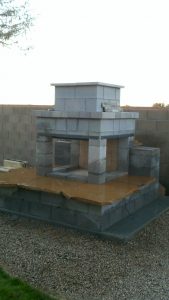
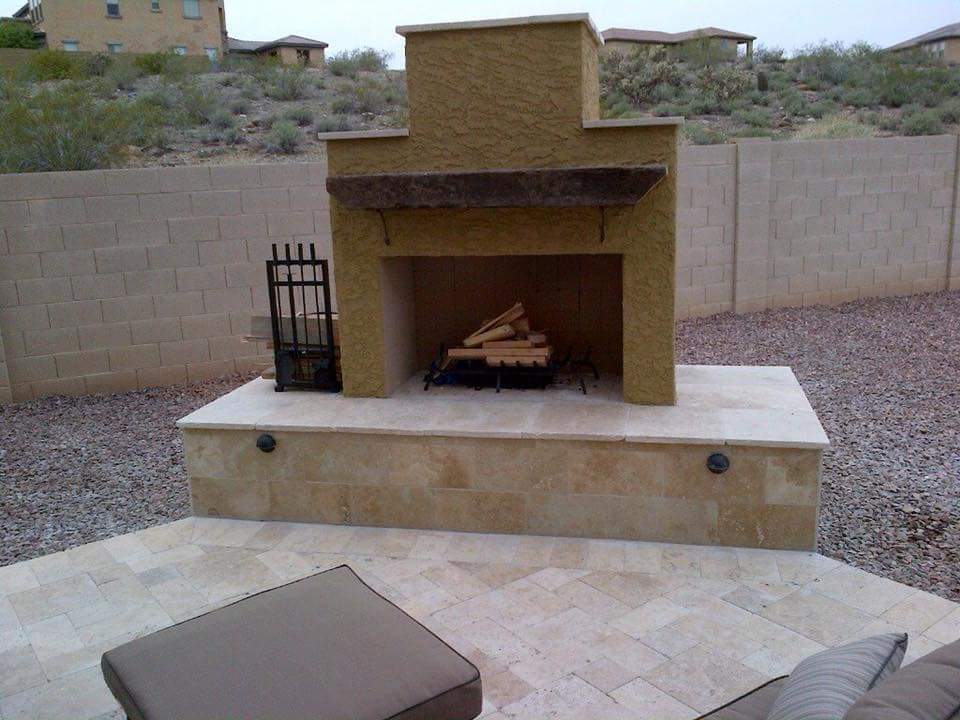
We venture not far from Backyard Flare headquarters in Arizona to introduce homeowner Jason.  A DIY guy who decided to build the popular Pima II fireplace design using the proven Backyard Flare outdoor fireplace construction plan.

Pima II outdoor fireplace stucco tile
Gorgeous Pima II outdoor fireplace built by Jason in AZ.

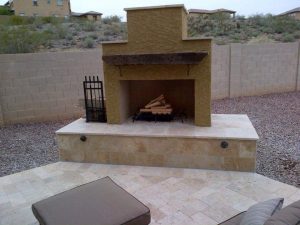
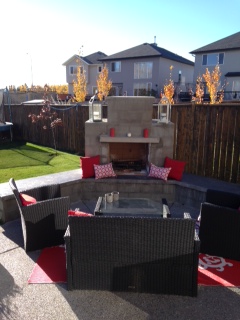
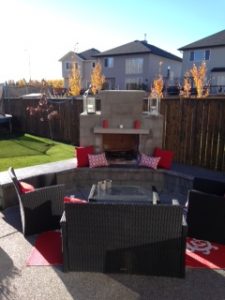
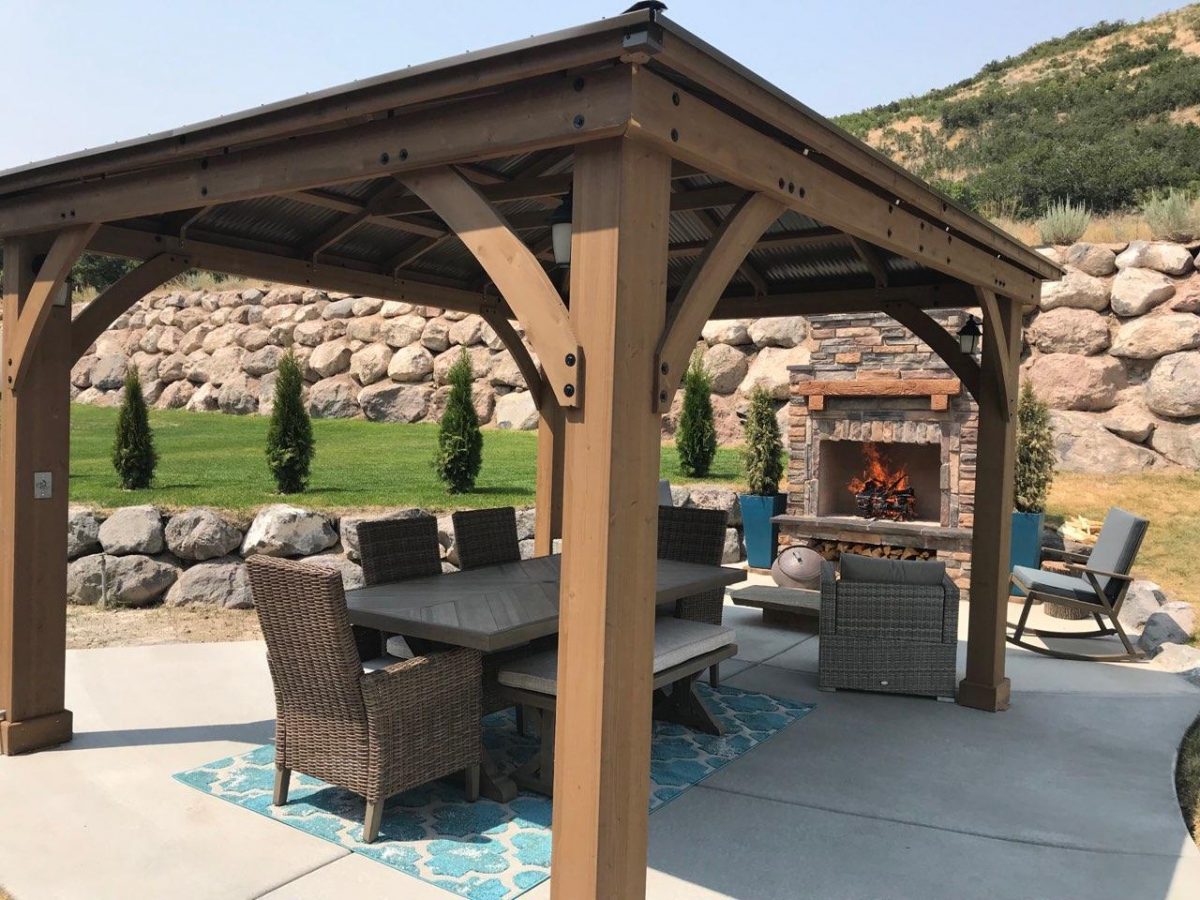
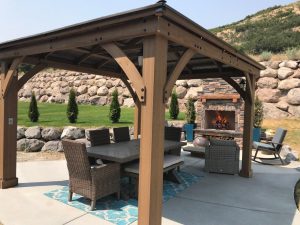
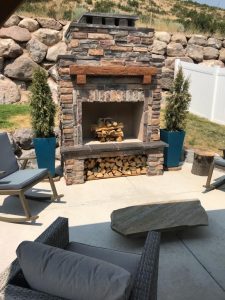
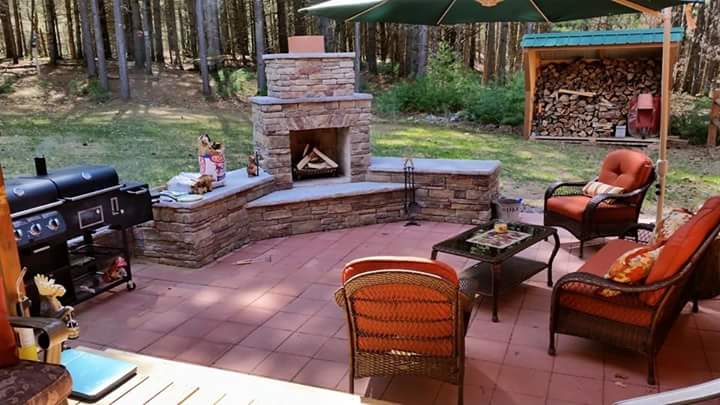
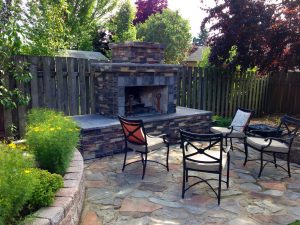
Jason has the traditional landscape rock in his yard as most of us do in southern Arizona.  A stunning tile patio was built with a perimeter tile of the same type.  The Pima II fireplace is built on a 45 degree angle to the patio.  The fireplace measuring just wider than eight feet is a perfect addition to this space and with wrap-around seating, lots of horizontal surface is available.

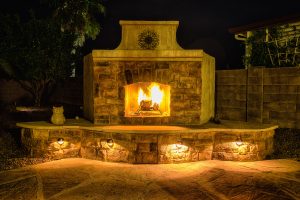
To keep continuity, Jason used the same tile for the patio to wrap up the hearth of the outdoor fireplace.  This tile then extends to the horizontal seating surface, which gives it a great finished and well thought-out look.  Jason added electrical line for low voltage lighting in the hearth, giving the fireplace a subtle look at night even when it’s not being used.  This outdoor fireplace is backyard furniture for sure, providing a great focal point.

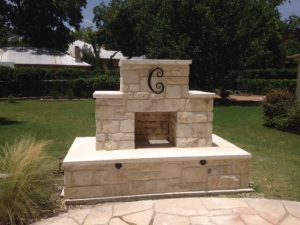
Stucco Is a Cost Saving Veneer Choice

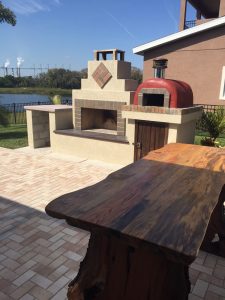
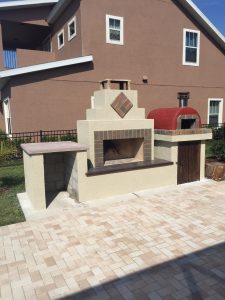
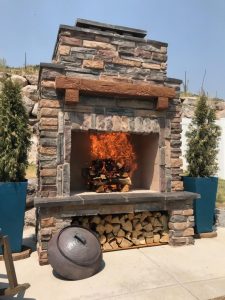
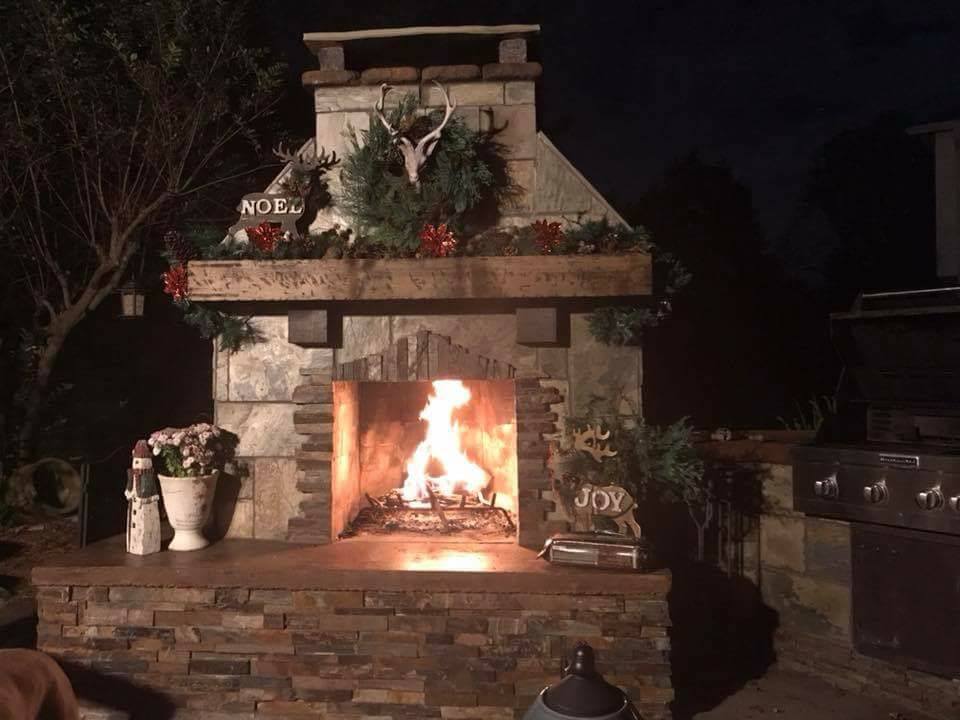
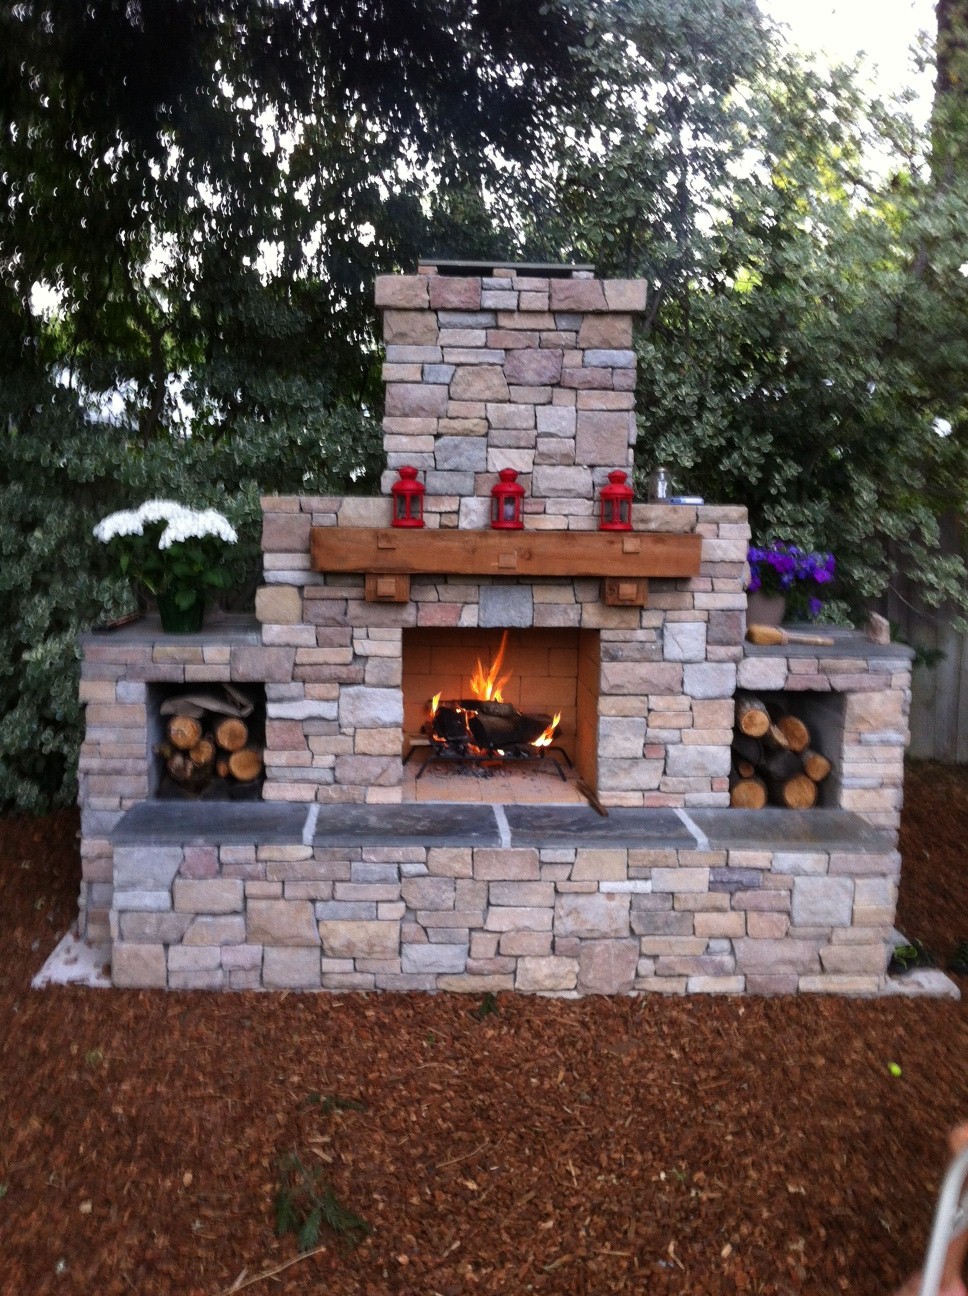
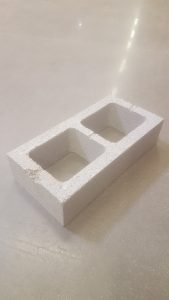
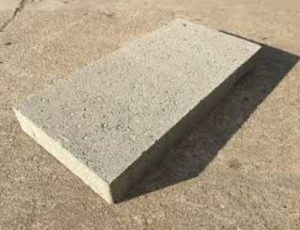
For the main vertical firebox and chimney sections, Jason elected to use stucco as the finish material.  In Arizona, as with many other states, this matches the home’s exterior, which also keeps the theme going throughout.  With the texture and darker earth tone paint, it blends really nice with the natural desert landscape seen behind Jason’s block wall.  The horizontal sections of the chimney and the top were covered with matching tile, which was saw cut with a diamond blade.  Super simple by the way.

Pima II outdoor fireplace with lights and fire
When the sun goes to sleep, the lights come on and the fire burns. how beautiful.

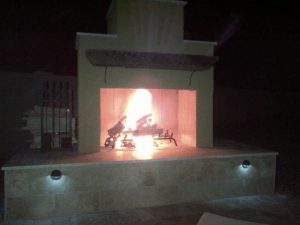
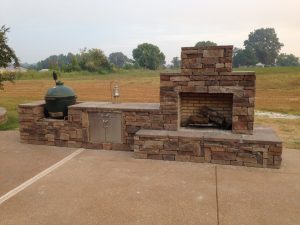
Jason wanted to add some pop, so he finished the front of his outdoor fireplace with a gorgeous piece of distressed wood for his mantel.  Wanting to match other elements, Jason used metal brackets underneath the wood.  These metal brackets match the metal fireplace tool set and the metal fire grate in the firebox.  Jason got ready and stacked a pile of pine in the firebox, ready for a great nighttime burn.  I’m sure the neighbors stare out their back doors at the glow from the chimney and they smell the sweet smell of burning pine.

Help is Available

How has this outdoor fireplace inspired you?  Are you ready to build your masterpiece like Jason did and transition your backyard space?  Backyard Flare can help you with any worries or concerns of the masonry world, and even with design help.  We have assisted hundreds of homeowners who are weekend DIY’ers, realize their potential to build outdoor fireplaces just like Jason’s, and you can do it too.

Thanks so much for reading about another great DIY outdoor fireplace build.   We’ll bring you more soon, and as always …happy building.

Dan Heston

DIY Outdoor Fireplace Built for Cheap

CAN I BUILD MY OWN DIY OUTDOOR FIREPLACE?

DIY outdoor fireplace
Gorgeous light colored veneer and lighting make this a very cool DIY fireplace.

If you’ve gotten as far as thinking you want an outdoor backyard fireplace, then the next obvious thought should be on the construction method.  To lay it out as simply as possible, either you build it yourself or a contractor builds it for you.  And I’m not talking about a prefabricated fireplace where you stack a few pieces and have a fire an hour later.  I’m talking about a permanent cinderblock structure with all the amenities such as seating, shelving, lighting, veneer, firewood storage, etc…  Frankly a DIY outdoor fireplace can be built for cheap.


Realistic Contractor Concerns

DIY douglas outdoor fireplace decor
Great DIY corner designed fireplace all decorated and ready for a party.

When you elect to have someone else build your fireplace, you will pay for two specific things.  They are materials and labor, the latter of which will be most of your cost.  Is it easier to have someone else sweat while lifting block and splattering mortar?  Absolutely, but you must then step back and look at the alternative.  You!  Have you given much thought to building your own fireplace?  If the answer is no or even maybe, let me give you some things to mull over.  Just one of them may sway you or the entire list may persuade you that a DIY project may be the way to go.

First off, let’s look at the project as a whole.  Building on a large scale with construction plans can be very enjoyable and rewarding.  Think of it as stepping out on a new adventure with a lot of the guesswork taken out because of the plans you hold in your hand.

Some of us have a small perfectionist attitude making it difficult to sit back and watch someone build something for us, knowing we would do it differently.  I want to build to my taste; with my ideas in mind.  Contractors, many times, provide building crews that are only interested in getting done in order to move on to the next project.  In the end, it’s all about cash flow.  Do they care about the final look of something they may never see again, but that you will have to look at everyday for quite some time?  Maybe, however, I prefer complete control of my projects and how they’re built. That’s why I love DIY and that’s why I always try to persuade others to jump on the DIY train.  It’s a fun train.

It may seem small, but you also need to consider whether you will want contractor building crews in your backyard all day for the duration of your project.  They always seem to show up too early or not at all.  Then there’s the problem with the mess that is always left each day.

Think About a DIY Project

Pima DIY outdoor fireplace LG Green Egg kitchen grill
DIY Pima II fireplace with a great outdoor kitchen attached.

When you build yourself, you control the pace of the project.  Some DIY warriors can complete a fireplace project in as few as 9-10 days while still holding down a job.  Others will spend a few weeks to construct their fireplace working only a couple hours here and there.  When you build, it’s up to you how you structure your timeline.

If the previous reasons haven’t convinced you to build your own fireplace then think about the money you could save by not soliciting the services of a contractor.  As mentioned before, most of your cost with a contractor will be for labor.  It is estimated that you can take the total cost of your materials and multiply it by 5-6 to give you an approximate labor cost.  With this example, if you were to spend a total of $1,000 for materials, then the labor could cost as much as $5,000-$6,000, for a grand total of $6,000-$7,000 for a completed fireplace.  That’s expensive!

Not only are you paying for labor, but at times the contractor will make money on materials too. In other words, they will charge you more for each block than what it will cost for you to go to your own home improvement store to buy them.  You’ll only know that though if they provide you with an itemized list of materials and labor broken down.

Nothing is set in stone with how fireplaces have to be built, or even how much you have to pay.  The truth is, however, that you will save money if you step out on faith and build your own outdoor fireplace.  Think about how you’ll feel when you finish your own DIY outdoor fireplace project, knowing that you could have spent so much more.

Look No Further Than Backyard Flare

If you’re looking for assistance in the form of DIY outdoor fireplace construction plans, please visit Backyard Flare, LLC at www.backyardflare.com.  We have many fireplace designs that we’re sure would look great in your outdoor living space.  We would love the opportunity to work with you to make your backyard the talk of the neighborhood.  We’ll give you the knowledge needed and be there for you along the way.  Thank you for reading and we hope to hear from you.

As we always say …happy building.

Please follow us on Instagram and Facebook, as we have lots of cool DIY outdoor fireplace photos and videos added almost every day.  Contact Dan with any questions.

Dan Heston
Backyard Flare, LLC
Tucson, Arizona
dan@backyardflare.com
www.backyardflare.com
www.diyoutdoorfireplaces.com
520-269-9740

DIY Fireplace Reviews – FL and UT

It Started in Florida

Let’s talk about two beautiful DIY fireplaces built by the same people, years apart, in two different states.  These fireplaces transformed their backyards into such welcoming areas.  But first, let’s meet our player

outdoor fireplace pizza oven DIY
Combo fireplace and pizza oven DIY

s.  Husband and wife team, Marko and Kelly, were customers of Backyard Flare years ago and they built a stunning DIY outdoor fireplace and pizza oven combo when they lived in sunny Florida.  They used a Backyard Flare construction plan and the backyard was positively changed forever.  The structure drew lots of accolades from Backyard Flare followers and it was definitely a beautiful, one of a kind, fireplace.  It’s easy to see why so many people were raving about it.  It was so different than most.

DIY outdoor fireplace pizza oven
The red color on the oven adds so much to this design.

I have seen lots of pizza ovens and most are earth tone colors.  Marko and Kelly decided that a bold and deep reddish color would look great on their oven instead of keeping it like everyone else’s ovens.  I have to say, I was impressed with the color choice. It worked so well with the surrounding area and it brought a pop of color not seen anywhere else in their yard.  Coupled with the dark tones of the accent tile and the light color stucco, it was a hit.  I’m sure it made a huge impact in the sale of their home, bringing in more money on the sale, than they would have had with a plain Jane backyard.

And then They Moved

Now fast forward a few years, with Marko and Kelly relocated to the great state of Utah.  They bought a new home and needed to bring the backyard up to a standard they were used to.  The new fireplace structure, although smaller than the Florida fireplace, is no less impressive.

Utah outdoor fireplace diy pergola
Utah backyard with DIY fireplace and pergola

The fireplace sports a square topped firebox and an equally wide firewood storage void under the hearth.  Natural stone is on the horizontal surfaces, including the top of the fireplace.  Keeping with the earth tone feel, Marko and Kelly added a wood mantel and a beautiful faux stone veneer.

outdoor fireplace diy wood mantel storage
This fireplace sports a wood mantel and a firewood storage void.

It’s not just the fireplace that brings the total feel to the backyard.  The natural flagstone table in front of the fireplace draws the earth tones to the patio. A huge pergola with a large outdoor table is the perfect place to have an outdoor dinner or just a place to sit and really relax. The white picket fence in the background with the bold green grass, adds contrast to the whole picture.  The large boulder wall behind the fireplace and the slight hill with natural vegetation adds to the rustic look as compared to the veneer on the fireplace.  The bold color on the pots to the sides of the fireplace make the structure appear to be wider than it is.

DIY outdoor fireplace fire
In action with a raging fire.

This is such a beautiful fireplace and I am sure this backyard will create lots of great memories.  Great job Marko and Kelly.  We are sure you will continue to enjoy your backyard paradise and we hope you will continue to share your fireplace with us.

Kudos Go Out

Special thanks to Marko and Kelly for sharing these great photos with us and allowing us to share them with the world. Also, thank you to all our faithful readers out there and to those who just found us.  We can help you with your outdoor fireplace dream.  Visit our website at www.backyardflare.com for some great inspiration and fireplace ideas.

Check us Out on Social Media

Please follow us on Facebook and Instagram for lots of cool info and fun pics and video.  Thanks for reading and as I always say…happy building.

-Dan

The Perfect S’more

The Perfect S’more

Is there a day that goes by where you don’t contemplate the perfect S’more or the ingredients that it takes to construct one?  I don’t think so, as these quandaries are what keep lots of people up at night.  I often lie there for hours at a time, beads of sweat collecting on my forehead, while I count marshmallows and small squares of chocolate.  Did I break the graham cracker perfectly, so the two sides are equal? Is the marshmallow gooey enough?  The perfect S’more…oh my…so much to consider.

Funny to think about, and “no” I really don’t drive myself into crazed sleeplessness over something as simple as a S’more.  Having said that, I thought this would be an amusing blog post to write about how to build the perfect S’more and to get some feedback on what constitutes your perfect S’more.

So Many Questions

What is the perfect roast level of the marshmallow?  How much chocolate is necessary for these tasty and crunchy dessert sandwiches?  These seem like crazy questions and an over analyzation of a simple sweet snack, but really think about what you do when you build the perfect S’more.  You make a lot of micro decisions when you are in the S’more frame of mind.

Marshmallow on a stick
Marshmallow on a Stick

You will usually impale a helpless marshmallow on a skewer or metal stick and hold it over the open flame without mercy.  The question lies; however, do you hold it just outside the flame or catch it on fire?  Do you require a golden brown slow roast, or do you prefer the stick mounted flaming marshmallow ball like a torch used by Indiana Jones?  How long do you let the marshmallow burn before you blow out the flame?  Is there a point when too much burn is too much, and intending to start over, you resort to flinging the sticky mess off the stick for the dog to devour?

Chocolate
Perfect Milk Chocolate

Do you prepare your graham cracker and chocolate before the marshmallow torture or do you yell at others in panic to get your cracker and chocolate ready?  If you’re like most, you do the latter.  You were so focused on the marshmallow torture and open flame that you “tunnel-visioned” yourself out of paying attention to the chocolatey crunchy portions of the sweet treat. Remember that your failure to prepare the cracker and chocolate should not constitute an emergency on the part of your family and friends.

S’more (Some More) Questions

Do you forget and leave the graham crackers open, so the dog gets into them, “Pavlov Dog Style”?  Do you viciously eat a good portion of the chocolate beforehand, and then realize that there may not be enough to go around?  Are you the one that puts the hot and sticky marshmallow skewer down on the chair in haste not realizing that it will glue itself to the seat cushion?

The Perfect S'more
Building the Perfect S’more

With so many things to consider, should we as humans even be stepping into the tough decisions necessary to build the perfect S’more?  Is it better done as a team event?  This blog post has not done anything except make me hungry for a S’more and nervously anxious at the thought of building one.  I hope the next time you decide to make the perfect S’mores that you talk it over first with your guests.  Think about logistics and have a game plan before indulging in such glorious delicacies.

S'more
S’more Time Anyone?

Or just have fun.  S’mores are a great way to share memories with family and friends.  Leave a comment and let us know some of your S’more memories or thoughts.  We’d love to hear them.

Build Your Own Marshmallow Fireplace

Please visit www.backyardflare.com if you are interested in a DIY fireplace or outdoor kitchen construction plan.  They are perfect places to build a fire necessary for your marshmallow torture.  Thanks for reading, and as always…happy building.

Dan

Vintage and New Outdoor Fireplaces – They’re Everywhere

outdoor stone fireplace, house is gone
What stories can this AZ fireplace tell?

Outdoor Fireplaces – What History Can They Tell?

I have been traveling quite a bit lately.  Additionally, I have been fortunate enough to have gone to some really neat locations.  Just a few visited in the past few months are Harpers Ferry, West Virginia, Winterpark, Colorado, El Paso, Texas, and the Grand Canyon in northern Arizona.  When I go to a new place, I love the opportunity to walk around and explore the old and new.

One thing that seems timeless is the fireplace built in an old house lot.  They still stand, absent the house or an old cabin.   I love walking around these towns and noticing great outdoor fireplaces built in new areas, at shopping malls, at apartment complexes, and even outdoor patios of fancy bars and restaurants.

Vintage Fireplace
Old fireplace in a WV city park

The old vintage stone fireplaces through their cracks and stains can sometimes tell a silent story, letting your mind wander at how much they have seen and been witness to over the passing years.  Who graced the hearth and seating around these graceful structures?  What conversations and decisions took place in front of the fire?

Imagine the fireplaces in the homes and parks of West Virginia that kept home owners and those fighting in the civil war warm.  They used them every day during the harsh winters.  Imagine the fireplaces in the Grand Canyon lodges that kept tourists warm during the 1930s when the park was really becoming a destination.  Now those are old fireplaces with stories too abundant for us to even imagine.

How About the New?

Shopping center outdoor fireplace
Fireplace spotted in an AZ shopping center

But let’s think about how we can create our own memories and stories around an outdoor fireplace.  When you spot an outdoor fireplace at an outdoor shopping center, stop and check it out.  Sit on the hearth and if it is providing heat, enjoy it for a few minutes.  Relax and even grab a drink if you have time.  Become the history that can be told by that fireplace 100 years from now.

Pay attention to where you are and if you see an old or even a new fireplace that needs to be in a photograph, take a pic and send it to us at, dan@backyardflare.com.  Let us know where and how you found it.

Thanks and as always, happy building!

Decorate For the Season

Create Your Christmas Fireplace

Oh my…the Christmas season is in full swing and decorations are being added to everything indoors.  Why not add some spice to the outdoors too?  Add some small things or even some big things to your fireplace and make it spectacular.  Some people add great decor to their structures and turn them into a “Christmas Fireplace”.  We have seen some spectacular outdoor fireplaces this 2017 Christmas season that we just have to share.

Outdoor Fireplace Christmas
Amazing reds and greens make this outdoor fireplace pop with the Christmas spirit.

Does it get much better than a decorated outdoor structure with signs of noel and joy?  I don’t think so.  Check out the mantel covered in red berries and a green pine wreath above it. With the vases full of flowers, this fireplace makes me want a warm glass of cider or some hot chocolate with extra marshmallows.

Outdoor Fireplace
Beautiful DIY outdoor fireplace decorated for the Christmas season

It doesn’t take much to turn an already gorgeous outdoor fireplace into a seasonal masterpiece.  Another wreath makes this fireplace step right into the Christmas season and the lighting overhead adds a lot too.   By adding reds and greens, as well as lighting and images of Christmas, you will turn a nice space into an even more welcoming space.

What are some of your holiday decorating ideas?  Write a comment and let us know and even share a picture of how you designed.  Thanks and we hope you have a great holiday season.  Merry Christmas and Happy New Year.

Care to add a DIY fireplace to your backyard?  Visit us at www.backyardflare.com for great information and ideas for your next project.


Outdoor Fireplaces and Draft Problems


Outdoor Fireplace Draft

#outdoorfireplace, #backyardflare, #outdoorfireplacedesign
Gorgeous corner fireplace built along a custom patio. No soot stains means it was built correctly.

I was surfing the web the other day as I do quite often and I noticed differences between good and bad drafting structures.  If you know what to look for, it’s very apparent, an it almost always has to do with the outdoor fireplace draft.  Some of the best looking fireplaces seemed to be the dirtiest.  I started paying attention to the fireboxes of some of these fireplaces.

Gas Fireplaces – The Good and Bad

A lot of fireplaces are designed and plumbed to burn natural gas or propane.  Gas fireplaces are easily controlled and can be turned on and off quickly.  This can also be problematic if the structure isn’t built correctly.

Even with a gas fireplace, burning either natural gas or propane, which are very popular, soot build up can still be a problem.  This occurs if the fireplace does not vent well.  Heat rise in a fireplace is most often referred to as the draft.  The single most important aspect of any fireplace, inside or outside, is its functionality and whether the smoke rises effectively.  This will be either through the chimney or out the front of the firebox and up the front of the structure.

Now some may think that because a gas fireplace doesn’t produce smoke that it shouldn’t matter.  The truth is that gas fireplaces are sometimes dirtier than a wood burning fireplace when it comes to soot discoloration of the structure.

Pay attention to the inside of outdoor fireplaces that you see around your town.  Stick your head inside and look up.  Do you see a tiny chimney opening, or a large opening that will collect the smoke before allowing it to evacuate upward?  Most of the time, there will be very apparent issues with regard to the path of least resistance.  When a firebox height in is equal to the chimney opening, you will have problems with a bad draft.

Importance of a Good Fireplace Draft

The smoke or invisible soot from a gas burn will exit the structure through the front when draft is affected.  This smoke and/or soot will travel right up the front of the structure and the front will turn black.  A wet rag and some dish soap can easily remove the soot from a fireplace.  It’s just a hassle to deal with.

If you’re interested in building a beautiful outdoor fireplace in your backyard or if you just want to explore the possibility and learn more about them, please visit us at www.backyardflare.com.  Thanks for reading.


3 Great Ways to Finish Your Outdoor Fireplace

After building your outdoor fireplace, outdoor kitchen, or other outdoor structure, there are endless ways to finish the look.  You will have to consider options for both your horizontal and vertical surfaces as well as extra bling such as lighting.

This article isn’t long enough to possibly explain or list the seemingly endless combinations of veneer and seating options so we’ll just briefly talk about a few of the more popular looks.  There are a lot of manufacturers that make and deal in different types of products but they all effectively do the same thing. They add a beauty to the outside surface of your outdoor fireplace.  Faux stone, tile, stacked real stone, and stucco are among the most popular looks.

Vertical Surfaces

The basic purpose of these vertical veneers is to cover the drab gray cinder block.  Let’s go through them one by one.  Faux stone looks very realistic and it can add a rustic look like the fireplace was built entirely out of rock. Lots of different looks are available.  Tile veneers can expand into regular ceramics or even a natural travertine stone.  These tile veneers will give you a more modern look most of the time.

Outdoor fireplace with stacked stone, flagstone and lighting
Stacked stone and lighting on a three sided outdoor fireplace

Stacked stone is a real stone that has been milled and shaped so the pieces fit together nicely.  Some of the better products will look seamless.  The small size of the stone allows for several different colors and stone variations to be used in conjunction with each other.  Very elegant.  The final veneer that offers a great look is stucco.  Stucco can be textured or applied as a smoother surface.  The beauty of stucco is that it weathers well and it can be painted to match other items in your backyard.

Horizontal Surfaces

When it comes to the horizontal surfaces of the outdoor fireplace, look to natural stone for a smorgasbord of different textures and colors.  Most of this stone is very easy to work with.  You will cut the sections of stone with the same diamond blade you used to build your cinder block structure.

Flagstone seating on an outdoor fireplace
Flagstone ready for trimming

If you decide on the color of the vertical veneer and the horizontal surface material at the same time, you can pick great matching elements.  Certain colors and textures really complement each other but there is definitely no “one way” to complete the finish work of the structure.  As far as veneer and horizontal surface material is concerned you have more options than you can imagine.

Lighting

Lighting is a great way to add that special flair to any outdoor fireplace.  It brings a certain elegance to the fireplace and if used along the bottom of the hearth, it will frame it nicely.  Low voltage lighting is the way to go for this look and the addition of this lighting is relatively inexpensive.

Faux stone, stucco, and lighting added to an outdoor fireplace
Lighting adds a great look to any fireplace

Comment on this article with your thoughts.  Share your favorite final look and/or what you did to make your fireplace a one of a kind.

Visit us at www.backyardflare.com for great content and ideas for your outdoor fireplace.

Three Phases to Plan Your Backyard

Building Your Backyard

If you have ever wondered how to go about building your backyard to perfection, then keep reading.  We hope this article will give you a bit of guidance.

Great Patio

For many, their backyard area is an eyesore.  Others just need a bit of spicing up.  If you are in either category, you can achieve the perfect backyard if you adhere to the right phases in the right order.

Building your backyard
Phase One
planning

The first phase is planning the layout.  Step back and really look at what you have.  This will be a great time to brainstorm with a tablet of paper and pencil to sketch out different scenarios.  By drawing different layouts on a piece of paper, you can compare the different possibilities and see what works the best for your space.  You may find that certain layouts will make better sense than others.  Talk your ideas over with family and friends and take in their ideas.  You never know, you may not have thought of everything.

Building your backyard
PHASE TWO
gathering

Building Your Backyard
Custom Pima Design with added wood storage voids.

The second phase is gathering what you will need to get the job done.  This includes everything from a construction plan, the tools necessary, and the materials needed to build your project.  If you are wanting to build a masonry structure, have the vendor deliver the blocks, mortar, and cement on a pallet to as close to the work site as possible.

The tools needed are sometimes specialized so you won’t have too many other opportunities to use them again.  These will be trowels, masonry cutting blades, etc.  Borrow what you can and don’t buy them if you don’t have to.  If you must buy a tool, buy cheap, and even if you must buy two, it still may not be as expensive as one professional grade tool.

Building your backyard
PHASE THREE

Building Your Backyard
Modified Pima Design with wider chimney stack.

The third phase is the best part, the building of the project.  A solid foundation is paramount for many masonry structures due to their weight.  A lack of stability under a masonry structure could result in shifting and cracking.  The building phase is a great time to get help from family and friends.  Sometimes a pizza and beverages go a long way.

The building phase will be the part everyone will see so definitely take your time and pay attention to the small stuff, the detail, the minutia.  It’s the attention to detail that will make your project a stand-out backyard.

When you get to lighting and irrigation make sure you don’t have too much of the project finished.  This is especially irritating if you have to rip out some of the progress to add electrical and water lines.

While building your backyard, pay attention to the phases and your project will turn out to be the talk of the town thus your neighbors and family will be in awe.  Be careful because you will then be the go-to for the how to.

If you need any assistance on a masonry structure like a fireplace, kitchen, pizza oven, and want a DIY construction plan, visit www.backyardflare.com.  Building your backyard does not have to be a chore or burden.  We’ll help you along the way and give you the insight you’ll need to get it done and on a budget.  Happy building.

Natural stone was used for the seating surface, shelves, and top.


Cinder Blocks Explained

Cinder Blocks Explained

Cinder block sizes vary and many different shapes are available for your outdoor projects.  There are short ones, tall ones, solid ones and some are made with holes/voids.  Not only are they different sizes, but some that are classified with the same dimensions can be slightly different allowing them to be used in a different manner.

You can build outdoor structures such as fireplaces, kitchen, and pizza ovens using primarily the blocks that are described in this article.  Just for a bit of clarification, most people will call them cinder blocks but there is a slightly more technical term for them.  They are sometimes referred to as concrete masonry units (CMU) by the folks that make them and sell them.  When shopping for these blocks, you only need to call them cinder blocks though and know a little about how they are sized.  The cinder blocks sold in the United States are sized in inches.

Cinder Blocks and Sizes Explained

8x8x16 Block

8x8x16 block

The most common cinder block is an 8x8x16 as seen in the adjacent picture.  These measurements are the depth, height, and width respectively.  Most construction projects, needing any structural integrity, will be built using this size block. These blocks have voids, designed to be filled with concrete, which provides great strength.


8x8x8 Block

8x8x8 block

These 8x8x8 cinder blocks are perfect cubes that are widely used in conjunction with the 8x8x16 cinder blocks.  These blocks also have voids which allow them to be filled with concrete.

Some have notches manufactured into them for rebar, but the notch will not be used most of the time.  When you are building using a running bond/staggered pattern, these will certainly be useful.


8x4x16 block

8x4x16 block

An 8x4x16 cinder block is half as tall as standard 8x8x16 cinder blocks, so they are very good to incorporate into your structure. These cinder blocks are used as a transition block when only a little bit of height is needed as they are only 4” tall.  These blocks also have voids.


4x8x16 block

4" block used for your outdoor fireplace
4x8x16

Occasionally, you will need a cinder block that is only 4” in depth.  These cinder blocks are measured 4x8x16. They have much smaller voids in them which makes them harder to fill with concrete.

A lot of cinder block walls are constructed using these blocks.


8x2x16 cap block

Use these cinder blocks for finish work and solid surfaces.
8x2x16 cap block

One of the last widely used cinder blocks is an 8x2x16 cap block.  When you only need to add a couple inches to your structure or to close off a section, you will use these blocks. These cinder blocks are solid and are also used when a flat surface is needed for finish work.

If you are interested in building an outdoor fireplace or kitchen there are great ways of building them.  Cinder blocks are just one way of constructing them, but it’s a fantastic way to build a structure with great integrity and strength.  Visit www.backyardflare.com for great outdoor fireplace designs, ideas, and DIY construction plans.