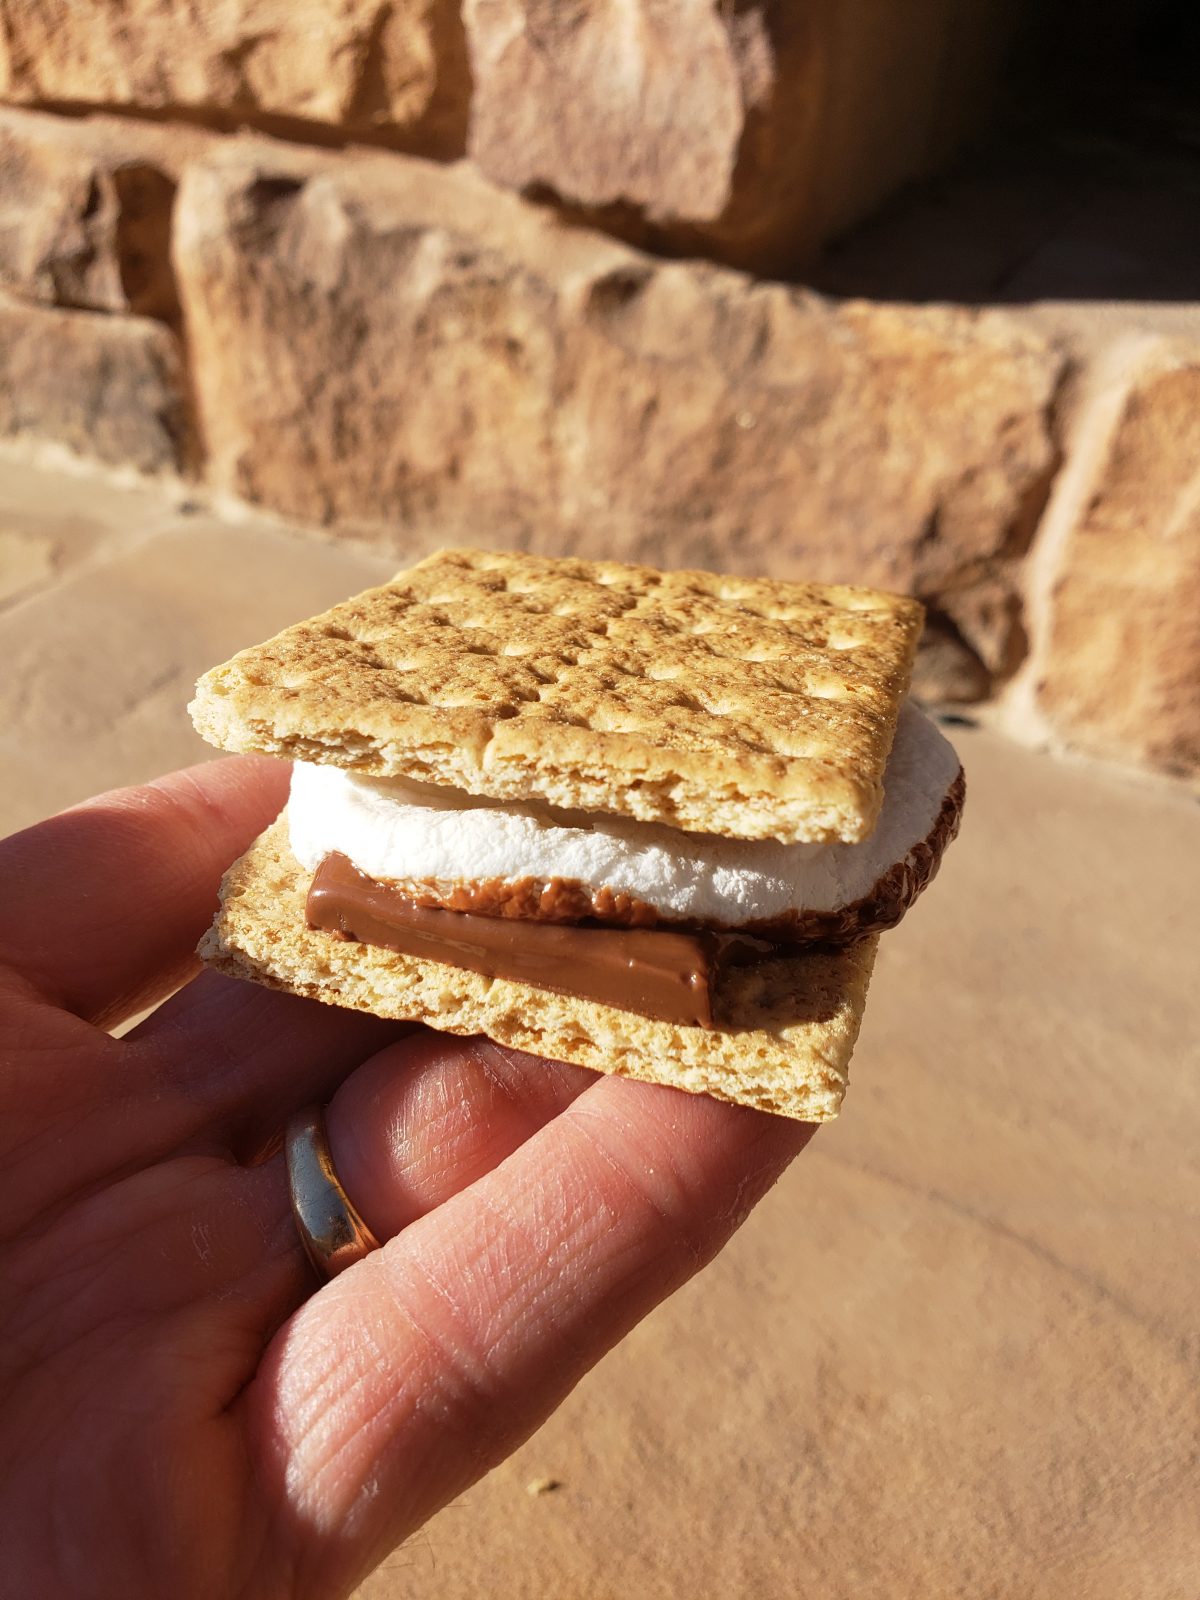
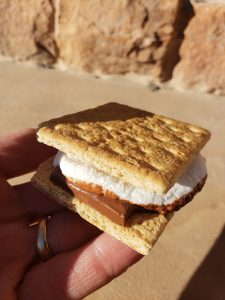
The Perfect S’more

The Perfect S’more

Is there a day that goes by where you don’t contemplate the perfect S’more or the ingredients that it takes to construct one?  I don’t think so, as these quandaries are what keep lots of people up at night.  I often lie there for hours at a time, beads of sweat collecting on my forehead, while I count marshmallows and small squares of chocolate.  Did I break the graham cracker perfectly, so the two sides are equal? Is the marshmallow gooey enough?  The perfect S’more…oh my…so much to consider.

Funny to think about, and “no” I really don’t drive myself into crazed sleeplessness over something as simple as a S’more.  Having said that, I thought this would be an amusing blog post to write about how to build the perfect S’more and to get some feedback on what constitutes your perfect S’more.

So Many Questions

What is the perfect roast level of the marshmallow?  How much chocolate is necessary for these tasty and crunchy dessert sandwiches?  These seem like crazy questions and an over analyzation of a simple sweet snack, but really think about what you do when you build the perfect S’more.  You make a lot of micro decisions when you are in the S’more frame of mind.

Marshmallow on a stick
Marshmallow on a Stick

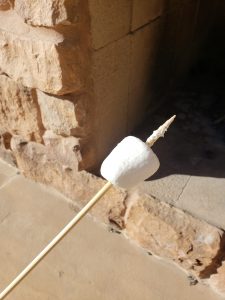
You will usually impale a helpless marshmallow on a skewer or metal stick and hold it over the open flame without mercy.  The question lies; however, do you hold it just outside the flame or catch it on fire?  Do you require a golden brown slow roast, or do you prefer the stick mounted flaming marshmallow ball like a torch used by Indiana Jones?  How long do you let the marshmallow burn before you blow out the flame?  Is there a point when too much burn is too much, and intending to start over, you resort to flinging the sticky mess off the stick for the dog to devour?

Chocolate
Perfect Milk Chocolate

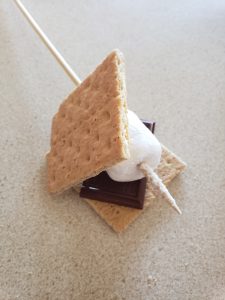
Do you prepare your graham cracker and chocolate before the marshmallow torture or do you yell at others in panic to get your cracker and chocolate ready?  If you’re like most, you do the latter.  You were so focused on the marshmallow torture and open flame that you “tunnel-visioned” yourself out of paying attention to the chocolatey crunchy portions of the sweet treat. Remember that your failure to prepare the cracker and chocolate should not constitute an emergency on the part of your family and friends.

S’more (Some More) Questions

Do you forget and leave the graham crackers open, so the dog gets into them, “Pavlov Dog Style”?  Do you viciously eat a good portion of the chocolate beforehand, and then realize that there may not be enough to go around?  Are you the one that puts the hot and sticky marshmallow skewer down on the chair in haste not realizing that it will glue itself to the seat cushion?

The Perfect S'more
Building the Perfect S’more

With so many things to consider, should we as humans even be stepping into the tough decisions necessary to build the perfect S’more?  Is it better done as a team event?  This blog post has not done anything except make me hungry for a S’more and nervously anxious at the thought of building one.  I hope the next time you decide to make the perfect S’mores that you talk it over first with your guests.  Think about logistics and have a game plan before indulging in such glorious delicacies.

S'more
S’more Time Anyone?

Or just have fun.  S’mores are a great way to share memories with family and friends.  Leave a comment and let us know some of your S’more memories or thoughts.  We’d love to hear them.

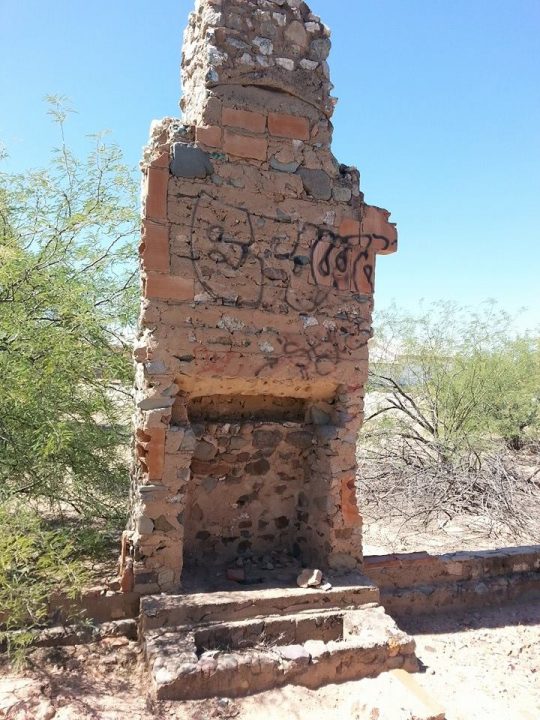
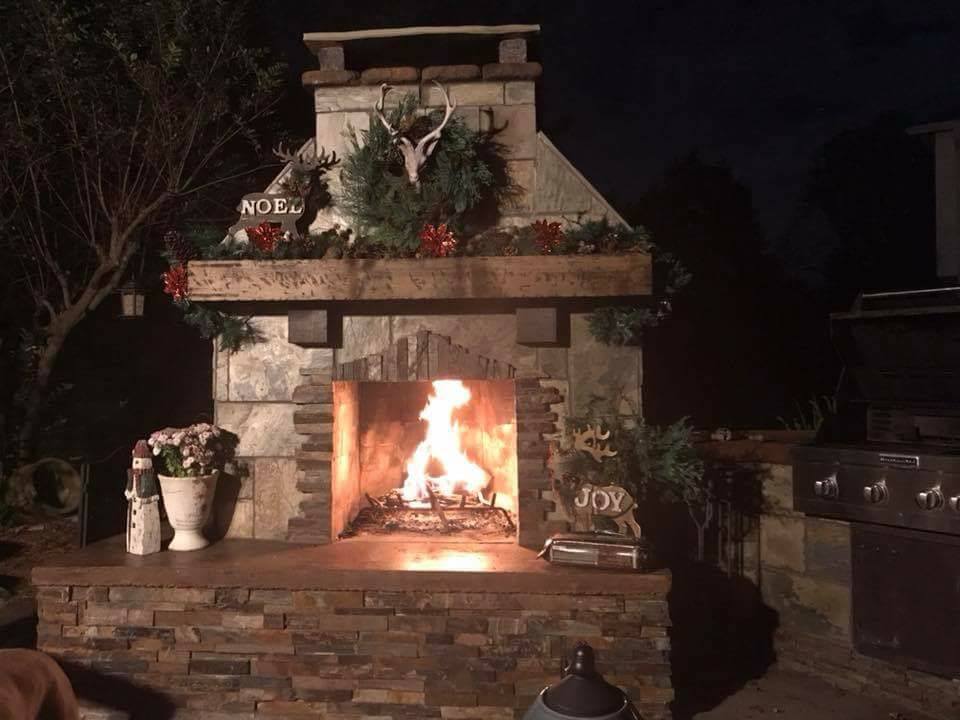
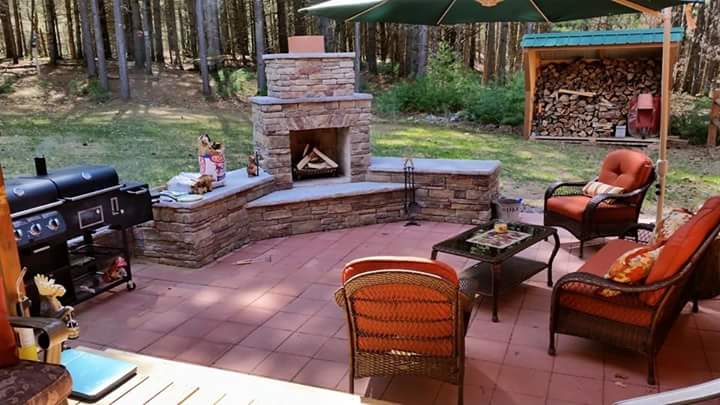
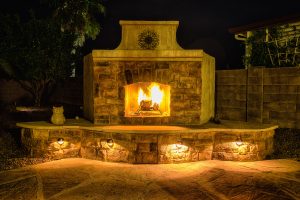
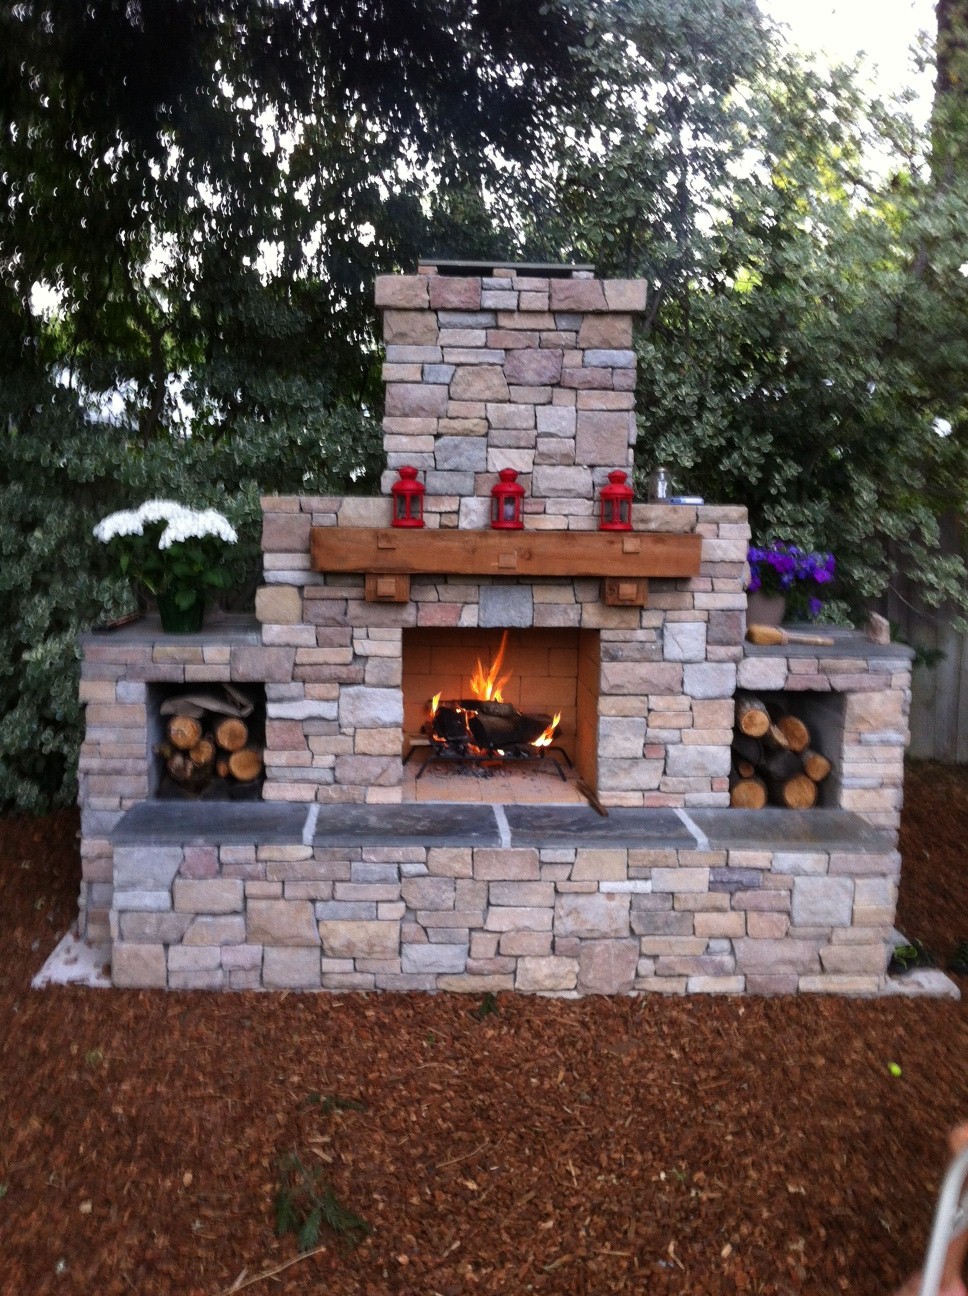
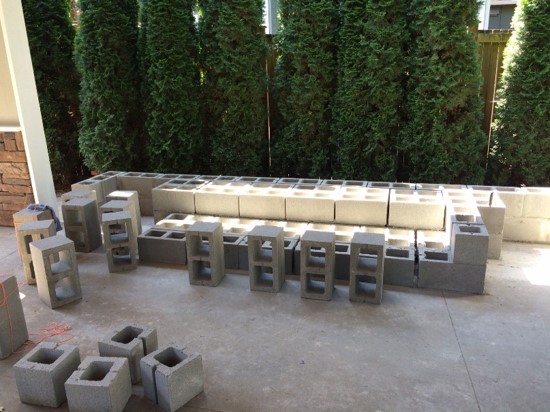
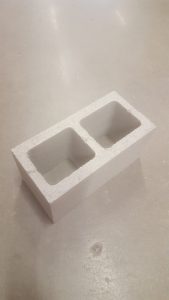
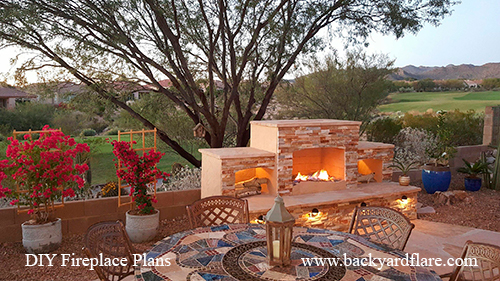
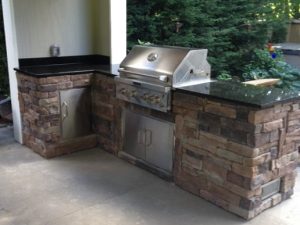
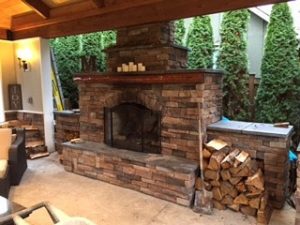
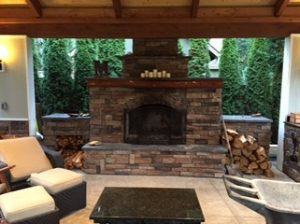
Build Your Own Marshmallow Fireplace

Please visit www.backyardflare.com if you are interested in a DIY fireplace or outdoor kitchen construction plan.  They are perfect places to build a fire necessary for your marshmallow torture.  Thanks for reading, and as always…happy building.

Dan

DIY Summer

Get Excited

Oh my gosh, I am excited about this DIY summer.  So many people are diving into great DIY outdoor fireplace and outdoor kitchen projects.  We have received countless emails and calls about custom fireplaces and are really pumped to see these structures built.  There are so many great ideas and backyard spaces that are begging for a stunning outdoor fireplace.  Do you have one of those spaces?  If you said yes, we want to hear from you too.

The best part about a late spring and summer build is that you can take your time on the construction.  By doing most of the building during the hotter parts of the spring and summer, there won’t be any rush to complete the structure.  Your construction can be solely a few hours each weekend or sporadic hours throughout the week.  Those cooler days will arrive and when they do, the fireplace will be ready to go.

I was at a graduation party a couple days ago and it just so happened to be at a friend’s house where I built Backyard Flare’s second ever fireplace.  This structure is absolutely huge.  I remember building this structure in the heat of the Arizona summer, under the beating rays of the sun.  Plenty of water was consumed and I think we are still paying off the credit card bill from our purchase of sunscreen.  We killed a saw while cutting block and even drew a little bit of blood during the build.  Those things at the time were a nuisance, but now I look back on them and smile, remembering all the fun we actually had during construction.

Reminiscing an old DIY Summer

During the graduation party, I ventured out into the backyard and walked around the fireplace to reminisce.  It was built on an old basketball court after the homeowner’s kids grew up and moved out.  I wanted to stoke up a fire, but because the temperature was still in the 90s, I decided that that wasn’t necessary.  I took a few pics to show my wife that the fireplace still looked great after more than ten years.

DIY Outdoor fireplace in Tucson.
Decade old outdoor fireplace in Tucson, Arizona.
DIY outdoor fireplace with stucco and tile finish
The memories around an old fireplace are great. Build your own memories.

What I’m getting at is that a well built outdoor fireplace or kitchen becomes backyard furniture in a sense. A decade later, a fireplace will still be there, begging to be used.

Contact Us

Let us know how we can help if you are interested in stepping into a fantastic DIY build.  Visit us at www.backyardflare.com, email us at dan@backyardflare.com, or call Dan at 520-269-9740.  We would love the opportunity to help you design a beautiful fireplace or kitchen.  Take care and as always…happy building!


Dan Heston

Vintage and New Outdoor Fireplaces – They’re Everywhere

outdoor stone fireplace, house is gone
What stories can this AZ fireplace tell?

Outdoor Fireplaces – What History Can They Tell?

I have been traveling quite a bit lately.  Additionally, I have been fortunate enough to have gone to some really neat locations.  Just a few visited in the past few months are Harpers Ferry, West Virginia, Winterpark, Colorado, El Paso, Texas, and the Grand Canyon in northern Arizona.  When I go to a new place, I love the opportunity to walk around and explore the old and new.

One thing that seems timeless is the fireplace built in an old house lot.  They still stand, absent the house or an old cabin.   I love walking around these towns and noticing great outdoor fireplaces built in new areas, at shopping malls, at apartment complexes, and even outdoor patios of fancy bars and restaurants.

Vintage Fireplace
Old fireplace in a WV city park

The old vintage stone fireplaces through their cracks and stains can sometimes tell a silent story, letting your mind wander at how much they have seen and been witness to over the passing years.  Who graced the hearth and seating around these graceful structures?  What conversations and decisions took place in front of the fire?

Imagine the fireplaces in the homes and parks of West Virginia that kept home owners and those fighting in the civil war warm.  They used them every day during the harsh winters.  Imagine the fireplaces in the Grand Canyon lodges that kept tourists warm during the 1930s when the park was really becoming a destination.  Now those are old fireplaces with stories too abundant for us to even imagine.

How About the New?

Shopping center outdoor fireplace
Fireplace spotted in an AZ shopping center

But let’s think about how we can create our own memories and stories around an outdoor fireplace.  When you spot an outdoor fireplace at an outdoor shopping center, stop and check it out.  Sit on the hearth and if it is providing heat, enjoy it for a few minutes.  Relax and even grab a drink if you have time.  Become the history that can be told by that fireplace 100 years from now.

Pay attention to where you are and if you see an old or even a new fireplace that needs to be in a photograph, take a pic and send it to us at, dan@backyardflare.com.  Let us know where and how you found it.

Thanks and as always, happy building!

Decorate For the Season

Create Your Christmas Fireplace

Oh my…the Christmas season is in full swing and decorations are being added to everything indoors.  Why not add some spice to the outdoors too?  Add some small things or even some big things to your fireplace and make it spectacular.  Some people add great decor to their structures and turn them into a “Christmas Fireplace”.  We have seen some spectacular outdoor fireplaces this 2017 Christmas season that we just have to share.

Outdoor Fireplace Christmas
Amazing reds and greens make this outdoor fireplace pop with the Christmas spirit.

Does it get much better than a decorated outdoor structure with signs of noel and joy?  I don’t think so.  Check out the mantel covered in red berries and a green pine wreath above it. With the vases full of flowers, this fireplace makes me want a warm glass of cider or some hot chocolate with extra marshmallows.

Outdoor Fireplace
Beautiful DIY outdoor fireplace decorated for the Christmas season

It doesn’t take much to turn an already gorgeous outdoor fireplace into a seasonal masterpiece.  Another wreath makes this fireplace step right into the Christmas season and the lighting overhead adds a lot too.   By adding reds and greens, as well as lighting and images of Christmas, you will turn a nice space into an even more welcoming space.

What are some of your holiday decorating ideas?  Write a comment and let us know and even share a picture of how you designed.  Thanks and we hope you have a great holiday season.  Merry Christmas and Happy New Year.

Care to add a DIY fireplace to your backyard?  Visit us at www.backyardflare.com for great information and ideas for your next project.


Outdoor Fireplaces and Draft Problems


Outdoor Fireplace Draft

#outdoorfireplace, #backyardflare, #outdoorfireplacedesign
Gorgeous corner fireplace built along a custom patio. No soot stains means it was built correctly.

I was surfing the web the other day as I do quite often and I noticed differences between good and bad drafting structures.  If you know what to look for, it’s very apparent, an it almost always has to do with the outdoor fireplace draft.  Some of the best looking fireplaces seemed to be the dirtiest.  I started paying attention to the fireboxes of some of these fireplaces.

Gas Fireplaces – The Good and Bad

A lot of fireplaces are designed and plumbed to burn natural gas or propane.  Gas fireplaces are easily controlled and can be turned on and off quickly.  This can also be problematic if the structure isn’t built correctly.

Even with a gas fireplace, burning either natural gas or propane, which are very popular, soot build up can still be a problem.  This occurs if the fireplace does not vent well.  Heat rise in a fireplace is most often referred to as the draft.  The single most important aspect of any fireplace, inside or outside, is its functionality and whether the smoke rises effectively.  This will be either through the chimney or out the front of the firebox and up the front of the structure.

Now some may think that because a gas fireplace doesn’t produce smoke that it shouldn’t matter.  The truth is that gas fireplaces are sometimes dirtier than a wood burning fireplace when it comes to soot discoloration of the structure.

Pay attention to the inside of outdoor fireplaces that you see around your town.  Stick your head inside and look up.  Do you see a tiny chimney opening, or a large opening that will collect the smoke before allowing it to evacuate upward?  Most of the time, there will be very apparent issues with regard to the path of least resistance.  When a firebox height in is equal to the chimney opening, you will have problems with a bad draft.

Importance of a Good Fireplace Draft

The smoke or invisible soot from a gas burn will exit the structure through the front when draft is affected.  This smoke and/or soot will travel right up the front of the structure and the front will turn black.  A wet rag and some dish soap can easily remove the soot from a fireplace.  It’s just a hassle to deal with.

If you’re interested in building a beautiful outdoor fireplace in your backyard or if you just want to explore the possibility and learn more about them, please visit us at www.backyardflare.com.  Thanks for reading.


3 Great Ways to Finish Your Outdoor Fireplace

After building your outdoor fireplace, outdoor kitchen, or other outdoor structure, there are endless ways to finish the look.  You will have to consider options for both your horizontal and vertical surfaces as well as extra bling such as lighting.

This article isn’t long enough to possibly explain or list the seemingly endless combinations of veneer and seating options so we’ll just briefly talk about a few of the more popular looks.  There are a lot of manufacturers that make and deal in different types of products but they all effectively do the same thing. They add a beauty to the outside surface of your outdoor fireplace.  Faux stone, tile, stacked real stone, and stucco are among the most popular looks.

Vertical Surfaces

The basic purpose of these vertical veneers is to cover the drab gray cinder block.  Let’s go through them one by one.  Faux stone looks very realistic and it can add a rustic look like the fireplace was built entirely out of rock. Lots of different looks are available.  Tile veneers can expand into regular ceramics or even a natural travertine stone.  These tile veneers will give you a more modern look most of the time.

Outdoor fireplace with stacked stone, flagstone and lighting
Stacked stone and lighting on a three sided outdoor fireplace

Stacked stone is a real stone that has been milled and shaped so the pieces fit together nicely.  Some of the better products will look seamless.  The small size of the stone allows for several different colors and stone variations to be used in conjunction with each other.  Very elegant.  The final veneer that offers a great look is stucco.  Stucco can be textured or applied as a smoother surface.  The beauty of stucco is that it weathers well and it can be painted to match other items in your backyard.

Horizontal Surfaces

When it comes to the horizontal surfaces of the outdoor fireplace, look to natural stone for a smorgasbord of different textures and colors.  Most of this stone is very easy to work with.  You will cut the sections of stone with the same diamond blade you used to build your cinder block structure.

Flagstone seating on an outdoor fireplace
Flagstone ready for trimming

If you decide on the color of the vertical veneer and the horizontal surface material at the same time, you can pick great matching elements.  Certain colors and textures really complement each other but there is definitely no “one way” to complete the finish work of the structure.  As far as veneer and horizontal surface material is concerned you have more options than you can imagine.

Lighting

Lighting is a great way to add that special flair to any outdoor fireplace.  It brings a certain elegance to the fireplace and if used along the bottom of the hearth, it will frame it nicely.  Low voltage lighting is the way to go for this look and the addition of this lighting is relatively inexpensive.

Faux stone, stucco, and lighting added to an outdoor fireplace
Lighting adds a great look to any fireplace

Comment on this article with your thoughts.  Share your favorite final look and/or what you did to make your fireplace a one of a kind.

Visit us at www.backyardflare.com for great content and ideas for your outdoor fireplace.

Three Phases to Plan Your Backyard

Building Your Backyard

If you have ever wondered how to go about building your backyard to perfection, then keep reading.  We hope this article will give you a bit of guidance.

Great Patio

For many, their backyard area is an eyesore.  Others just need a bit of spicing up.  If you are in either category, you can achieve the perfect backyard if you adhere to the right phases in the right order.

Building your backyard
Phase One
planning

The first phase is planning the layout.  Step back and really look at what you have.  This will be a great time to brainstorm with a tablet of paper and pencil to sketch out different scenarios.  By drawing different layouts on a piece of paper, you can compare the different possibilities and see what works the best for your space.  You may find that certain layouts will make better sense than others.  Talk your ideas over with family and friends and take in their ideas.  You never know, you may not have thought of everything.

Building your backyard
PHASE TWO
gathering

Building Your Backyard
Custom Pima Design with added wood storage voids.

The second phase is gathering what you will need to get the job done.  This includes everything from a construction plan, the tools necessary, and the materials needed to build your project.  If you are wanting to build a masonry structure, have the vendor deliver the blocks, mortar, and cement on a pallet to as close to the work site as possible.

The tools needed are sometimes specialized so you won’t have too many other opportunities to use them again.  These will be trowels, masonry cutting blades, etc.  Borrow what you can and don’t buy them if you don’t have to.  If you must buy a tool, buy cheap, and even if you must buy two, it still may not be as expensive as one professional grade tool.

Building your backyard
PHASE THREE

Building Your Backyard
Modified Pima Design with wider chimney stack.

The third phase is the best part, the building of the project.  A solid foundation is paramount for many masonry structures due to their weight.  A lack of stability under a masonry structure could result in shifting and cracking.  The building phase is a great time to get help from family and friends.  Sometimes a pizza and beverages go a long way.

The building phase will be the part everyone will see so definitely take your time and pay attention to the small stuff, the detail, the minutia.  It’s the attention to detail that will make your project a stand-out backyard.

When you get to lighting and irrigation make sure you don’t have too much of the project finished.  This is especially irritating if you have to rip out some of the progress to add electrical and water lines.

While building your backyard, pay attention to the phases and your project will turn out to be the talk of the town thus your neighbors and family will be in awe.  Be careful because you will then be the go-to for the how to.

If you need any assistance on a masonry structure like a fireplace, kitchen, pizza oven, and want a DIY construction plan, visit www.backyardflare.com.  Building your backyard does not have to be a chore or burden.  We’ll help you along the way and give you the insight you’ll need to get it done and on a budget.  Happy building.

Natural stone was used for the seating surface, shelves, and top.


Cinder Blocks Explained

Cinder Blocks Explained

Cinder block sizes vary and many different shapes are available for your outdoor projects.  There are short ones, tall ones, solid ones and some are made with holes/voids.  Not only are they different sizes, but some that are classified with the same dimensions can be slightly different allowing them to be used in a different manner.

You can build outdoor structures such as fireplaces, kitchen, and pizza ovens using primarily the blocks that are described in this article.  Just for a bit of clarification, most people will call them cinder blocks but there is a slightly more technical term for them.  They are sometimes referred to as concrete masonry units (CMU) by the folks that make them and sell them.  When shopping for these blocks, you only need to call them cinder blocks though and know a little about how they are sized.  The cinder blocks sold in the United States are sized in inches.

Cinder Blocks and Sizes Explained

8x8x16 Block

8x8x16 block

The most common cinder block is an 8x8x16 as seen in the adjacent picture.  These measurements are the depth, height, and width respectively.  Most construction projects, needing any structural integrity, will be built using this size block. These blocks have voids, designed to be filled with concrete, which provides great strength.


8x8x8 Block

8x8x8 block

These 8x8x8 cinder blocks are perfect cubes that are widely used in conjunction with the 8x8x16 cinder blocks.  These blocks also have voids which allow them to be filled with concrete.

Some have notches manufactured into them for rebar, but the notch will not be used most of the time.  When you are building using a running bond/staggered pattern, these will certainly be useful.


8x4x16 block

8x4x16 block

An 8x4x16 cinder block is half as tall as standard 8x8x16 cinder blocks, so they are very good to incorporate into your structure. These cinder blocks are used as a transition block when only a little bit of height is needed as they are only 4” tall.  These blocks also have voids.


4x8x16 block

4" block used for your outdoor fireplace
4x8x16

Occasionally, you will need a cinder block that is only 4” in depth.  These cinder blocks are measured 4x8x16. They have much smaller voids in them which makes them harder to fill with concrete.

A lot of cinder block walls are constructed using these blocks.


8x2x16 cap block

Use these cinder blocks for finish work and solid surfaces.
8x2x16 cap block

One of the last widely used cinder blocks is an 8x2x16 cap block.  When you only need to add a couple inches to your structure or to close off a section, you will use these blocks. These cinder blocks are solid and are also used when a flat surface is needed for finish work.

If you are interested in building an outdoor fireplace or kitchen there are great ways of building them.  Cinder blocks are just one way of constructing them, but it’s a fantastic way to build a structure with great integrity and strength.  Visit www.backyardflare.com for great outdoor fireplace designs, ideas, and DIY construction plans.


Great Ways to Finish Your Outdoor Fireplace

Great Ways to Finish Your Outdoor Fireplace

There are some great ways to finish your outdoor fireplace.  Basically, there are endless of ways to add the finishing touches which will make your outdoor fireplace a one of a kind.  Even if you build the basic rough structure that another person constructed, yours will look different.

If you pay attention to detail, your fireplace and backyard landscape can look like something in a magazine.  We will cover five of the big finishing touches and things you can do to give your fireplace the wow factor.

1. Low voltage lighting

Even when the fireplace is not being used, low voltage lighting is a great way to add a great night time visual aspect to it.  The lighting is powered by a transformer specifically designed for these types of lights.  By connecting the fireplace lights to landscape lighting in your yard, everything will be illuminated at the same time.

Lighting adds a great look to any fireplace
2. Natural stone seating surface

By using a natural stone material for the seating, you will have a very durable, and inexpensive surface.  There are a couple widely used stone options, such as flagstone and bluestone.  Both can be purchased at landscape supply retailers and you will have tons of colors and patterns to choose from.  Cutting the stone is as simple as using a diamond blade for a smooth edge or a chisel and hammer for a rough rustic edge.

Natural stone was used for the seating surface, shelves, and top.
3. Stacked Stone Veneer

Stacked stone is a great way to finished the vertical surfaces of the fireplace, but it can be somewhat expensive as compared to other finish options.  This type of material is purchased in arrangements that will fit together seamlessly.  The stone is real and engineered during the cut process, meaning that it will be very easy to install.  Cutting this stone will take a bit more time and patience as it is sometimes brittle.

Stacked stone added to the fireplace hearth.
4 . Faux Veneer

Faux veneer is a fabulous way to add a cheaper finish to the outside of your fireplace than natural stone.  The great thing about faux veneer is that you can find virtually any texture, color, shape, and size imaginable.  The faux stone is basically a manmade product that is painted and finished to look just like a real material.  The faux stone is very easy to cut but it may take a bit of extra time fitting it together.  There is no “one way” to put it together most of the time, so using your Tetris skills will come in handy.  Faux veneer will usually require corner pieces that will give you a great finished look as the material wraps from one vertical surface to another.

faux veneer outdoor fireplace
DIY built fireplace with faux veneer.
5. Wrought iron accents

Wrought iron accents will add both a décor and some functionality to your fireplace.  First, add an elevated fire grate in your firebox.  This will both give you a great look, but it will aid in keeping your burning wood elevated for proper air flow.  Fireplace tools will give you the capability of working and stoking your fire as you need to.  Many tools sets will come with a holder as well keeping it nice and neat.

outdoor fireplace wrought iron
Adding wrought iron definitely adds character.

Well there you go, five considerations that if done right, will set your fireplace on a pedestal.  You don’t have to do them all to achieve a great look, but they certainly won’t hurt.

If you want to build your own outdoor fireplace, check out www.backyardflare.com for some great ideas and inspiration.  We are sure you will get a vision for how you can transform your backyard into a great destination.

Build a Stunning Outdoor Living Area

Build Your Stunning Outdoor Living Area

This week’s backyard profile goes out to Adam in the great state of Washington.  What a great job Adam did, building his stunning outdoor living area, with the help of Backyard Flare and their design team.  But… Adam went the extra mile and he constructed an outdoor destination complete with a fireplace, outdoor kitchen, and patio cover on steroids.

Wood framing of patio cover
Patio cover is framed

The blank slate started with the building of the wood framed pergola.  A pitched roof with a decorative underbelly and drop lights covered a large footprint.  This cover offered the living area with a respite from the sun or the probable Washington State rainfall.  The support beams of the patio cover were stained darker than the wood slats.  What a great look.

Pitched roof patio cover
Patio cover with pitched roof

Finishing the Patio Cover

Brilliant white trim accented the beautiful gray tone siding and then fantastic light sconces were set on the vertical corner sections.  These lights provided ample light and amazing ambiance for the outside of the patio cover.  A rugged transition to the ground was accomplished by covering the bottoms of the corner pillars a great faux stone veneer.

Outdoor Living Area
Great looking flagstone walkway
Outdoor Living Area
Lighting always makes the structure look elegant

Flagstone was laid in an erratic pattern to form the approach to the covered patio.  The earth tone colored stone was broken into large sections and then placed into the soil.

Outdoor Kitchen Construction

One corner of the structure was used as a partial wall for a very large outdoor kitchen.  The structure was then equipped with a stainless-steel drop in barbecue grill, stainless access door, and several linear feet of counter top for cooking preparation.

Outdoor kitchen
Outdoor kitchen with barbecue, stainless doors

Outdoor Fireplace Construction

Afterward, lots of cinder block was delivered for the Backyard Flare designed fireplace.  Adam used the construction plan from Backyard Flare to build his fireplace structure with ground level storage voids.  Subsequently, these storage voids worked well aesthetically on each side.


After the cinder block rough build was completed to the top of the two-tiered chimney stack, the veneer was then applied. This veneer matched the veneer used on the outdoor kitchen and the bottoms of the patio pillars which added a great overall look.  The horizontal surfaces of the fireplace were covered with a dark stone, complimenting the veneer perfectly.

Outdoor fireplace design
Backyard Flare designed fireplace

Outdoor fireplace plan

A mantel was added to the front width of the fireplace and then veneer was added to the structure.  Adam took a blank section of his yard and then transformed it into a very welcoming outdoor living area.  I’m sure he and his family and friends have spent many days and nights making great memories.

If you would like to build an outdoor structure such as a fireplace or outdoor kitchen visit us at www.backyardflare.com.  We will help you with all your design needs and can take most of the guess work out of it.  Thanks for reading and we hope to hear from you.  Happy building!