Outdoor Fireplaces and Draft Problems


Outdoor Fireplace Draft

#outdoorfireplace, #backyardflare, #outdoorfireplacedesign
Gorgeous corner fireplace built along a custom patio. No soot stains means it was built correctly.

I was surfing the web the other day as I do quite often and I noticed differences between good and bad drafting structures.  If you know what to look for, it’s very apparent, an it almost always has to do with the outdoor fireplace draft.  Some of the best looking fireplaces seemed to be the dirtiest.  I started paying attention to the fireboxes of some of these fireplaces.

Gas Fireplaces – The Good and Bad

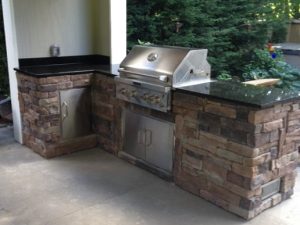
A lot of fireplaces are designed and plumbed to burn natural gas or propane.  Gas fireplaces are easily controlled and can be turned on and off quickly.  This can also be problematic if the structure isn’t built correctly.

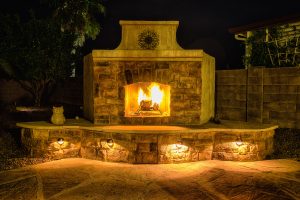
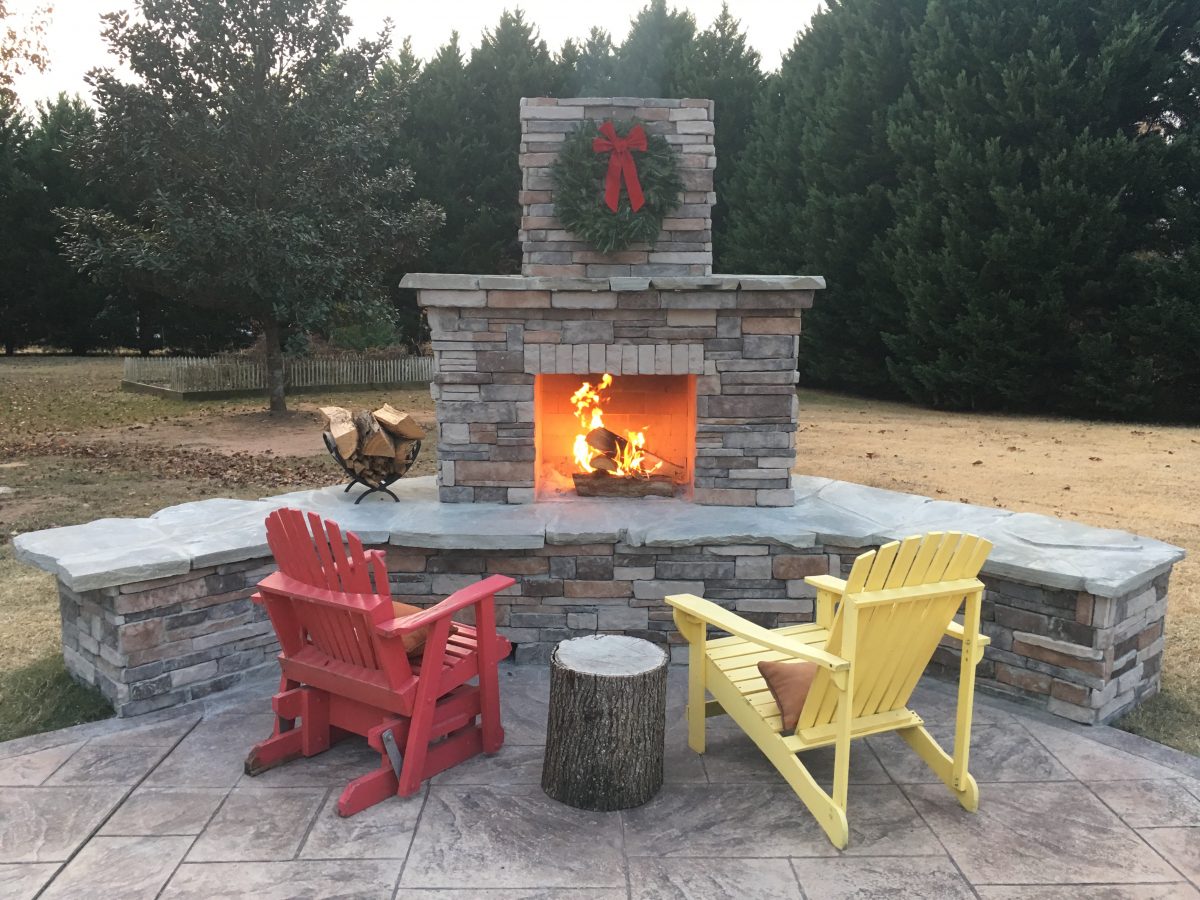
Even with a gas fireplace, burning either natural gas or propane, which are very popular, soot build up can still be a problem.  This occurs if the fireplace does not vent well.  Heat rise in a fireplace is most often referred to as the draft.  The single most important aspect of any fireplace, inside or outside, is its functionality and whether the smoke rises effectively.  This will be either through the chimney or out the front of the firebox and up the front of the structure.

Now some may think that because a gas fireplace doesn’t produce smoke that it shouldn’t matter.  The truth is that gas fireplaces are sometimes dirtier than a wood burning fireplace when it comes to soot discoloration of the structure.

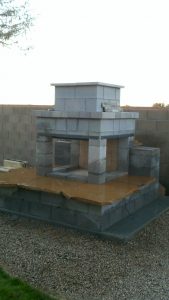
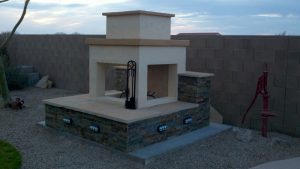
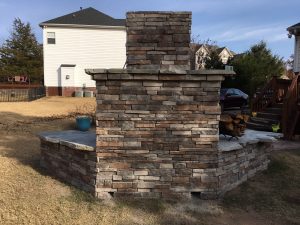
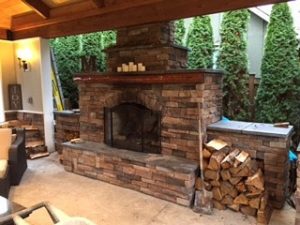
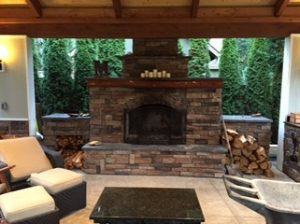
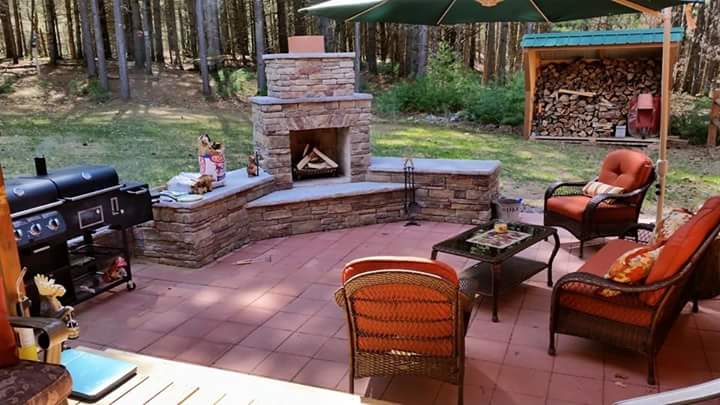
Pay attention to the inside of outdoor fireplaces that you see around your town.  Stick your head inside and look up.  Do you see a tiny chimney opening, or a large opening that will collect the smoke before allowing it to evacuate upward?  Most of the time, there will be very apparent issues with regard to the path of least resistance.  When a firebox height in is equal to the chimney opening, you will have problems with a bad draft.

Importance of a Good Fireplace Draft

The smoke or invisible soot from a gas burn will exit the structure through the front when draft is affected.  This smoke and/or soot will travel right up the front of the structure and the front will turn black.  A wet rag and some dish soap can easily remove the soot from a fireplace.  It’s just a hassle to deal with.

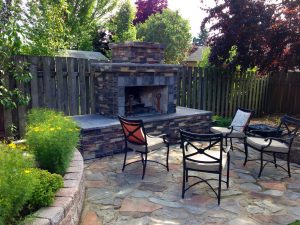
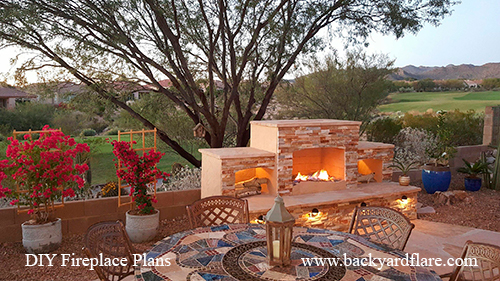
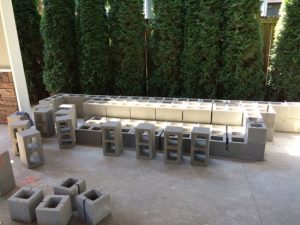
If you’re interested in building a beautiful outdoor fireplace in your backyard or if you just want to explore the possibility and learn more about them, please visit us at www.backyardflare.com.  Thanks for reading.


3 Great Ways to Finish Your Outdoor Fireplace

After building your outdoor fireplace, outdoor kitchen, or other outdoor structure, there are endless ways to finish the look.  You will have to consider options for both your horizontal and vertical surfaces as well as extra bling such as lighting.

This article isn’t long enough to possibly explain or list the seemingly endless combinations of veneer and seating options so we’ll just briefly talk about a few of the more popular looks.  There are a lot of manufacturers that make and deal in different types of products but they all effectively do the same thing. They add a beauty to the outside surface of your outdoor fireplace.  Faux stone, tile, stacked real stone, and stucco are among the most popular looks.

Vertical Surfaces

The basic purpose of these vertical veneers is to cover the drab gray cinder block.  Let’s go through them one by one.  Faux stone looks very realistic and it can add a rustic look like the fireplace was built entirely out of rock. Lots of different looks are available.  Tile veneers can expand into regular ceramics or even a natural travertine stone.  These tile veneers will give you a more modern look most of the time.

Outdoor fireplace with stacked stone, flagstone and lighting
Stacked stone and lighting on a three sided outdoor fireplace

Stacked stone is a real stone that has been milled and shaped so the pieces fit together nicely.  Some of the better products will look seamless.  The small size of the stone allows for several different colors and stone variations to be used in conjunction with each other.  Very elegant.  The final veneer that offers a great look is stucco.  Stucco can be textured or applied as a smoother surface.  The beauty of stucco is that it weathers well and it can be painted to match other items in your backyard.

Horizontal Surfaces

When it comes to the horizontal surfaces of the outdoor fireplace, look to natural stone for a smorgasbord of different textures and colors.  Most of this stone is very easy to work with.  You will cut the sections of stone with the same diamond blade you used to build your cinder block structure.

Flagstone seating on an outdoor fireplace
Flagstone ready for trimming

If you decide on the color of the vertical veneer and the horizontal surface material at the same time, you can pick great matching elements.  Certain colors and textures really complement each other but there is definitely no “one way” to complete the finish work of the structure.  As far as veneer and horizontal surface material is concerned you have more options than you can imagine.

Lighting

Lighting is a great way to add that special flair to any outdoor fireplace.  It brings a certain elegance to the fireplace and if used along the bottom of the hearth, it will frame it nicely.  Low voltage lighting is the way to go for this look and the addition of this lighting is relatively inexpensive.

Faux stone, stucco, and lighting added to an outdoor fireplace
Lighting adds a great look to any fireplace

Comment on this article with your thoughts.  Share your favorite final look and/or what you did to make your fireplace a one of a kind.

Visit us at www.backyardflare.com for great content and ideas for your outdoor fireplace.

Three Phases to Plan Your Backyard

Building Your Backyard

If you have ever wondered how to go about building your backyard to perfection, then keep reading.  We hope this article will give you a bit of guidance.

Great Patio

For many, their backyard area is an eyesore.  Others just need a bit of spicing up.  If you are in either category, you can achieve the perfect backyard if you adhere to the right phases in the right order.

Building your backyard
Phase One
planning

The first phase is planning the layout.  Step back and really look at what you have.  This will be a great time to brainstorm with a tablet of paper and pencil to sketch out different scenarios.  By drawing different layouts on a piece of paper, you can compare the different possibilities and see what works the best for your space.  You may find that certain layouts will make better sense than others.  Talk your ideas over with family and friends and take in their ideas.  You never know, you may not have thought of everything.

Building your backyard
PHASE TWO
gathering

Building Your Backyard
Custom Pima Design with added wood storage voids.

The second phase is gathering what you will need to get the job done.  This includes everything from a construction plan, the tools necessary, and the materials needed to build your project.  If you are wanting to build a masonry structure, have the vendor deliver the blocks, mortar, and cement on a pallet to as close to the work site as possible.

The tools needed are sometimes specialized so you won’t have too many other opportunities to use them again.  These will be trowels, masonry cutting blades, etc.  Borrow what you can and don’t buy them if you don’t have to.  If you must buy a tool, buy cheap, and even if you must buy two, it still may not be as expensive as one professional grade tool.

Building your backyard
PHASE THREE

Building Your Backyard
Modified Pima Design with wider chimney stack.

The third phase is the best part, the building of the project.  A solid foundation is paramount for many masonry structures due to their weight.  A lack of stability under a masonry structure could result in shifting and cracking.  The building phase is a great time to get help from family and friends.  Sometimes a pizza and beverages go a long way.

The building phase will be the part everyone will see so definitely take your time and pay attention to the small stuff, the detail, the minutia.  It’s the attention to detail that will make your project a stand-out backyard.

When you get to lighting and irrigation make sure you don’t have too much of the project finished.  This is especially irritating if you have to rip out some of the progress to add electrical and water lines.

While building your backyard, pay attention to the phases and your project will turn out to be the talk of the town thus your neighbors and family will be in awe.  Be careful because you will then be the go-to for the how to.

If you need any assistance on a masonry structure like a fireplace, kitchen, pizza oven, and want a DIY construction plan, visit www.backyardflare.com.  Building your backyard does not have to be a chore or burden.  We’ll help you along the way and give you the insight you’ll need to get it done and on a budget.  Happy building.

Natural stone was used for the seating surface, shelves, and top.


Great Ways to Finish Your Outdoor Fireplace

Great Ways to Finish Your Outdoor Fireplace

There are some great ways to finish your outdoor fireplace.  Basically, there are endless of ways to add the finishing touches which will make your outdoor fireplace a one of a kind.  Even if you build the basic rough structure that another person constructed, yours will look different.

If you pay attention to detail, your fireplace and backyard landscape can look like something in a magazine.  We will cover five of the big finishing touches and things you can do to give your fireplace the wow factor.

1. Low voltage lighting

Even when the fireplace is not being used, low voltage lighting is a great way to add a great night time visual aspect to it.  The lighting is powered by a transformer specifically designed for these types of lights.  By connecting the fireplace lights to landscape lighting in your yard, everything will be illuminated at the same time.

Lighting adds a great look to any fireplace
2. Natural stone seating surface

By using a natural stone material for the seating, you will have a very durable, and inexpensive surface.  There are a couple widely used stone options, such as flagstone and bluestone.  Both can be purchased at landscape supply retailers and you will have tons of colors and patterns to choose from.  Cutting the stone is as simple as using a diamond blade for a smooth edge or a chisel and hammer for a rough rustic edge.

Natural stone was used for the seating surface, shelves, and top.
3. Stacked Stone Veneer

Stacked stone is a great way to finished the vertical surfaces of the fireplace, but it can be somewhat expensive as compared to other finish options.  This type of material is purchased in arrangements that will fit together seamlessly.  The stone is real and engineered during the cut process, meaning that it will be very easy to install.  Cutting this stone will take a bit more time and patience as it is sometimes brittle.

Stacked stone added to the fireplace hearth.
4 . Faux Veneer

Faux veneer is a fabulous way to add a cheaper finish to the outside of your fireplace than natural stone.  The great thing about faux veneer is that you can find virtually any texture, color, shape, and size imaginable.  The faux stone is basically a manmade product that is painted and finished to look just like a real material.  The faux stone is very easy to cut but it may take a bit of extra time fitting it together.  There is no “one way” to put it together most of the time, so using your Tetris skills will come in handy.  Faux veneer will usually require corner pieces that will give you a great finished look as the material wraps from one vertical surface to another.

faux veneer outdoor fireplace
DIY built fireplace with faux veneer.
5. Wrought iron accents

Wrought iron accents will add both a décor and some functionality to your fireplace.  First, add an elevated fire grate in your firebox.  This will both give you a great look, but it will aid in keeping your burning wood elevated for proper air flow.  Fireplace tools will give you the capability of working and stoking your fire as you need to.  Many tools sets will come with a holder as well keeping it nice and neat.

outdoor fireplace wrought iron
Adding wrought iron definitely adds character.

Well there you go, five considerations that if done right, will set your fireplace on a pedestal.  You don’t have to do them all to achieve a great look, but they certainly won’t hurt.

If you want to build your own outdoor fireplace, check out www.backyardflare.com for some great ideas and inspiration.  We are sure you will get a vision for how you can transform your backyard into a great destination.

Building a Dream Backyard

Building a Dream Backyard

The latest fireplace profile comes to you from South Carolina.  Builder and homeowner Nick had plans of building a dream backyard and he contacted Backyard Flare, LLC for help.  Nick is a DIY enthusiast and he knew he could build his own outdoor fireplace. He chose the Douglas design and got his construction plan from Backyard Flare.

Starting Off With a Blank Slate

Building a Dream Backyard
DIY fireplace built in South Carolina using a Backyard Flare DIY construction plan.

Nick had an existing stamped concrete patio in his backyard with a small flowering garden on one corner.  The patio wasn’t designed or constructed with weight bearing in mind so Nick poured an additional slab for the fireplace.  Nick built a wood frame to see the footprint of the structure as well.

Building a Dream Backyard
Nick had a bunch of bushes to remove.

Drainage was added to the slab so that water would not accumulate.  This is a very smart move when building a non-linear structure.  The drainage was built through the entire slab so any water drained behind the structure.

Nick’s DIY Construction

The cinder block work was started with the wing walls built to the same height as the main seating section.  The normal Douglas design has the side extensions higher than the center seating section so this modification was Nick’s vision.

Ready for Veneer
Nick finished the rough build phase of construction.

The entire structure was built in rough form, then it was time for veneer and finish work.  Nick covered the horizontal surfaces with a neutral flagstone.  The edges were left rough for a great outdoor look.  Nick chose a great looking faux stone with a relatively small pattern.  The pieces were not all the same size so there was a bit of puzzle piecing the veneer together.  This task slows down the construction but it makes for a great looking veneer pattern.

Building a Dream Backyard
Nick added flagstone for the seating and a great looking veneer to the vertical surfaces.

After the construction was completed, Nick added a couple colored deck chairs and a rustic piece of log for a small “beer holder”.  The chimney was adorned with a great looking wreath and a log holder was added for spare firewood.

Nick used veneer on the backside of the fireplace for complete finished look.
Build Your Own Dream Space

If you would like to explore the possibility of building an outdoor structure such as a fireplace or outdoor kitchen visit us at www.backyardflare.com.  We will help you with all your design needs so most of the guess work will be taken out of it for you.  Thanks for reading and we hope to hear from you.  Happy building!

Build a Stunning Outdoor Living Area

Build Your Stunning Outdoor Living Area

This week’s backyard profile goes out to Adam in the great state of Washington.  What a great job Adam did, building his stunning outdoor living area, with the help of Backyard Flare and their design team.  But… Adam went the extra mile and he constructed an outdoor destination complete with a fireplace, outdoor kitchen, and patio cover on steroids.

Wood framing of patio cover
Patio cover is framed

The blank slate started with the building of the wood framed pergola.  A pitched roof with a decorative underbelly and drop lights covered a large footprint.  This cover offered the living area with a respite from the sun or the probable Washington State rainfall.  The support beams of the patio cover were stained darker than the wood slats.  What a great look.

Pitched roof patio cover
Patio cover with pitched roof

Finishing the Patio Cover

Brilliant white trim accented the beautiful gray tone siding and then fantastic light sconces were set on the vertical corner sections.  These lights provided ample light and amazing ambiance for the outside of the patio cover.  A rugged transition to the ground was accomplished by covering the bottoms of the corner pillars a great faux stone veneer.

Outdoor Living Area
Great looking flagstone walkway
Outdoor Living Area
Lighting always makes the structure look elegant

Flagstone was laid in an erratic pattern to form the approach to the covered patio.  The earth tone colored stone was broken into large sections and then placed into the soil.

Outdoor Kitchen Construction

One corner of the structure was used as a partial wall for a very large outdoor kitchen.  The structure was then equipped with a stainless-steel drop in barbecue grill, stainless access door, and several linear feet of counter top for cooking preparation.

Outdoor kitchen
Outdoor kitchen with barbecue, stainless doors

Outdoor Fireplace Construction

Afterward, lots of cinder block was delivered for the Backyard Flare designed fireplace.  Adam used the construction plan from Backyard Flare to build his fireplace structure with ground level storage voids.  Subsequently, these storage voids worked well aesthetically on each side.


After the cinder block rough build was completed to the top of the two-tiered chimney stack, the veneer was then applied. This veneer matched the veneer used on the outdoor kitchen and the bottoms of the patio pillars which added a great overall look.  The horizontal surfaces of the fireplace were covered with a dark stone, complimenting the veneer perfectly.

Outdoor fireplace design
Backyard Flare designed fireplace

Outdoor fireplace plan

A mantel was added to the front width of the fireplace and then veneer was added to the structure.  Adam took a blank section of his yard and then transformed it into a very welcoming outdoor living area.  I’m sure he and his family and friends have spent many days and nights making great memories.

If you would like to build an outdoor structure such as a fireplace or outdoor kitchen visit us at www.backyardflare.com.  We will help you with all your design needs and can take most of the guess work out of it.  Thanks for reading and we hope to hear from you.  Happy building!